Unlock Hidden Treasures with the Minelab Equinox Metal Detector
Are you ready to revolutionize your treasure hunting experience? Look no further than the Minelab Equinox series, a game-changing line of metal detectors that’s taking the detecting world by storm. Whether you’re a seasoned pro or just starting out, the Equinox offers unparalleled performance and versatility for all your detecting needs.
## Multi-IQ Technology: The Heart of the Equinox
At the core of the Equinox’s success is Minelab’s groundbreaking Multi-IQ simultaneous multi-frequency technology[1]. This innovative feature allows the detector to adapt seamlessly to various terrains and target types, giving you the power of multiple detectors in one sleek package.
## Versatile Search Modes for Every Adventure
The Equinox series comes equipped with four primary search modes, each designed to excel in specific environments:
1. Park Mode: Perfect for trashy areas like public spaces
2. Field Mode: Ideal for historical sites with diverse target sizes
3. Beach Mode: Optimized for wet or dry sand and underwater detecting
4. Gold Mode: Specialized for finding gold nuggets in mineralized ground[1]
Each mode offers two custom search profiles, providing a total of eight customizable settings to fine-tune your hunting experience.
## Advanced Features for Superior Performance
– High-resolution target identification for accurate finds
– Fast recovery speed to uncover treasures others might miss
– Waterproof design (IP68 rated) for submerged detecting up to 5 meters (16 ft)[3]
– Lightweight carbon fiber shaft for extended comfort during long hunts[3]
## Tips and Settings for Maximizing Your Equinox
To truly harness the power of your Equinox, mastering its settings is crucial. Here are some key areas to focus on:
1. Recovery Speed and Iron Bias: Adjust these to optimize target separation in trashy areas
2. Frequency Selection: Choose from multiple frequencies for different target types
3. Audio Settings: Customize tones for clearer target identification
4. Ground Balance: Fine-tune for challenging soil conditions
## Expert Guidance: Clive James Clynick’s Equinox Manuals
For those seeking to elevate their Equinox skills, Clive James Clynick’s books are an invaluable resource. His comprehensive guides, including “The Minelab Equinox Series: From Beginner to Advanced,” offer in-depth insights into maximizing your detector’s potential[4].
Clynick’s books cover essential topics such as:
– Understanding Multi-IQ technology
– Customizing settings for specific sites and hunting styles
– Mastering audio options for better target recognition
– Developing advanced techniques for finding gold and silver
While Clynick’s books may focus on specific Equinox models, the principles and techniques discussed are generally applicable across the entire Equinox series. This makes them an excellent investment for any Equinox user looking to enhance their detecting skills.
## Join the Equinox Revolution
Whether you’re hunting for coins in the park, relics in historic fields, or gold nuggets in rugged terrain, the Minelab Equinox series has you covered. With its advanced technology, versatile modes, and customizable settings, the Equinox empowers detectorists of all levels to uncover more treasures than ever before.
Ready to take your detecting to the next level? Explore the Minelab Equinox series today and discover why it’s become the go-to detector for treasure hunters worldwide. Don’t forget to pair your new detector with Clive James Clynick’s expert guides to unlock its full potential. Happy hunting!
Unlocking Hidden Treasures: The Nokta Anfibio Metal Detector
Are you ready to embark on a thrilling treasure hunt? Look no further than the Nokta Anfibio metal detector, a game-changer in the world of metal detecting. This powerful device combines cutting-edge technology with user-friendly features, making it the perfect companion for both novice and experienced detectorists.
## Multi-Frequency Power
The Nokta Anfibio series offers three models: the Multi, 14, and 19. The Anfibio Multi stands out with its versatile 5kHz/14kHz/20kHz operating frequencies, allowing you to adapt to various terrains and target types[1][2]. Whether you’re searching for coins, relics, or jewelry, the Anfibio has you covered.
## Waterproof Wonder
With an IP68 rating, the Anfibio is fully submersible up to 5 meters (16.4ft)[1][3]. This feature opens up a whole new world of detecting possibilities, from beach combing to underwater exploration. The detector’s waterproof capabilities, combined with its dust-proof design, ensure durability in even the most challenging environments.
## Advanced Features for Superior Performance
1. Excellent Discrimination: Save time by focusing on valuable targets and avoiding unwanted items[1][3].
2. Fast Recovery Speed: Uncover treasures that other detectors might miss, especially in trash-laden areas[1][3].
3. E.U.D. Function: The Extra Underground Depth feature helps detect metals masked by ground conditions[1][3].
4. Wireless Freedom: Enjoy tangle-free detecting with the included 2.4 GHz wireless headphones[1].
## User-Friendly Design
The Anfibio’s single menu design offers simple operation, saving you valuable detecting time[1]. Its retractable shaft (76cm – 136cm) ensures easy transport and storage[1][2]. The built-in 3700mAh Lithium Polymer battery provides up to 19 hours of use, keeping you in the field longer[1][3].
## Customizable Search Modes
Depending on the model, the Anfibio offers up to 9 search modes, including General, Multi-Tone, Beach, Deep, and Cache[1][2]. This versatility allows you to optimize your detector for specific hunting conditions and target types.
## The Anfibio Advantage
– Large 28cm (11″) DD search coil for excellent depth and coverage[1]
– Vibration feature for silent operation and underwater use[1][3]
– Backlit keypad for night hunting[1][3]
– Online firmware updates to keep your detector at peak performance[1]
While the Anfibio series has been discontinued[7], its impact on the metal detecting community remains significant. Many detectorists still swear by its performance and versatility.
For an in-depth exploration of metal detecting techniques and how to maximize your Anfibio’s potential, be sure to check out my book, “Mastering Metal Detection: From Beginner to Expert.” This comprehensive guide covers everything from understanding your detector’s settings to interpreting signals and uncovering hidden treasures.
Whether you’re a weekend warrior or a serious relic hunter, the Nokta Anfibio metal detector offers the perfect blend of power, versatility, and ease of use. Start your treasure hunting journey today and discover what lies beneath your feet!
The Minelab Manticore: Mastering Detector Settings for Maximum Treasure Recovery
## Advanced Settings: The Key to Detecting Success
The Minelab Manticore isn’t just a metal detector – it’s a sophisticated instrument with incredibly nuanced settings that can dramatically improve your treasure hunting performance. Understanding these settings is crucial to maximizing your detecting potential.
## Comprehensive Settings Breakdown
1. **Frequency Settings**
– Multi-IQ+ allows simultaneous multi-frequency processing
– Customizable settings for different terrain types
– Ability to fine-tune sensitivity and discrimination
1. M11 11-inch Double-D Coil
– Default settings optimized for general detecting
– Excellent all-terrain performance
– Recommended for beginners and intermediate detectorists
2. M8 8″x5.5″ Elliptical Coil
– Ideal for tight spaces and complex ground conditions
– Specialized settings for urban and relic hunting
– Enhanced maneuverability in challenging environments
3. M9 9″ Round Double-D Coil
– Balanced coverage and precision
– Adaptable settings for various detecting scenarios
## Clive James Clynick’s Expert Perspective
In his authoritative book “Understanding the Minelab Manticore’s Digital ‘Fast’ Processing,” Clynick emphasizes the importance of mastering detector settings. He notes that the Manticore’s processing power isn’t just about depth, but about the thoroughness and precision of its settings.
## Technical Specifications
– Waterproof to 5 meters (16 ft)
– IP68 rating
– Large color display for easy settings management
– Customizable audio response
– Fast digital signal processing
For metal detecting enthusiasts seeking the ultimate technological advantage, the Minelab Manticore represents a quantum leap in detector settings and performance. Its Multi-IQ+ technology provides unparalleled flexibility and precision in target identification.
Whether you’re searching beaches, historical sites, or goldfields, the Manticore’s sophisticated settings ensure you’ll never miss a potential find. The detector’s ability to process complex ground conditions with its advanced settings sets it apart from competitors.
## Call to Action
Unlock the full potential of your Minelab Manticore by understanding its intricate settings. Visit clivesgoldpage.com for comprehensive guides, expert tips, and in-depth tutorials on maximizing your detector’s performance.
Discover more. Detect smarter. Choose the Minelab Manticore.
The Minelab Manticore: A Game-Changer in Metal Detecting Technology
Metal detecting enthusiasts, treasure hunters, and history buffs, listen up! The Minelab Manticore has arrived, and it’s revolutionizing the world of metal detection. This powerhouse detector combines cutting-edge technology with user-friendly features, making it a must-have for both beginners and seasoned pros.
## Multi-IQ+ Technology: More Power, More Depth, More Finds
At the heart of the Manticore lies Minelab’s latest innovation: the Multi-IQ+ Simultaneous Multi-Frequency engine. This technology delivers a staggering 50% power increase compared to its predecessor, the Equinox series[1][4]. The result? Unparalleled depth, improved target separation, and enhanced discrimination capabilities.
## Coil Options: Versatility for Every Hunt
The Manticore comes standard with the M11 11-inch round Double-D coil, but Minelab offers additional coils to suit various detecting conditions:
1. M8 Coil: An 8″x5.5″ elliptical Double-D coil, perfect for tight spaces and improved maneuverability[5].
2. M9 Coil: A 9″ round Double-D coil, offering a balance between coverage and precision[8].
3. M15 Coil: While not explicitly mentioned in the search results, this larger coil is often included in promotional packages[6].
## Key Strengths of the Manticore
1. **Fast Response**: Exceptional target separation performance, allowing you to find desired targets among ferrous trash[1][4].
2. **Enhanced Discrimination**: Improved Target ID stability and customizable Ferrous Limits for unprecedented control[1][4].
3. **Waterproof Design**: Dive up to 5 meters (16 ft) with IP68 rating, perfect for underwater exploration[1][4].
4. **Intuitive Control**: Large color screen and user-friendly interface for easy operation[1][4].
5. **Versatile Search Modes**: 10 customizable modes, including All-Terrain, Beach, and Goldfield options[1][4].
## Expert Insight: Clive James Clynick’s Analysis
In his book “Understanding the Minelab Manticore’s Digital ‘Fast’ Processing,” renowned metal detecting expert Clive James Clynick delves deep into the Manticore’s capabilities. He highlights the detector’s remarkable ability to hit coins surrounded by nails, attributing this to its extremely thorough and detailed processing[3].
Clynick explains, “When you see the Minelab Manticore advertised as having ‘50%’ more power to the coil–this does not necessarily equate to depth–it equates to thoroughness of process[3].” This insight underscores the Manticore’s ability to process through various challenging conditions, from black sand to complex audio and metering tasks.
## The Manticore Experience
Whether you’re searching for relics on land or treasures underwater, the Manticore is equipped to handle it all.
Ready to elevate your metal detecting game? Explore the Minelab Manticore and its accessories to unlock a world of hidden treasures. For more in-depth analysis and expert tips on using the Manticore, visit Clive’s Gold Page at clivesgoldpage.com.
# The Nokta Legend: Revolutionizing Metal Detecting
Are you ready to elevate your treasure hunting experience? Discover the Nokta Legend, a cutting-edge multi-frequency metal detector that’s transforming the world of metal detecting.
## Why Choose the Nokta Legend?
The Nokta Legend stands out as the brand’s first simultaneous multi-frequency metal detector, offering unparalleled versatility and performance:
– **Adaptability**: Excels in various environments – land, beach, and underwater (up to 5 meters)
– **Superior Discrimination**: Customizable settings for precise target identification
– **User-Friendly Interface**: Intuitive for beginners, powerful for experts
## Impressive Features of the Nokta Legend
– **IP68 Rated**: Fully waterproof and dustproof for durability
– **Multi-Frequency Technology**: 2 multi and 5 single frequencies for optimal detection
– **Versatile Search Modes**: Park, Field, Beach, and Gold modes for all terrains
– **FerroCheck™**: Exclusive feature providing detailed target analysis
## Mastering Your Nokta Legend
While the Legend is designed for ease of use, unlocking its full potential requires expert guidance. That’s where “A Beginner’s Guide to the Nokta Legend” comes in handy.
### Why This Book is Essential for Legend Users
– **Up-to-Date Information**: Covers the latest firmware updates (v.1.09 / v.1.17)
– **Expert Insights**: Authored by Clive James Clynick, with over 40 years of detecting expertise
– **Practical Techniques**: Learn to customize your Legend for optimal performance
### Glowing Reviews from Readers
– “An information goldmine for Legend users!” – AP
– “Comprehensive and easy to understand. A must-read!” – WE
– “This guide took my detecting skills to the next level!” – LD, UK
Don’t miss out on maximizing your Nokta Legend’s potential. Get your copy of “A Beginner’s Guide to the Nokta Legend” today! Visit [clivesgoldpage.com](https://www.clivesgoldpage.com) to order and start your journey to becoming a Legend master!
## How to Use Your Nokta Legend Effectively
1. **Choose the Right Frequency**: Learn when to use multi vs. single frequencies
2. **Master Ground Balance**: Adjust for different soil conditions
3. **Understand Discrimination Settings**: Filter out unwanted targets
4. **Explore Advanced Features**: Dive into FerroCheck™ and other unique capabilities
Enhance your metal detecting journey with the Nokta Legend and “A Beginner’s Guide to the Nokta Legend”. Order your copy now at [clivesgoldpage.com](https://www.clivesgoldpage.com) and unlock the secrets to successful treasure hunting!
High Performance Underwater Headphones for the Minelab Manticore
These phones are professional grade. They are super loud with clean sound to identify targets and hear deeper signals. They feature pressure chamber 50mm drivers that are a combination of peizo and speaker. They also feature industrial noise blocking earcups and Sony braided spiral cable. They are loud enough to be heard through a dive hood.
These headphones are impedance matched for the Manticore and sound incredible!
$150 PP F&F shippped Fed Ex Expedited.
PM me for more info or e-mail to:
cliveclynick@rogers.com
As someone who has owned dozens of underwater headphones I highly recommend this to extend the life of any pair you buy. This method was shown to me by a top pro for protecting where your coil cable enters the coil but works on headphone jacks too.
1/ Its easiest to do this with the jack on the machine. Disconnect the coil cable so you can wrap freely. Cut a strip of rubberized tape about 6” long. You can choose to do the front flange crack and the back wire end separately or use one long piece of tape—maybe 8” long. Cut on a diagonal. Separate the backing by nipping off a corner with your teeth. Hold one long corner down against the plastic flange crack. (Not the metal one that turns). Then wind the tape around and stretch it to twice its original length. As you come around on your first turn get it to contact where you are holding the first point by laying it down over top. Then go around once or twice to complete the seal. Pull on a corner and lay it flat to finish the wrap. The metal flange should turn freely but the tape should cover where the plastic flange connects the body of the plug to the front carrier.
Do the same at the back wire end making sure to pull extra hard to go down to the wire size. There should be no gaps between the back of the plug and the wire.
Then get some electrical tape and starting from the front again, wrap the entire plug tighly. Again pull hard to go down to the wire diameter. This second layer is to protect the more fragile rubberized tape and stop it from unraveling.
This will prevent any underwater headphone jack you use from leaking. Its more necessary if you plan to hunt a lot but it’s ten minutes well spent. When a plug leaks, water can wick up the cable–making it very hard to re-solder. Here’s how the finished product should look:
The outside layer can be changed if it gets damaged or starts to unwind. What’s important is to create a good seal on the front flange thread and the back where the cable comes out.
My Best Minelab Manticore Salt Water Settings: M11, M9 and M8 Coils
I’ve done a lot of testing lately mostly with the M9 and M8. These are both great coils and both make a big difference in the Manti’s signal to noise ratio. This means that you can run hotter in salt and hear smaller targets. My initial tests have been on a fresh water beach and with small targets. Fact: There are a lot of ways you can run this machine and not all of them are that great on small gold. With the NOX I found that simple 2 Tone and Prospecting audio (g2) were the best so I set about trying to replicate these settings. Two tone is a great freshwater beach Manticore setting. I ran Surf and Seawater to overcome my tough, black sand mixed in beach. This way of operating gives great detail on responses especially when you combine it with skilled use of the cross sweep and high quality headphones. Really hammers those small foils–you can see the potential right away. With the M9 I was able to run the Sensitivity up to 28—quite a powerful setting. Higher though causes the audio to “bunch up” –overrunning targets slightly and sounding jumpy overall. (Its very important to be able to hear when the Manti is doing this).
Im anxious to try simple Two Tone in fast salt to see if it can be balanced out to run as well there as it does on my black sand freshwater beach. I take the stock middle “line” down to zero in that I feel that this big low tone block blends with the ground noises in salt. Even moving the Tone Break up a bit would not be out of the question to accomplish this as it worked well to stabilize the NOX. In that chains are the best finds where I hunt this is something to be done with caution.
At the same time my tests over time have shown that its Prospecting audio that’s got the most low conductor punch. Dankowski’s 11 coil settings are very good and let you walk right down the slope into the swish. You may have to run Horseshoe “on” to do this and having this choice lets you also run right in salt water. This requires lower Sensitivity settings though depending which coil you are using. I’ve gone in behind my own hunt running “segmented “ style audio and found quite a few more targets running Prospecting audio. This made a believer out of me. Its more like a pulse or all metal signal and seems to ride over interference sources like slopes and seabed contours better than a segmented mode.
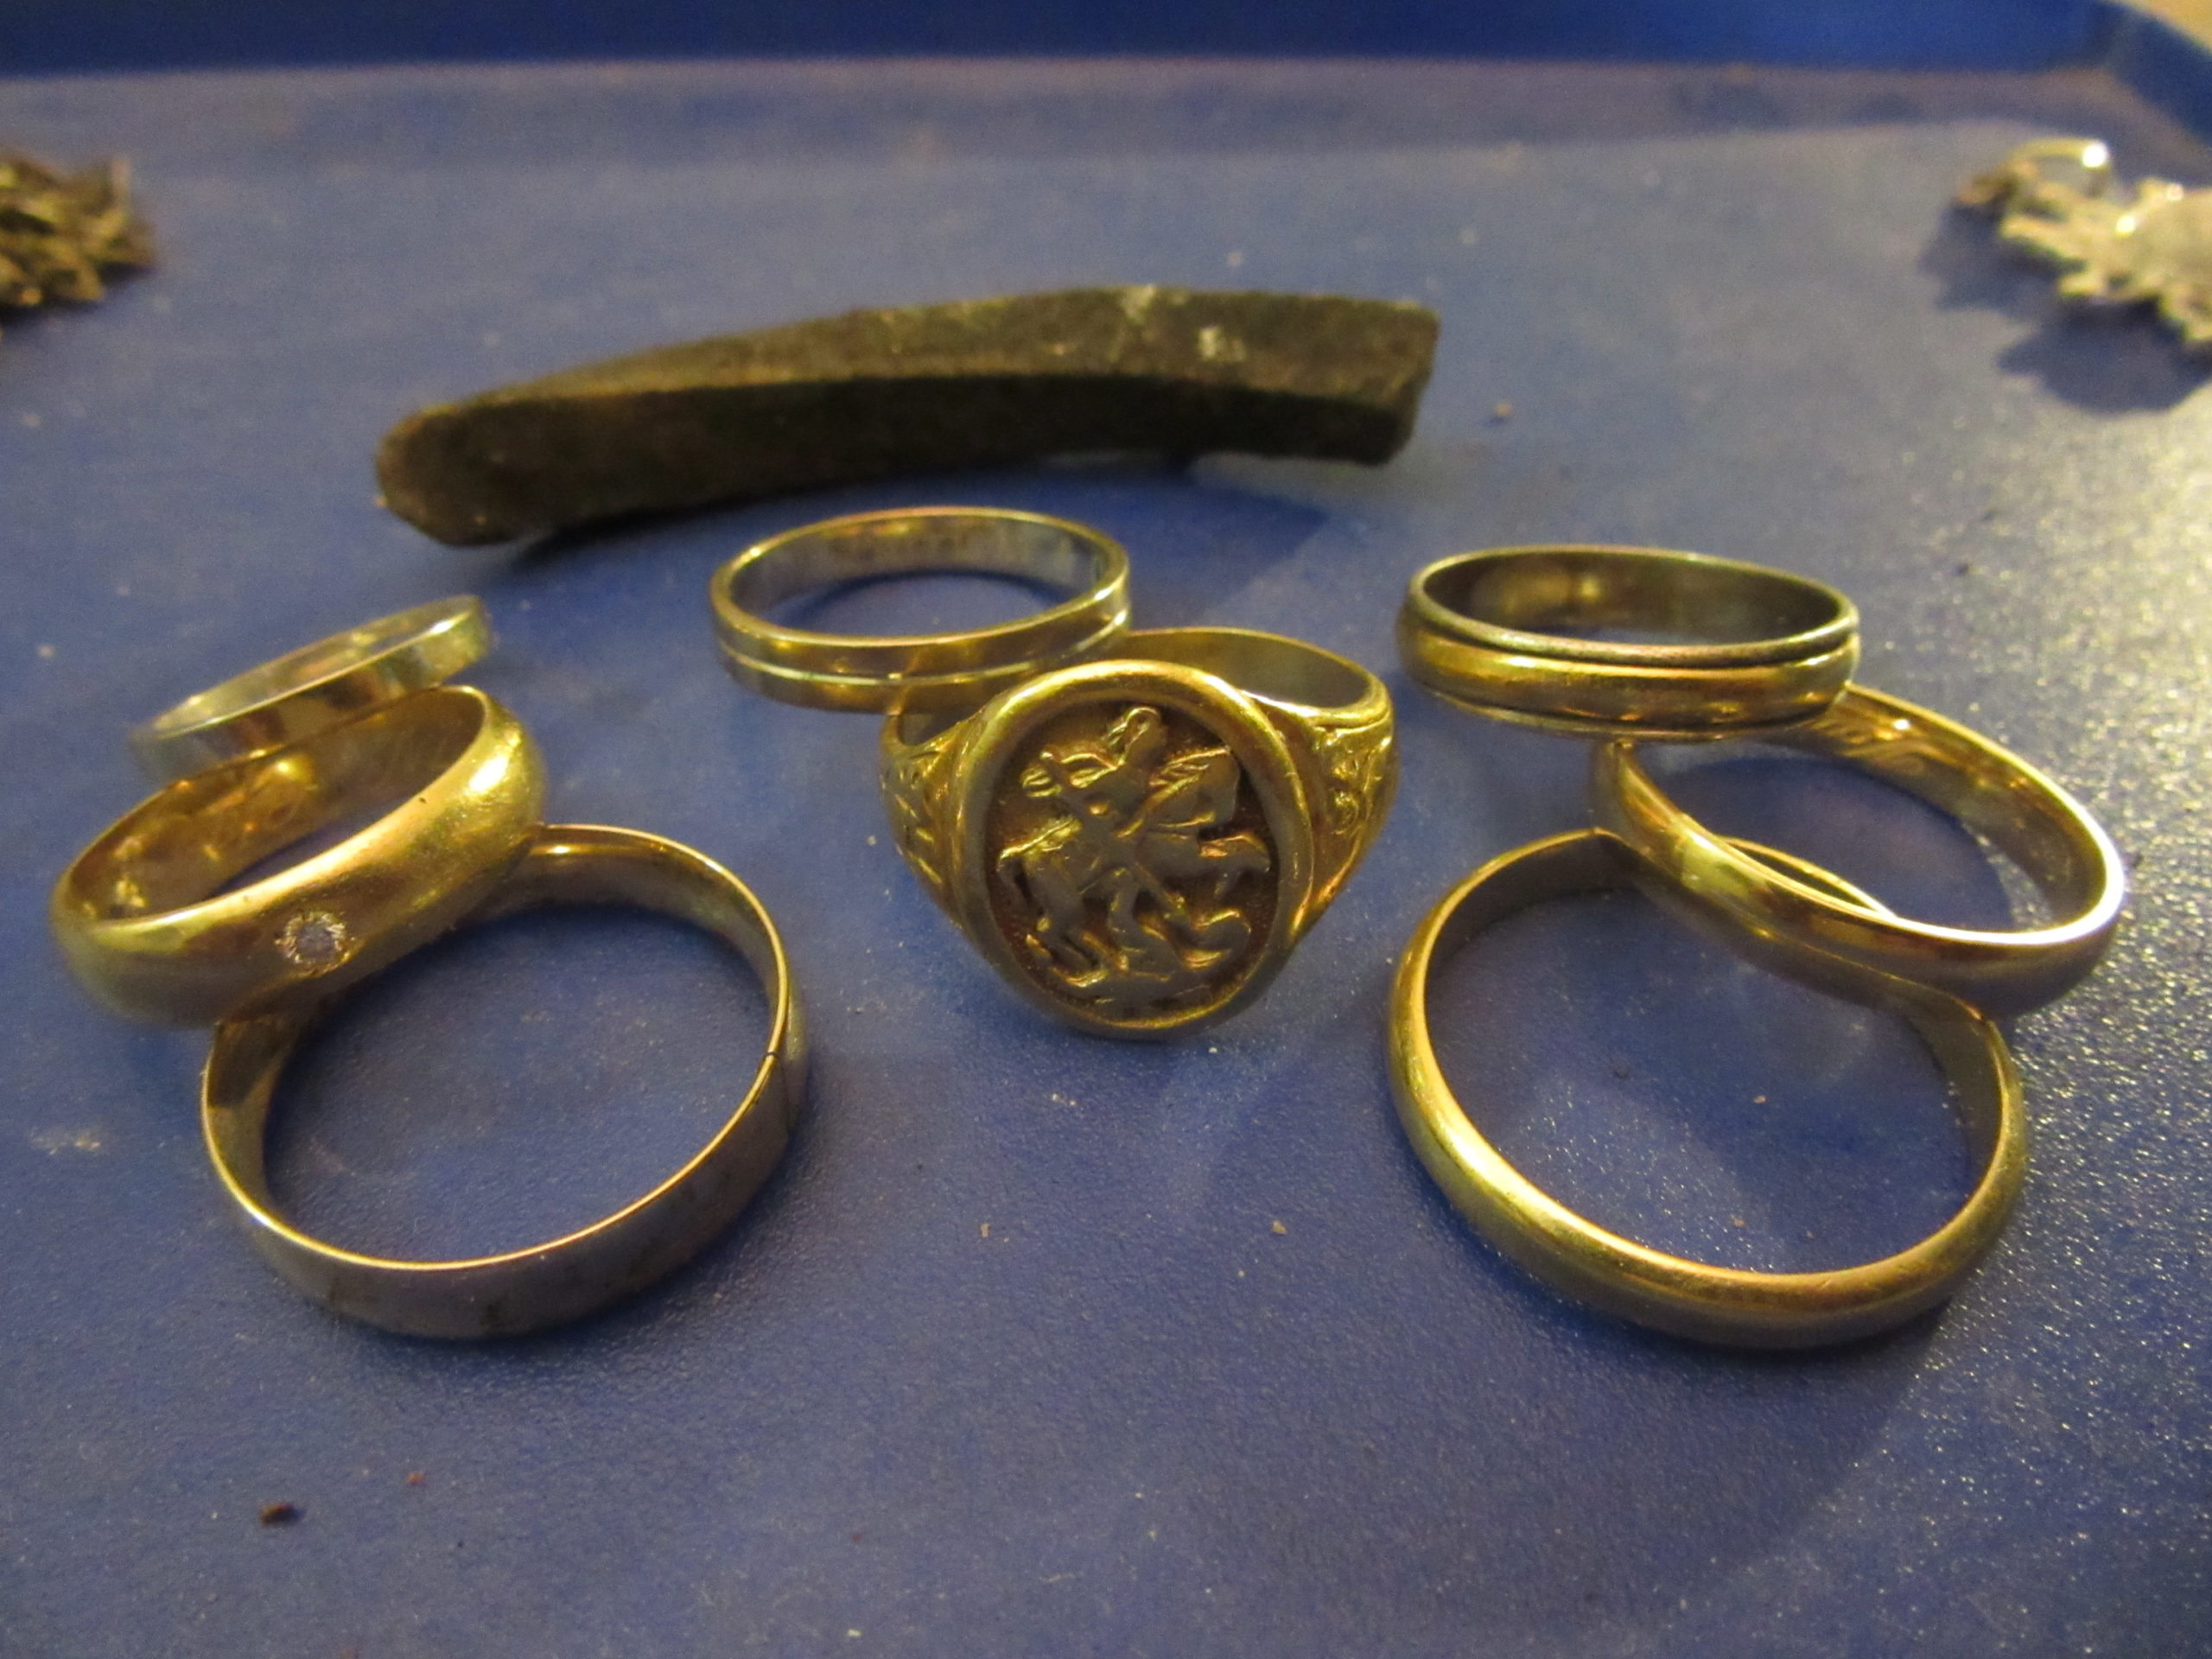
Got this 48.2 gr. 18k chain running Dankowski’s settings for the 11″ coil using the 15″ coil–going up and down the slope.
Finally we have Dankowski’s Low Conductor mode. This is a very powerful way to run the Manticore but it’s noisy. It too can be run with horseshoe “on” to smooth it out a bit but the low conductor sensitivity does react to fast water and seabed. This setting requires very low Sensitivity settings—20 or lower. At the same time it’s very powerful this way –especially if you are hunting for small gold. If you are searching ground where a lot of chains are found—these two settings are definitely the way to go.
While I’ve gotten some great results running “segmented” type audio—particularly Five Region All Tones using the “Freestyle” ferrous Limits grid and “Excal” type audio (One Region All tones) my tests are now showing me that the super responsive, fluid response of Prospecting audio performs better—especially on small gold.
Speaking of “Freestyle” Neil’s audio set up is very fluid but is based upon five tones–so it gives a lot of information on signals but still “pops” well on targets in dense trash or iron. this audio set up can be pirated for other applications besides use with the “Freestyle” Ferrous Limits grid. The Ferrous Limits bordering also acts to smooth out the machine in salt water.Neil Jones’s “firewall” type approach in his “Freestyle” settings also work wel l to tone down the noise in salt water. Dankowski talks a lot about “getting used to” the noise and hearing through it. You can also run lower Ferrous Volume too.
Best yet with the Manti found running “:Freestyle” it’s .78 ct.
Minelab Manticore Settings for the 8″, 9″ and 15″ Coils.
M8: very strong for a coil that size—and very punchy on the micro gold. Maybe not deep enough to use full time although I do see top pros doing this with the NOX 6”
M8 Coil (Dankowski)
With Manticore and 11″ or M8 coil……. I recommend
Beach Mode – Low Conductors
Recovery Speed = 4
Ferrous Limits = Upper: 4….and Lower: 0
Audio Theme: Prospecting audio
Volume: 25
Iron Volume: 25
Nothing ‘Notched’ (bring in the horseshoe)
Ground Balance
Do NOT Disc out ANYTHING!!
Make absolutely sure to dig ALL targets in the ‘single digits’ ID range. It’ll be a little painful (at first); yet, you will incur a epiphany-moment…..that will ‘justify’.
You should swing the small coil (M8) just a little slower than the M11 coil. About 1/3 slower. And…… if you can……. keep it about 2mm (to no more than) 5mm above the ground……IF you can start to handle the ear-bashing (assuming Sens 30). Hearing the aberations and salt-delta’s of the ground …is JUST as important as hearing real targets. In short order……. this will become intuitive.
M9: this coil seems to have “the best of both worlds” in that it’s quite deep and has good low conductor sensitivity (given the right settings).
M11: Great, deep all arounder—it will get small gold but is limited on real micro targets like fine chains.
M11( Dankowski)
Beach = General
Recovery Speed = 4
Audio = Prospecting
Ground Balance the unit over some water.,.,.,.,., about 2-feet deep of water. , . , . , . , . with the coil bobbing method ABOVE the water (not “IN” the water).
Volume = 25
Iron Volume = 25
Ferrous Limits – Upper = 5
Ferrous Limits – Lower = 3
Notch nothing! Bring in the iron. (Don’t allow for ‘ghost’ signals).
Sensitivity is going to be your ‘variable’. Run the Sens as high as you can IN the water.,.,.,.,., at a level that you can understand/handle. This may be around Sens 22.
M15: Nice large coil to swing. I see guys cutting off struts but I don’t feel this is necessary. Compared to a Coiltek 15” there is not much drag at all. I exercise my shoulder with a dumbbell to be able to search longer with this coil. The NOX could not really handle its big coil in salt and Dankowski says the same thing about the M15. It does require some balancing and higher /sensitivity settings are not necessarily what will get the performance. Its okay on small gold but does require that these targets have some solidity to them. If you want to run this coil at a sloped saltwater edge run N/S not E/W the interference from dragging the coil downhill needs a faster Rec Speed. With the 15″ for the NOX the recommendation was REC SPD 4 I try and stay around this level unless Im going parrellel on a hill. In fresh I see guys running Goldfield–great, smooth micro gold getter–Sens down at 20.
These are my observations after a couple of years with the Manti.
(Some micro 22k gold with the 11″ coil, 4.9 gr.)
For more information on getting the most from this great detector check out my book:
I’ve owned so many pairs of underwater phones that I”ve lost count. Not many have survived—some were not great quality but many stopped working due to my own neglect. Here are some of the simple methods I’ve learned to get longer life from my headphones:
1/ Cables and Strain Relief
This is where a set of phones will usually begin to deteriorate. The first and most important thing is to never pull sideways (or in any direction) on the machine side jack. I secure mine with two elastics or Velcro ties. One goes I front of the detector “brain” handle and one behind. I wrap the cord around underneath the handle—once or more if the cord is longer. This prevents any pulling on the jack hardware whatsoever. These plugs are very hard to solder so it’s important not to let pulling make the carrier wires intermittent.
Second is the section of wire where it leaves the earcup. This can also be subject to pulling so be aware of this especially when you put the machine down to dig. It’s also possible to pinch the cable under your arm as you swing—causing pulling on this section of the phones cable. This is an easier fault to fix by opening the earcup—pushing the cable in and cutting out the short and re-soldering.
Next is the smaller wires that go from the earcup over the arch. If you let the earcups continually turn upside-down, these will begin to crack where they enter the cup. It’s not a bad idea to look for a way to add some strain relief here using epoxy or rubberized tape. However, this has to be secured to the earcup. So if you are going to wrap tape around the wire—use epoxy or “Crazy Glue” to anchor the tape to where the wire comes out. This way you are spreading the bending out more—to a longer section of the wire further down.
These simple strain relief modifications will prevent those terrible headphone suprises that any experienced detectorist will be all too familiar with.
Keep an eye on your cables at all of these critical flexion points—looking for cracking. Once water gets inside these wires they become near-impossible to solder. Epoxy or silicone can be used to seal this damage.
When you plan to use a set of phones in salt water there are other things to look at:
Metal “Sliders”
1/ Where you have phones that feature metal “sliders’ these can rust if not properly cared for. When you get a new set of phones coat these with dielectric grease to reduce any rusting. Rise after every salt water use. This should include periodic soaking / spraying to remove any salt from the metal that’s underneath the arch padding. This area is easy to neglect and leave damaging salt on.
This whole upper array can be replaced if necessary–what’s critical are the wires.
2/ Flush and inspect the earpads. These need to have the salt water squeezed out after every salt water use. I do this by pressing the earcups together. There are usually drain holes top and bottom. It’s also a good idea to shake the earcups to see if any water is sitting inside. If you feel any, sit the phones upright so that it can drain out. This salt water can begin to eat away at any silicone protecting the wires inside.
Overall
If you notice any “fuzz” or crackling in the sound of your phones find the short immediately. Do this by wiggling the cables at all of the above sites. If it’s the plug you might be able to solder it yourself or if not –take it to a TV shop. Have the solder done then try and reseal the fitting using epoxy or another sealing compound. Look for something that’s classified as “marine” sealant.
I also bag my phones to travel. This prevents the cables from being pulled when you remove something nearby. A drawstring pouch works well–or just a standard zip lock freezer bag to keep them contained.
With underwater phones the best defense is awareness—knowing how phones get damaged and avoiding those mistake. It’s simply a matter of developing good habits–watching for damage and catching it early.. Hope this information is of value.
The more I use the Nokta Legend’s Beast mode, the more impressed with it I am. It allows for very high Sensitivity settings—producing amazing depth on small targets. The audio is also very descriptive although it takes some getting used to. This is a great gold hunting mode as it lets you hear the cleanest, non-ferrous targets. These are the smooth, extended high tones. Also, because it derives from Goldfield mode–its good in black sand.
1/ Press the right arrow to go to Goldfield mode.
2/ Press the Frequency button untill beast mode (bE) is displayed under the “M” on screen.
3/ Press the Ground Balance button to begin the first GB sequence. Pump the coil from a height of about two feet off the ground to the ground untill you get a stable reading. Then press the GB button to exit.
4/ Now press the Ground Balance button again to begin the second GB sequence. Press the frequency button to enter into this second process. “2 gB” should appear at the right of the screen. Press pinpoint as you bob the coil to ground balance. Then press the GB button to exit. This second Ground Balance is abseloutley necessary to stablize the machine in beast mode.
5/ Now adjust the Sensitivity to suit your conditions.
6/ You can also make changes to the Iron Reject by going to the Recovery Speed feature and pressing pinpoint. Where you have iron and “mixed” targets (part iron, part non-ferrous–such as bottlecaps), Iron Reject acts to push these targets down into the lower tones.
7/ You also have the option of changing the Audio Gain by going to the Volume control and pressing pinpoint.
For more information on finding Gold, Silver and Relics with the Nokta Legend, check out my book:
SOME MORE TIPS FOR THE UPCOMING SUMMER SEASON IN THE DRY SAND ….
I found a great article on the Treasure Coast blog the other day and I want to share with you here… Many of us take winter getaway vacations to warmer climates, and many times we bring along our metal detectors to hunt the beaches at the resorts that we stay at at the various beach destinations…… here is a guide of how to more effectively hunt those exclusive Beach spots more efficiently !
You can find a lot of jewelry on a beach, but more of it in the water. Hunting in the water and in the wet sand requires a little more technique to do it well than working on the dry beach. Yet there are some things that can help you find more jewelry even in the dry sand.
It goes without saying that most jewelry will be lost where more people frolic. Both the quantity of people and their activities are important factors. And of course there is a vast difference in the quality of jewelry at different beaches. It is also obvious that you can’t find much expensive stuff on a beach visited only by people of modest means.
I mentioned volleyball courts the other day. They are good places to find jewelry.
Most of the people that I’ve seen detecting volleyball courts, detect the middle of the playing area. I wouldn’t skip that area, but you will find a lot to the back and well outside of the court itself. Think about it. Where do people dive after balls? A lot of that happens outside of the boundaries. And that is a place where things are often lost.
Another place to check on a volleyball court is the area right around the base of the posts that hold the nets. That is where people tend to lay things. Then sand gets kicked over the items. A lot of detetorists don’t check that area, especially if the polls are metal. You can make adjustments to detect where others won’t or can’t.
A third tip I have for volleyball courts is to look in the morning right after rain or watering. Fine chains and other things are sometimes exposed.
You might choose to grid the busier areas. Nothing wrong with that, but don’t neglect the areas that a lot of other detectorists might neglect. Beach chairs are often made of metal or have metal parts that make detecting difficult. Many detectorists will not detect close or under beach chairs because they don’t know how. You can learn to do it. I also would always check where beach chairs have been moved. Look at the tracks in the sand if they are still there. Often a high tide or something will cause chairs that are normally in one location to be moved.
I’ve found a lot of pairs of ear rings around beach chairs. That is the main place where there is a good chance of finding a matching pair. It seems people take them off and lay them down or else drop them there. They are often very good earrings. Other places you’ll usually just find a single earring.
When hunting dry sand, DON’T discriminate out watches! There are Rolex watches and other valuable watches in the dry sand. They won’t likely be found real often, but there are more of them out there than you might think. I don’t know how they get buried, but they do.
Another tip that I’ve found productive is to detect very trashy areas that a lot of people will avoid.
Get to know the life guards and beach concession workers. They might tell you about items being lost and where. I always remember the time when a fellow that rented jet skis and other water toys lost the keys before he opened for the day and said he’d give me fifty dollars if I found them for him. I think this was back in the eighties. I found them in just a few minutes and he gladly paid me.
Some of the old timers that I knew would sit where they could see what people were doing and where and then detect at the beach at the end of the day. You’d be surprised how often you’ll see people obviously looking for something they lost. And often they’ll ask you if you can find it for the.
There are a few tips for finding jewelry in the dry sand. All of those things have been productive for me.
Great advice Brian. I was walking on our beach in full swing today and thought about this question. The big three are Numbers, Dollars and Activity. Everything cues off the numbers. Make an imaginary chart of the most people you have ever seen–and a minimum day. Then add a few increments in the middle. (3/4, 1/2, 1/4….) This will tell you your overall chances. Look for a few other indicators to give you an idea of just how much beach usage there is–such as how long the line is at the snack bar. A minimum day is valuable for your observations too. It teaches you where the main usage areas are–the key activity centers where the few people who are there gravitate to. Activity is the “solvent” that can make up for low numbers–vollyball is a good example. At the same time, nothing can subsitiute for dollars–if its not being worn–its not in the sand. Huge numbers can offset both activity and dollars–but don’t count on it. Use the amount of trash present to get a better idea of how much usage various areas have but don’t forget–kids deposit trash too. When you have a good knowledge of how your beach operates–you can then use the three “action” modalites to fine tune your efforts. These are coverage, accuracy and depth. Heavily hunted prime sections may require more depth. Big sections with moderate potential require coverage. High trash sections require accuracy. Learn how to “turn up”one (or even all three) of these based upon what your observation tell you. This is the advantage that owning multiple types of machine gives you. Having the choice of running a MF detector up at 20 / 40 kHz helps too. When you do find something, analyse why–especially in terms of the numbers that produced that amount of concentrated activity. These are a few of the beach-reading tricks that 45 years of digging have taught me. Good Luck,
All Terrain High Conductors
Recovery Speed = 2
Ferrous Limits = Upper 7 (to start with)…… and Lower 3
Ferrous Volume = 2
Volume = 25 (Wired KOSS QZ99 phones)
Nothing notched….. nothing Disc’d out
Discrimination Pattern = All Metal
1-Region All Tones
Audio Theme = Normal……. but with Profile set to = Simple (This is important for deep targets to sound louder)
Sens 2-points higher than EMI. 2-points INTO the EMI. THEN….. a LONG PRESS Noise Cancel….until the unit locks on to one specific Noise Cancel channel. THEN boost the Sens to “just at…. or: just below” any EMI.
Good Luck!
Finally got hold of this coil for the Minelab Manticore and had it out for a few spins . You could say that my experiences with the 15″ NOX coil gave me the knowledge base to begin my comparisons with. The NOX 15–was a good good, deep coil but chattered in salt and needed to be slowed down (4) to get good depth. I ran the Manti 15″ in Neil Jone’s “Freesestyle” settings, transposed on Beach Deep, Beach General, and the All Terrain General modes. In that it uses 3 levels of filtering (Ferrous Limits, segmented audio and all tones) Freestyle is a great system for stabilizing the Manticore at higher senitivity settings, and bringing up good, clean responses. This system was pretty good for the big coil–it ran very smoothly even up at 26 / 28 on fresh water sand. This coil really showed how well it interracts with the Manti’s great processing–giving clean, sharp tones on several deep coin sized targets–15 inches and deeper.
I also tried this coil on some of the stock modes. It sounded really good in Beach General in that you could hear the interraction with the ground–evidence of signal penetration owing to the lower frequency weighting. One high tone proved to be a toy car down 18″ -plus.
All Terrain General seemed to have a lighter touch owing to its higher weighting responding to the heavily mineralized fresh water sand–probably not the best big coil tough sand mode.
“…in the house…!”
I also tried the coil with another great system–Tom Dankowski’s Beach Low Conductor settings. This is also a very deep way to run the Manticore although it’s a bit more noisy. In that this system uses Prospecting audio, it was a good test for how the coil filtered down signals to a clean, single tone. The 15″ coil was pretty good at this–although there was more flutter due to to the “open screen” nature of Tom’s settings.
It’s obvious that the Manticore has stronger processing than the Equinox and how the machine operates with a larger coil is a good test of this. This coil was, smooth, hit several deep targets, and sounded off well on some very small, deep signals too.
The overall depth was still short of a pulse machine such as the Whites Dual Field, but was certainly approaching it. At the same time, The Manticore gives you great audio, and on-screen accuracy.
A Couple of Minelab Manticore 15″ coil ponters:
1/ to really get a feel for the kinds of tuning changes that are needed to get the depth from a big coil–try testing it indoors. Before getting these coils to go deep–a way has to be found to make your signals stand out from the larger detection fieild.
2/ To get the hang of hearing when you are tuning too high or too fast–test test the extremes–the maximum settings over targets to hear how these affect detection.
n My best Manticore find so far, it’s .75 ct.
3/ If there’s any detector that can process well enough to support a big coil–it’s theManticore, but at the same time your setting and sweep speed need to be balanced. Lower Sensitivity and a slower Recovery Speed give the detector time to process what’s under the coil effectively.
4/ Where you are hearing short clipped shallow signals, this mean that deeper oneswill be harder to hear and acquire. Lower sensitivity makes your signals sound fuller and gives you more target information in the signal tone.
5/ When you want to use the red “iron indicator” remember that you are dealing with a more skewed detection field ratio. This means that more exact, narrow coil passes will be needed to get an accurate response on non-ferrous signals.
When I got my first 15″ “WOT” coil for the Soverign years ago–it took for a couple of years and some instruction from an “old-timer” before I was able to really get the performance from it. This involved learning to run a balanced signal and hear exactly how the machine was performing. I get the sense that this is a coil that will perform best turned down, not up. Be sure to base your settings upon testing, not guesswork.
This coil has a ton of potential and is a must for the kit of any serious Minelab Manticore hunter.
For more information on getting results with this great detector, check out my new book:
1/ Where you are having trouble stabilizing the unit—go to one of the modes that has a lower frequency weighting. (A/T High Conductors, A/T Trash Reject, Beach General). These are more stable. They also work well at bringing up targets in heavy soils or dense sand. Higher weighted modes are more volatile and noisy. The Manticore has the advantage of providing good detection of all types of targets on any of the available frequency weightings. These low frequency weightings also act as a kind of a low-level discriminate control in that those targets which are mixed with the ground’s signal (tin, steel, very light foils, anything corroded) are pushed down to not sound off as well.
A few Manticore finds…
2/ Beach Deep and Beach Low Conductors are both very deep search modes but lack stability around the water’s edge. To get used to how the Manticore responds to salt water moving over the coil—try using one of these modes and bring the coil into the water. Notice how the signal tone mutes slightly. This means that the machine is losing depth. So when you are setting the machine up around salt water listen for this muting effect—its a cue to lower your Sensitivity or try a faster Recovery Speed. In that these two modes are very deep it’s worth experimenting to find ways to run them at the water’s edge or even in a light salt environment.
3/ Where you are having problems running higher Sensitivity settings around salt water you also have the option of adding a small amount of rejection (one or two increments). This forces the signal to “assign” on one side of this reject block or the other—making for more stable audio. At the same time this “1-2” zone is where thin chains respond. It’s a tradeoff—depending on how important it is to you to run higher Sensitivity at that location. A good “all purpose” Sensitivity setting for salt is “22” although by muting the signal a bit with more Ferrous Limits “bordering” it’s possible to settle the audio down and run the Manticore higher.
For more information on getting results with the Minelab Manticore check out my new book:
The newest “crop” of detectors feature what’s termed “fast digital” processing. This processing was in effect–faster and more detailed than anything under the coil–ground, iron and targets. It’s safe to say that these types of circuits are making determinations measurable in the thousandths of a part. This means that the machine can audio and meter report with great accuracy–and separate targets from what they were resting in with great precision. Elements of this whole can then be subtracted–biased / filtered out. This is what gives the Minelab Manticore its remarkable ability to hit coins that are surrounded by nails–extremely thorough and detailed processing.
These machines also read within targets–reporting on the alloys they contain, or with targets that contain some iron or corrosion–both the ferrous and non-ferrous parts. All of this information is available to you. Whereas an analog signal is simply “the ground though a speaker,” (just like a simple pulse machine) a digital signal is more of a representation–kind of like the way a computer codes information into “ones and zeroes.” It’s removed from the actual ground by this codification. This allows all the great features that we see on a modern detector–amplification, tone menu options, precise ground balance and tracking (the list goes on)–these are this code as managed in software. Everything is converted into a “value.” Differences in these values are recognized as ground, iron and targets of various relativestrengths. A good way to put it is that these detectors don’t detect metal–they detect anomalies.
What you have is gold-machine level processing applied to the task of normal detecting.It’s almost an “over-matching” limited only by the basic physics of what ground conditions will allow.
So when you see the Minelab Manticore advertised as having “50%” more power to the coil–this does not necessarily equate to depth–it equates to thoroughness of process. This power lets the Manticore process through / around all kinds of things: viscosity (black sand), fast salt water, complex audio and metering tasks, reject blocks, iron and diverse alloys–all at great speed.
“Multi IQ” enhances this processing / filtering by digitally locking the signal away from the volatile influences of iron–making for even better separation and reporting accuracy.
When you put a machine like the Equinox 800 or Manticore into its Prospecting mode this processing is well illustrated. The detector is more or less able to separate one part gold from 1000 parts black sand. How these machines perform this reduction has a lot to teach us about the overall platform.
A good way to understand this is to imagine a pyramid. At the base of this triangle we have the wide-responding, diverse signal of the ground, iron and any metal that’s under the coil. As we move upwards there are the various processes: bias, (promoting the more orderly parts of the response by way of audio filtering) and modulation (taking out more of the rough elements and screening for coin-sized targets), with Discrimination and Ferrous Limits acting to further refine the signal. Finally at the top of this pyramid we have the single (ideally) clean tone of a nugget or silver dime. With the Equinox 800 or Manticore’s Prospecting modes you can almost “hear” this process as the rough “sides” of the signal tone lag and boil down to the finished tone. If you take the ground’s massive random signal as a starting point, what the detector is doing is sounding off on “peaks” in this signal. The more distinct this “peak” is, the more distinct from the ground the target is.
Prospecting mode with either machine is more of a sharp, pointed triangle. This detailed processing lends itself well to the use of bias–or in the case of the Minelab Manticore, Ferrous Limits to focus upon less alloyed metals. With the Equinox I’ve used this clean, detailed high bias response to sort through shorelines littered with alloyed bottlecaps to find the gold.
From: “The Minelab Manticore: Tips, Tricks and Settings”
Learning a new machine is probably easier if you start with your “ideal” signal and work backwards from there. This way when you have something that is a poor response but has some of the elements of a good one—you are more likely to notice. Part of the skill of recognizing good targets mixed in with iron (or upended) involves just that—looking for parts of what a good signal presents. The more of these that are present, the better the chance that you have a masked good target. You could call this the method of “necessary but not sufficient.” So for example seeing a “92” flickering up on the screen is a good start but if it does not repeat over one exact spot on the ground, that’s not so good. It’s kind of like a ”point system” where everything you have in terms of target testing will come into play: coil control target testing, meter skills, all metal testing (Pinpoint mode)–all can give you that critical bit of information to help in your dig decision. The term “degraded” responses comes from skilled CTX 3030 hunters who learned to look for signals that were lower than ideal but still consistent in other ways. A few Minelab Manticore dense iron tips:
-peaked response in both modes, ideally. It’s always Pinpoint that’s the most telling no matter how much iron there is.
-climbing meter enhanced by a tight, narrow, controlled “IDing” pass.
–even a slight consistency to an angled cross sweep. This does not need to be a “full cross”-just off the original direction tells you a lot about the consistency of a response.
-using a single frequency checker is not a bad idea too. Many top hunters use “10 kHz or “15 kHz.” These slower more thorough frequencies will give a more accurate reporting on the relationship between the ground and your signal. An alternative would be one of the Beach modes that feature some low weighting but are faster responding.
-be sure to vary the speed and width of your coil passes. Another “old timers” trick is to swoop the coil down at the ground to send the signal down at different angles. This works well on upended coins or deep ones that are masked by shallower junk.
–try lowering the Sensitivity. This makes the surrounding iron smaller by relation in that it is wider responding.
-try both open screen and “Trash Reject” type FE Limits. I also sometimes work with a small (1-3 increments) reject block. This makes for cleaner target assignment on either side of the ferrous / nonferrous “line.”
With the Minelab Manticore its important to remember that when you want to use a frequency weighting that focuses upon high conductors for example, more falsing will come in from that end of the spectrum. Its up to you to enact a testing process to confirm your targets with accuracy. Making a quick switch to All Terrain General to check deep signals also works well.
A key tip I hear coming up again and again from skilled Manticore relic and coin hunters is to base your digging decisions on “which tone dominates.” “(iron or “good).” This, along with the “big two” tests (cross sweep and Pinpoint: wide / narrow) will seldom steer you wrong.
Even doing thorough signal examination–and with 40 years of practice–it’s when I neglect these simple basics that spikes wire and other high responding iron targets fool me. The mistakes I make most often are:
-no Pinpoint test to listen for a narrow, peaked response. (Thinking my Discriminate mode “ears” have “got this one).”
-no cross-sweep conformation (even a slight angle). Where you have heavily worked conditions–this is a good place to begin to “lower the bar.” I can’t say enough about the value of this quick part-angle check with a high Gain detector. It tells you a ton and offsets a lot of the machine’s tendency to continually “sound-off” on targets with no mass or consistency.
-no attention to the consistency between the target’s size and the Depth Meter. A classic big iron dig is one where you hear a small tone–but a shallow depth reading. Then, of course there is nothing at that depth. (It’s worth noting here again that this is why your initial Pinpoint reading is so important in that all of these other correlations hinge on it). Learn to get the most information possible from the Manticore’s Ratchet pinpointing system—it’s very valuable to your accuracy.
From: “The Minelab Manticore: Tips, Tricks & Settings” by Clive James Clynick
The Minelab Manticore is a beach gold hunters dream. It has great depth in both fresh and salt water and offers you a wide range of overall settings, audio options and frequency weightings to suit your beach hunting preferences. It’s important to learn what this machines features do and how to match what your conditions demand. I favour low weighted settings. These saturate and penetrate tough ground more thoroughly and let you run higher Sensitivity settings. Its also important to understand how your Ferrous Limits and discriminate settings act to hinder the signal reducing depth and separation. The Minelab Manticore also has very strong signal processing. This translates into very accurate audio. Where you hear a “”peaked” sounding tone–this is something that is distinct from the surrounding ground. Gold does not corrode and therefore is very distinct from the ground compared to say–a rusted bottle-cap. So you could say that as a gold-hunter, you are looking for signals that conduct well.
By using the Manticore’s accuracy, I try to narrow down my digs to mostly aluminum. Many hunters think that they are looking for gold but don’t use their machines accurately and dig up targets that aren’t even like gold in how they conduct the signal. Use the Manticore’s coil to examine your targets for consistency. Vary your coil passes and check your signals on the cross sweep to see how they “stay in.” This is they way to focuss in high quality signals even in very dense junk. In fact where there are heavily hunted conditons, I head for the most dense trash areas to use the accuracy advantages that the Manticore gives me. I find those signals that “dig everything” hunters have very little chance of finding because of the sheer target numbers. Here’s a picture of my best Manticore find so far–a .75 ct. diamond solatire ring. I found it in an area worked daily by professional hunters. This area had a lot of small iron targets which these hunters–even though they were using the Equinox–had no way conclusive of recognizing. The Minelab Manticore’s graph let me zero in on the best signals among this iron.
These are some of the methods that have helped me to make big finds at the beach with the Minelab Manticore metal detector.
For more information on understanding getting results with the Minelab Manticore metal detector check out the reviews of my new book:
“The Minelab Manticore: Tips, Tricks and Settings”
Decided to take the Minelab Manticore out for a late season one hour hunt at a heavily worked beach. This was a land hunt and I focussed on those areas which were not the actual beachfront but back where beachgoers would be getting sorted for the walk to the parking. A good place to look for is the “middle” of where this bundling and packing activity takes place. In heavy mineralised ground Im moving towards the lower weighted settings–such as All Terrain HIgh Trash. This kind of weighting brings up the cleaner signals and allows for higher Sensitivity settings. I also used Neil Jones’s “Freestyle” Ferrous LImits grid and audio set up. This also adds low range rejection and audio filtering. I got a deep high tone with 90’s VDI and up came a Tiffany 925 “1837” ring. Not a bad new value on these $295 CDN. Always great to get something off season after everyone else has given up.
What’s great about thie Minelab Manticore is that you can “mix and match” frequency weightings, Ferrous Limits (Bias) Discriminate grids, and run a wide variety of audio options.
For more information on getting results with the Minelab Manticore metal detector check out my new book:
“The Minelab Manticore: Tips, Tricks and Settings”
The Minelab Manticore has is a pretty solid charge system although the actual cables have a limited life.
Oxidization is your worst enemy. Second are iron filings. When you see that the charge won’t start or complete, suspect one of these. (Green light won’t begin or stop flashing). Where you have iron filings stuck to the magnetic points on the charge fitting, use a toothbrush to remove them. This takes a quick, sharp movement. You may have to finish by using your fingers to pinch and remove the filings. This will allow the detector to charge and complete properly.
Over time, both charge surfaces will oxidize. This can also be a cause of charge initiate / complete problems. Use a pencil eraser to remove this oxidization from the flat contact surfaces. Then spray with some contact spray. This will restore proper charging. Be sure to make a few power on “touches” of the contact to get the spray working.
In an emergency, take a sharp edge and lightly score the charge surfaces to restore current. This should be done only as a last resort as it will remove the conductive coating. At the same time, a coating of corrosion on these surfaces is what is preventing a proper charge.
Co-Axe Jacks
These corrode over time too—both the contact surfaces and the aluminum threads. This can be seen by the flat grey appearance of the threads and how they become harder to start and turn.
Treat the threads with dielectric plumbers grease periodically to keep them working smoothly. I work the grease in thoroughly by going around the thread with a toothbrush. When these are severely corroded it’s not impossible to break off a contact pin trying to place the jack. Its a good idea to be careful when installing a coil so as not to bend any of these pins. Try to have good light, and eye the machine from above or straight on at the side. This way it’s easier to see if you are cross-threading. For beginners, the best way to install a coil is to use two hands with the screen flat across your belly. This gives you a perfect view and a stationary target. Begin by seating the plug with a light, careful touch. Turn the collar backwards to feel the thread. Then wiggle the plug into full seating and begin to turn clockwise. If you feel any resistance or grit start again. If you don’t have much practice with this, eye the plastic part of the coil side jack for the gap that goes at the top. Rushing at this stage is the easiest way to break or bend a pin. Never force the fitting.
The actual contacts can become oxidized too. This can cause the coil to give an error message when connected, or with the headphone jack—corrosion can cause weak, “tinney” sounding audio. I recently restored one of these by using contact spray, (with live “touches” to break up the oxidization) and a quick, light touch across the male side with a wire brush. A final coating on both sides of the jack / plug completes the restoration. Be careful not to point the spray right into the machine side jack—its just not necessary.
These are a few tips to keep your Minelab Manticore metal detetor in top shape.
2. Multi 3 (M3) has been added to PARK and FIELD modes. This mode is more heavily weighted towards the low frequency response of the Legend (4 and 10 kHz) It’s Ideal for humid, wet and/or conductive soils. It eliminates the moisture in the soils which can cause falses. It also weakens the response of targets generating 10-11 IDs such as coke and aluminum foil. (This upgrade has great potential for detecting in any environment where there are a lot of low conductors that cause threshold noise and “part” signals. The conditions described above under “Signal Balancing the Legend in a Tough Target Environment” above would be an example). The downside here though is that because the ground forms part of the signal, when you reduce a detector’s sensitivity to the “join” between ground, iron and non-ferrous targets, low conductors also drop out. Steel targets area good example of this. When you are finding these “fence-sitter” type objects you are best able to hear small gold–especially the less solid objects such as bracelets, chains and earrings.
Overall the added stability that the M3 mode gives is surprising–as many corroded or “part iron” objects are ignored–even some bottlecaps. Making these kinds of objects “inhibit” (drop out) with repeated coil passes is also easier.M3 makes the Nokta Legend’s response more like the M1 (or MW) modes. As in the example above, if you are frustrated by small, part-ferrous types of targets (caps, hairpins…), M3 is the way to go. Be sure to use the coil to get the most from this mode’s foil and corroded target rejection. (See Basic Skills and the Legend,” pg 32).
For more information on getting results with the Nokta Legend metal detector at your hunt sites, check out my newly updated book:
No detector–even a sophisticated one like the Nokta / Makro Legend will take the place of basic skills and bottlecap responses are a good demonstration of why this is. I see one prominent “YouTube” personality who hears a sound, checks the consistency on the cross sweep and digs. While this is a good target testing start–adding a quick pinpoint mode check would greatly increase his accuracy by letting him get a better idea of where is targets are, what shape they are and how well they stand out from the surrounding ground.
These target features form the basis of what I call “correlation”–that is when you look for sets of target characteristics. This kind of approach takes a bit of practice but can improve your accuracy and hunt time usage a lot. Basically it keeps you off the “too bigs,” the “flyspecks,” the elongated objects and those objects that are partly iron. This type of a broad-based approach can help you to recognise any problem target–including bottlecaps.
As multi frequency machines became more sophisticated a problem arose with bottlecaps. Whereas with a single frequency detector most caps read at a particular part of the “ID” scale—the multiple frequencies of these more modern detectors all read the ground differently. This meant that the steel (or rust) part of a bottlecap could come in at any number of places on the “ID” scale. This confounded a lot of hunters in that it made caps harder to recognize just by “hearing and digging.” What ‘s needed are some other cap “tells” that involve basic skills.
These two targets have vastly different physical properites that can be recognized with practice. The ring is “clean” metal whereas the cap is a diverse alloy that contains iron or steel.
Several methods have emerged. The first involves moving the coil back off a target to listen for the iron tone to come in. This works because a cap signal is more blended with the surrounding ground and as the coil is moved off, the ground signal begins to dominate. This is not a bad method but does not work as well with those high responding caps that contain more aluminum. Quite a few beer brands (such as Heineken and Corona) fall into this category. Another problem is nearby iron could be what’s causing the low tone.
A second method involved turning up the Iron Volume. This makes the “surrounding” iron tone come in more loudly as the coil moves towards the target. This works but it makes the audio a bit loud and confusing overall. The way that these “blended-with-the-ground” signals respond is more obvious wtih the iron response turned up.
My suggestion is a bit of all of these methods but is simpler than any. It relies on the fact that a bottle cap is a “dogs breakfast” of metals. Using 60 Tones lets you hear these better. As well, any target that contains steel or rust is not a strong, solid tone. It’s not “peaked” in the middle. When you run (or switch to) 60 Tones cap signals are not centred. What you are hearing is the machine trying to “lock on” to a single conductive range and failing. As you move the coil off the signal and go to the cross sweep this process will begin again—and fail. The more rust a cap has the more quickly it will degrade as a centred response—that is–it will begin to break up. When you do repeat coil passes, it won’t pick up uniformly. As you move the coil around trying to get a fix on the target –the centre will appear to move. With practice in 60 Tones—the properties of a cap or iron target will be easier to spot in any tone “ID” mode including the segmented ones (2, 4 and 6). You can also combine this information with watching the meter readings for scattered number in the cap ranges. I find these to be around “20-21,” “27-30” and sometimes up higher for the ones with more aluminum. At the same time the coil will always reveal the inconsistencies of these targets.
So you are learning to recognize both the alloying and the steel content’s blending with the surrounding ground’s signal. The less “peaked” a signal’s tone is, the less distinct from the ground it is. Combine this with listening for transitioning, inconsistent tones in response to your coil movments.
In soil I also use pinpoint mode to see if a signal is wide (containing iron or steel) or drawn out. The “FerraCheck” is also a handy tool for recognizing caps. It’s also dependant upon coil control in that the iron side meter may not show bars on every pass. These may just flicker in and it’s necssary to remove the target completely from the detection field to get an accurate reading. Use the cross sweep and check the graph when the signal is the loudest.
Its only when you learn to use the coil this way that the real benefits of a multi frequency machine come into focus. These simple tests tell you if something is consistent enough to be any metal object of value.
These are the kinds of simple, basic skills that will save you needless digging and help you to get the most from the Legend.
For more information on getting results at your hunt sites with the Nokta Legend metal detector, check out the reviews on my book below:
“A Beginner’s Guide to the Nokta / Makro Legend Metal Detector, “
Here is an example of how using basic skills and an understanding of the various target types can improve your success with the Nokta Legend at bottlecap and foil–laden sites.
This is a setting that shows what the Nokta Legend can do on low conductive targets. At the same time—it’s’ not “hunt by numbers”–there is the need to use the coil and your ID skills to determine what responses are good quality ones. There’s also a notch to break up rusted bottlecaps. This also needs some skill building. The idea is to reduce the audio cleanness of any caps coming in around the “20” mark on the ID scale while still focusing on this important small gold range.
Park mode, 20 kHz (note that single fq use removes the v.1.09 Stability and adjustable Iron Bias from the menu options).
Sensitivity: 26 / 27
(If you really want to learn about how coil control target testing operates with the Legend, try some hunting in Gold mode. The high fq weightings make the detector sound off on a lot of “partial” signals that are not there on the return pass or cross sweep. This is what we are going to be doing in Park 20 kHz but it will be a lot easier).
Rec. Spd: 5/6 Where you have a lot of targets or black / grey sand 6 is better. You want to hear the “sides” of your targets.
Tones: 2. This is the best way to learn coil control target testing—two simple tones.
When you hear a repeatable tone with extension in the sound, go to the cross-sweep to check for consistency. As you do this (making sure you are now right over the object) look at the meter to see how “clean” the response is. Where you see clustered numbers—dig. Where you see the meter going “way off” the central numbers—this is a weak signal or alloy. Gold will stay much “tighter” on the meter. (Sweep irregularities notwithstanding). Also where you see the meter going up to “60” (or thereabouts) –this something that the machine is reading the ground right through—iron or a weak conductor in relation to the surrounding ground.
Caps: Without the “FerraCheck” graph the Legend would be a hard machine to learn. This is because it’s multiple frequencies respond to how a bottlecap is “joined” to the ground. So some that have a lot of aluminum corrode less and and read up high. Other’s are more corroded and come in mid way (27/30). Others still have a lot of rust and hit down around “20”. In that his is a specialized gold setting—these are the ones we are concerned with. I knock out “20” and “21.” Because a cap is a wide, spread out signal—this notch will knock the (tone) “middle” out of most of these rusted caps. Now here is where the coil control comes in. When you see a signal in this range “(19” to say “23)”–draw the coil off and do your cross-sweep pass. Keep this pass even and controlled. If the target is a cap you will see some bars on the left “iron” side of the meter. There will also be a significant meter change. This applies to most caps if done correctly although the high aluminum content ones are hardest. Where I want to break up these too I reject “27” to “31” as well. This also knocks out most small oval tabs too where there are a lot of junk targets.
Overall, understanding why caps respond the way they do is more effective than other coil methods such as backing the loop off and listening for the iron tone. You will be more effective in cap / junk laden conditions using the whole detector: audio, meter and coil.
Being able to sort though these gold-range responses accurately is an important skill with this detector.
Where you have a lot of weak foils try running more discriminate. (12/13/14…) The “M3” setting also weakens these foil responses but does so at the expense of gold sensitivity. This setting is smooth because it has a lot of 4 kHz weightingh–weakening the machine’s response to the part of the conductivity scale where both gold and iron come in.
This set-up has amazing low conductor sensitivity and is a great way to learn to recognize solid, quality targets of any kind with the Legend.
With the 20 kHz, expect a lighter, more delicate signal that requires a smooth, even sweep to be stable. It may not feel like it’s going deep—but will bring up some surprising low-conductor targets.
Where possible a slower Rec. Spd. such as “4” will give even more depth.
For more informaton on getting results with the Nokta Legend check out my book below:
The first thing I noticed about the Legend was it’s processing. Like the Anfibio—this processing makes for super clean audio in iron or dense trash. With the Legend however, this processing is fast and detailed enough to mediate multiple frequencies at once. This means that both the audio and meter information is more accurate as these frequencies cross confirm. As with any multi frequenciy machine, these frequencies examine the ground in different ways—making detection very thorough and deep. The Legend’s processing does two things:
1/ I immediately noticed how well this machine “pulls” up responses in dense trash or iron. Particularly in the multi-tone modes (6 and 60) these signals are reported very cleanly.
2/ This accurate processing reports the quality of responses well. What I mean by this is that targets that are rusted, made of diverse alloys or odd shaped such as “can slaw” sound rough whereas something made of fewer metals or a round object will give a cleaner, more solid tone. This is a great operationg characeristic–especially for beginners–helping you to focus on good qualtiy signals.
Also, weak conductors such as thin foils sound weak—that is, they don’t sound more solid than they are. This is especially important when searching for small gold.
This strong multi-frequency processing also means that simple target testing is very effective. So when you want to know what size or shape a target is—or how consistent it is—tests like using varied sweep speeds and directions will give you a lot of audio and meter information. Also, where you see big meter jumps—these are highly meaningful—indicating a poor quality signal or something odd-shaped. Pinpoint mode also gives good information on whether something has the sharp, narrow tone of a non-ferrous target—or the wide, drawn-out tone of iron. This effectiveness comes from the Legend’s high “resolution”–that is—the accurate processing of the multiple frequencies gives a lot of detail on what is under the coil.
This is also a detector with a lot of fidelity. You have the option of running multi frequency—or any of the single ones to bring up specific target ranges and examine the ground from a number of standpoints. The machine can be run fast or slow with high or low Iron Bias. This adjustable iron filtering is by far the most important feature of the v. 1.09 upgrade. What this means is that in dense junk or iron you have the choice of trying to speed up and bring up the “cleanest” responses–or to slow down and use the Legend’s processing to saturate what’s under the coil more and bring up tones one what you are looking for. These types of settings examine the ground in very specific ways letting you return to heavily worked prime ground with never before tried search methods. There are some remarkable videos out of the Legend’s low bias settings “seeing through” multiple spikes to bring up a tone on silver—as if the iron was not even there.
I’ve also had to opportunity to run the Legend at a tough, high-saline ocean beach. It performed well and even had great audio in nail infested sections—giving longer tones on non-ferrous targets that were mixed in. This audio processing was so accurate that the Legend even distinguished stainless steel from iron.
The Legends clean, sharp audio and tone menu choices are a great tool to help at these tough sites.
The v. 1.09 upgrade offers new audio preference choices including VCO (Pitch Audio), and Boost.
These are some of the great performance characteristics that I’ve noticed about the Legend in my first season of hunting with it.
I highly recommend this great detector for hunters at any level of the hobby.
This book is about:
-how basic skills can help you to get the most from the Legend’s amazing performance.
-understanding fast digital and multifrequency detectors.
-understanding and using the v.1.90 Upgrade’s key performance features.
-signal balancing and performance.
Legend deep silver and dense iron methods.
-using the Legend as a park and shoreline gold-hunting machine.
cjc
A Beginner’s Guide to the Nokta / Makro Legend
Clive James Clynick has detected for over 40 years and is the author of 24 detector “how to” manuals, numerous articles and product reviews. Topics include:
Customizing the Legend for Your Sites and Type of Hunting.
Navigation: “Fiddle Less and Find More.”
Getting Results with the Legend at Tough Sites.
Coil Control Target Testing and Other Skills.
Understanding Fast Digital and Multi Frequency Detectors .
Bottle Caps and Other Problem Targets.
The Legend as a Gold Jewelry Hunting Machine.
Understanding and Using the v.1.08 Updates’s Key Performance Features.
Want to learn to find gold among trash? Here’s how to develop your skills. From left: 1/ A solid gold target or dense, round foil. These respond in a unique way–soilid, clean and with a narrow meter reading. What you want is something that does not change that much when you sweep the coil cross-wise. This is the way to learn to stay off things like alloyed “can-slaw” and big foils. 2/ A “fence sitter” bottle cap. This is a cap with a lot of aluminum–but also some corrosion. learning to manage this “rust line” on your detector is an important skill in recognising good quality targets mixed in with hundreds of caps. Using the cross sweep will often show these as they will change dramatically. This is the detector responding to the corroded part and it’s interaction with the ground. 3/ A smal gold target that’s not a ring. Practicing with this will also help you to recognise your detector’s low (est) gold response as well as teaching you to be alert for targets that are strong, clean responses for their size. A good way to work with your testers is to put a cardboard box upside down and sweep while listening, watching the coil and meter.
There are guys up here who specialize in hunting in the woods. They find a ton of silver by doing detailed research and knowing what to look for in the forest. I spotted some old trees beside a river and decided to give it a try. The Legend is just a superb detector for this kind of hunting because of how much audio information it gives you. It’s also very smooth in the junk–even in All Metal. I ran in “Field” mode, Low Weighting (M1) and 6 Tones audio. Where you have a lot of too big targets (wire, big foils, tins…) its important to listen to the signal tone. I was able to hear those responses that were too big–even in discriminate.
Checking these in Pinpoint mode told me which ones were too wide and flat to be of interest. When using a machine with segmented audio (6 Tones for example) it’s important to be able to tell which high responses are coin sized and which are too big. Other targets were transitioning from high to mid tones–not what I was after. A few larger food package type foils told me that I was in an old picnic area. I got a clean high tone that read up in the low “50”s”. It was narrow in Pinpoint and checked on the cross sweep–bingo–silver ring. Now this might not be such a great find in open park ground but the Legend let me zero in in this high potential target in the middle of the woods, in an area full of big foils, cans, beer and screwcaps. This is a very well made and well thought out detector. I especially like the smoothness, separation and audio tone. Can’t wait to see what the next upgrade will do.
Im still writing about the Anfibio because I love this detector. It’s signal tone is so clean, it’s ID so accurate that Im going into parks I’ve worked for 40 years and picking out the gold. Here’s how I do it. I favor the elliptical KR24 coil. This coil is like a knife blade in the junk. I run 99 Tones, and low Sens (70 or even 68) to keep the meter responses tame. For the same reason I run ID depth “Low.” I run 20 kHz if the conditions allow it. If there’s any electricity in the ground I bring the SAT up one increment. The secret to telling gold from trash is coil control. This is what lets you make use of the Anfibio’s processing power. Hitting a signal across one direction tells you nothing. It’s only when you do a few repeat passes and a few at a slight angle to the first that you get an idea as to the target’s consistency, alloying and shape. The Anfibio’s level of processing takes my accuracy to a whole new level. I can tell anything that’s alloyed. Targets that are made of fewer metals give narrow meter responses and my coil movements tell me this. This laddered target testing saves me a ton of useless digging of small weak foil signals, can slaw, even zinc cents that come in up in the big ring range. Thats my secret–use the coil, keep the Sensitivity low, run 99 Tones to hear as much detail in the junk and within individual targets as you can. In the water I go between 99 tones and Deep mode depending on how much junk there is.
For more information on getting results with this amazing detector check out my book: “Successful Treasure Hunting with the Nokta Makro Anfibio.”
cjc
a 6.2 gr. 22k band from the beach.a 22k diamond ring from my local park.
-very, very nice build quality—very solid feel but much lighter than the Anfibio. Wand telescopes in and out much more cleanly. Coil is a tiny bit heavier than the AF28 to accommodate the MF winding.
-overall a nicely balanced unit-not so light as to make a larger coil “top heavy.”
-lot of information on the screen keeps all of your choices visible, very well laid out. Super fast access to any feature / adjustment. Maybe takes a bit of getting used to just how much is there. 1st day I’m already flying around it.
–great sounding audio, not “bitty,” nice faint range, not over-modulated.
–good tones come though the digital noises well, even at high Sensitivity levels. Reminds me more of the CTX than the NOX—full, strong sounding tones, clean processing and target assignment. (Indoor testing tells you a lot about how a machine handles any kind of interference).
-recovery speed just barely takes air test targets at full on–(so much for any of these “conclusive” on-ground videos). This is a feature that’s designed to work in ground while processing the full MF signal and ground. I would add that an Iron Bias control, added to this speed has the potential to clip / loose targets—possibly the reason why N/M initially opted for a pre-set. Where you have a lot of corroded or alloyed metal though (such as bottle caps), adjustable Iron Bias certainly improves the versatility and effectiveness of the machine. Not a feature to be taken lightly though—an advanced setting.
-turned down to Rec Spd 2, unit passes “iron cross” test with a medium sized band and two rusted spikes. Perfect tone and ID.
-big difference between M1 and M2 settings M2 has much more low conductor sensitivity, livelier, sharper tone overall.
-good, versatile selection of single FQs. I like the addition of “10” kHz as a “middle” high conductor / bad ground search mode. If the Anfibio is any indication I know that the 20 kHz will be sharp on gold and nimble in iron.
-Gold mode—the audio of this mode shows the sophistication of the filtering / processing. Clean, fast responses. Looks like a great fresh water black sand / edge “cherry picker.”
-I like the addition of a Stability control to augment (or even stand in for) normal signal balancing methods that often take a lot of trial and error to use effectively. Doesn’t seem to constrain the signal that much in air-seems like a combination of (lowered) FQ weighting and a low level adjustment of Discriminate and 1st Tone Break? I know for sure that this feature will allow the use of higher Sensitivity settings.
1/ Never using the cross sweep to determine how consistent a signal is. This results in a lot of elongated / micro targets that sound good in one direction getting dug up.
2/ Never using pinpoint to determine how solid, what size and shape a target is. Pinpoint can also tell you if a signal is iron by the wide or narrow tone.
Pinpoint can also tell you when the machine is responding to part of a larger object—like wire. Without the “fail safe” of pinpoint, the machine’s high gain causes you to dig too many “flyspecks” that have zero chance of being of value.
3/ Not using the depth meter to get an idea of target size and location in the strata. The depth meter can help to correlate the other information you are getting to give a better idea of where and what size a target is.
4/ Sensitivity too high (targets don’t stand out), or small surface targets dominate the signal. Target tones become clipped sounding, machine loses depth.
5/ Bias too low (targets don’t stand out), dig unwanted alloys, (ie tin, bottlecaps), rust. While there’s such a thing as “reaching down” into the iron to bring up signals, making the distinction between rust and non-ferrous metals is what the Minelab Equinox does well.
6/ Recovery speed too fast, targets don’t stand out.
7/ Using a large coil with too much sensitivity—targets don’t stand out from the larger detection field.
8/ Using a large coil with the recovery speed too fast—machine does not have time to process the information from the larger detection field.
cjc
For more information on getting resutls with the Minelab Equinox series check out my book:
Minelab Equinox Tips: Week 13: Understanding the Tone Settings
Its safe to say that it’s worth getting some practice in with each of the Tone settings because they all do different things. Lets take a look at the strengths and weaknesses of each.
2 Tone
2 Tone is a great learner mode because it teaches you to use the coil and listen for solid, peaked sounds. A peaked sound means something that’s distinct from the surrounding ground. As well, many alloyed targets—such as coins that contain steel will give a flat, broken tone in other modes as the machine struggles to separate then from the ground. Canadian coins are an example of this kind of signal. These can be heard better in 2 Tone by how they “catch” rather than giving a full sound. The machine is indicating on the part that is distinct from the ground—the change.
2 Tone also teaches you how to adjust for tough ground by bringing up the first Tone Break or using one or two increments of Discriminate to stop the machine from chattering. My personal feeling is that especially on the beach, 2 Tone gives you sharp, simple audio to perform any coil control tests with—helping you to recognize small, inconsistent junk sounding off.
5 Tone
I always found 5 Tone to be a bit quiet, but it can be very valuable where you want to quickly classify targets by how conductive they are. At the same time- bad ground or targets that are made of several metals will cause a lot of transitioning sounds that can be confusing. Bottle caps are an example of this kind of target. The machine is trying to “lock on” to something that straddles several tone “bins.” 5 Tone is more of a land hunter’s setting and one concern that I have with it is that it draws too much of your attention to how conductive something is—rather than the rest of the signal’s features. A problem is that alloyed targets are grouped within one tone “bin” to sound more solid and consistent than they are.
A plus is that 5 Tones smooths out the signal well when using the 15” coil in salt water by reducing the amount of work that the machine has to do in processing the amount of incoming information.
50 Tones
50 Tones is a very descriptive way to run the Minelab Equinox audio. It gives you a lot of detail as to how alloyed a target is by giving more tones on diverse alloys. The advantage of this is that it gives an added level of audio Discrimination by pointing you to targets that “lock on” to a single tone. At the same time 50 Tones can be noisy in salt water or bad sand as the changes in the ground sound off more. 50 Tones works well when used with “Horseshoe” mode in that good signals “climb” up out of the ferrous range and “lock on” well. The Equinox also features an adjustment (Tone Gap) that lets you widen the distance between the iron and non ferrous tones. This lets you create a larger tone difference between good non ferrous signals and targets that are on the border–such as hairpins or other steel / iron objects.
The fluid audio of 50 Tones also works well inland giving sharp indications on small, deep signals that are masked by iron.
All of these Tone applications have their uses and while many new hunters scour the internet looking for some “magical” settings—the best strategy for success with the Equinox is to learn the whole detector and focus upon simple, basic skills. This includes developing your skills with each kind of Tone setting. For more tips and information on the Minelab Equinox check out my book:
19/ Developing Your Accuracy and Conclusiveness with the Anfibio Multi
Whenever I want to write some advanced material on any detector–I’m continually drawn back to basic skills and competencies. The material in this book on; audio signal types, target types, basic skills, coil control and basic detector theory are necessary precursors to the more important device-specific information. The idea is to learn to “walk first”–then think about running “99” Gain in dense iron. Let’s look at how some of these basic skills allow us to move away from the “hopeful digging” model that so many engage in–towards greater accuracy and conclusiveness.
20/ Meter, Tone and Gain
It follows from the above discussion of the ”Power Curve” that as we increase the Gain of a high Gain detector a number of things begin to happen. For one thing–meter responses become more varied. This has been well-termed “ID splatter” something that’s a concern with the Anfibio. At the same time–there’s a lot of information to be gotten from this “splatter.” This bears upon our basic target types. Where you have a clean, single metal or a good conductor such as gold–expect a narrower ID response. Where you have something that’s diversely alloyed–expect a wide array of ID numbers to show.
An important distinction in these meter responses is that where you have a less complex alloy–such as gold or silver–numbers that “climb” are more common. These “climbing” meter responses are signals that are consistent enough to give sequential or close numbers–ascending or dropping. Where you have something that the Anfibo is struggling to identify–you have what I call “cycling” digits–big jumps–that may include low digits–or even “wrap” range readings. It’s also important to recognize that along with your Gain setting, coil control is the mediator of these responses. A wide sweep brings in more data to be analyzed. A fast sweep acts to confuse the machine’s circuits–also making for more scattered readings. Understanding and using this ID characteristic will later become an important “weapon” for acquiring and getting conclusive identification of signals in dense iron–by reducing the ”ratio” of other influences around the signal. (While there will be those who would say that “there’s no such thing as a conclusive ID”–here the idea is to begin by just moving towards recognizing the “no brainers).”
An important tip from the Notka / Makro manuals is that to get the best target ID from the Anfibio–slow down the coil. This is especially true in dense iron in that you are giving the machine more time to process the complex set of information under the coil and give an accurate report. Where you still see “wild” indications–suspect something alloyed, corroded or misshapen.
It’s also worth noting that as we reduce the Gain setting, the above meter differences: “(climbing” versus “cycling” and the size of these meter changes), become more meaningful. So whereas a high Gain setting might produce “wild” meter readings on an odd-shaped gold earring–a lower setting might tame this down–drawing your attention to the signal. This is another casualty of a high Gain setting–accuracy. This is not to say that we need to stick to the low presets–but there’s a need for more careful attention to how the meter acts in concert with your Gain.
From: “Successful Treasure Hunting with the Nokta / MakroAnfibio Multi.”
For more information on my book and to read a few reviews go to:
clivesgoldpage.com
…or click on “Products” above.
A few of the author’s finds from an old site with the Nokta Makro Anfibio
Minelab Equinox Tips of the Week # 9:Getting More Depth and Target Information by Using “Horseshoe” mode.
The Minelab Equinox’s “Horseshoe” All Metal setting is a handy feature that lets you get more depth—although it’s necessary to moderate the added noise. Running in All Metal lets you pick targets out of iron better, but at the same time more “borderline” objects (such as steel) are brought up to sound better than they are. Try alternating between Disc and All Metal to get a better idea of how solid something is and how much of the signal is ferrous. Steel and other objects that straddle the non-ferrous / ferrous boundary will be more obvious using this test. Look for signals where the above zero numbers and non-ferrous tone dominate.
There is a lot of information in how a signal relates to the surrounding ground. When an object is corroded or rusted, the machine struggles to produce a distinct tone. With “Horseshoe” mode “on” more of this information is available. As a gold hunter, I use this setting to hear how distinct from the ground something is–indicating a good, clean conductor. A good way to put it is that with practice you can learn to make very .accurate (iron / non-iron) classifiactions.
Also, where you have something that’s the machine is responding to only part of–such as big iron or twisted wire you can use this setting to hear the “whole” signal–and better idea of what the target is.
For more information on developing your accuracy with the Minelab Equinox check out my book:
One thing that makes the Minelab Equinox challenging to get used to for hunters that are coming from a simpler platformis the amount of detail that you hear and see on the meter. In the manual this is termed “resolution.” This amount of detail is a “two edged sword.” On one hand it lets you separate out masked targets well. The way to get the most from this strength is to use multiple sweep speeds and directions to “parse” out whats under the coil. The downside of “resolution” is that it actually splits targets–giving multiple responses to the various alloys in a target (bottle caps are a good example). These scattered tones and meter readings can be confusing.
The Equinox also reports how something relates to the surrounding ground. Where you see a target that is falling below zero this means something that is either corroding, similar to the ground (iron or steel) or a target that is in close to iron. Where you see a target that is climbing up into the high 30’s–this means something that is too big (or too “grounded)”. for the machine to classify. Twisted steel wire is a good example of this type of target.
Resolution lets you sort though multiple targets and focus on the ones that are “clean” metal. This 22k ring came from among dense iron and bottlecaps–using Bias to process out the junk.
I see a lot of new hunters debating over “which numbers to dig.” The fact is however that there’s a lot more to becoming accurate with a detetor than looking at numbers on a screen.
Distinguishing between signals that are “grounded” and those that are not is an important skill with the Equinox. As a rule–listen for “peaked” sounds–indicating something that is more distinct from the ground, and less alloyed. “Split” targets will be weaker and “flatter” as the machine struggles to identify them. It’s important to note though that brass and copper relics will often be among these corroded targets.
Higher Bias settings–especially using the “F2” Bias upgrade will make these differences more pronounced.
It takes time and practice to learn to use the Equinox’s detailed response to tell good signals from junk. It’s important to recognize the fact that if you use the coil–make varied passes, listen and watch the meter this detector will give you the information needed to save you time digging obvious junk. Resolution is one of the best performance features this machine offers. Why not use it?
For more Minelab Equibnox tips, settings and information on developing your accuracy with this exciting detector check out my book:
To really understand what the Anfibio Multi offers it’s a good idea to perform a simple demo of each frequency setting. Get some targets of different conductivities–for example a silver coin, some small gold or aluminum. Switch the machine to Gen mode. Begin in 14 kHz and note how the detector responds pretty much the same to each kind of target. Then go over to Options and change to 5 kHz. Test each signal again. Notice how now, when you raise the coil away from each target, the gold does not respond as well, whereas the silver signal is stronger. Now press Options again and go to 20 kHz. Now the opposite will be true–with the silver sounding off more weakly and the gold coming in stronger. In each Frequency–targets in the corresponding conductive range will be a better, cleaner signal that’s available with the coil further away. It’s a good idea to become familiar with just how pronounced these differences are in that each frequency also has negative effects: 5 kHz is more stable in bad ground but is sluggish and does not separate as well in iron as do the others. Its meter responses are more defined though and therefore 5 kHz makes a good cap checker–“taming” these diversely alloyed targets for easier identification. 14 kHz is more of an “all purpose” frequency–responding well to all metals. 20 kHz is more nimble in iron–faster, with better separation. 20 kHz sorts non-ferrous objects from iron with precision. I’ve had good results with this setting–pulling steel clad Canadian coins out of black sand. These were deeply buried and had been missed by other machines for so long that they came out purple! At the same time this high frequency is less stable and tends to be noisy around salt sand. Because of this light, fast, nimble operation, 20 kHz makes a good “trainer.” If you can use the Anfibio’s other features to stabilize the machine and identify targets in (the more scattered ID’ing) 20 kHz–the slower frequencies should be easier to manage.
The idea is to know when the benefits of running a particular frequency setting outweigh the drawbacks–or to take measures to offset these. So as a general guide:
5 kHz: stable, deep on high conductors but sluggish in iron or multiple targets
Remedies: -using 3 Tone (Gain less than 90) to get a faster response.
14 kHz: good all-around performer but can lack stability or small object sensitivity around black sand or in bad ground.
Remedies: -high Gain to bring up small targets or conversely, lowered Gain (or higher bottom Discriminate / Tone Break for more stable operation.
20 kHz: good low conductor sensitivity, good separation / in-iron performance but noisy / less stable / scattered meter.
Remedies: -3 Tone operation or lowered Gain for stability. Other choices include higher bottom Discriminate / Tone Break for more stable operation and to reduce the responses from foils, steel and iron.Smooth, even coil passes and use the cross sweep to get stable ID on targets. Lowering the ID Depth feature is also a good way to offset the sensitivity of 20 kHz mode–to allow more defined reporting.
Another simple cross-checking strategy is to have the frequency selector as your “last feature changed” on the “Options” menu. Then with one press–you are ready to check targets in another frequency.
These represent good examples of the kind of mindset that will help you to get top performance from a high fidelity detector like the Anfibio. There are very few conditions-related problems that it’s not possible to find a solution to if you have a solid understanding of what the various features and settings do and how these relate to basic detector theory. At the same time, when you want to make a change to accomplish a particular task–there may be other aspects of the performance that are affected. These may need to be addressed as well.
From: Successful Treasure Hunting with the Nokta / Makro Anfibio Multi
Minelab Equinox Tip of the Week # 7: “It’s all in Fun Until Someone Loses an Ear…”
There’s nothing worse than getting started on a hunt and having a part of your machine break—especially the coil ear. Unless you are very good with the “zip” ties—you’re done. I recently had an ear on my big Minelab Equinox coil break and later found out that it was mostly my fault. Here’s how to avoid making the same mistake. These coils are made of what you might call “space age” plastics. These have great tensile strength but can be brittle. What makes them break is constant pressure—creating fissures (tiny cracks). When there is something padding where the ear connects to the wand this cracking won’t happen.
Figure 1 shows my coil ear broken. Figure 2 shows the condition that I’d let my “teardrop” washers get to. Note the ridge going across it and all around wear. Keep an eye on these and replace them before they look like this way. This wear creates a “bone on bone” situation that will weaken the coil ear over time. Good washers also prevent you from pinching the ears in to stop the coil from flopping. Even flipping them over in the seating will extend the use of this washer. Even putting a little nylon washer in is not a bad idea if you can find a material thin enough to make one from. Don’t jam something too thick in though.
Figure 3 shows how the coil attachement should look–with some visible rubber in the two “gaps.” I was very lucky that Minelab helped me out. If you are past warranty this kind of problem can be fixed. Ive included a picture of a flat soldering tip. Using one of these you can actually “weld” with ABS plastic. Just get an old coil cover and with the iron really hot—reconnect the ear and then build up material to strengthen the join. It wont look great but the coil will be usable. If done properly (a magnifier might help) it can be made thicker and stronger than the original. Be sure to line up the bolt hole before the bond cools. For more Minelab Equinox tips, settings and information on preventing damage and having success in the field with the Minelab Equinox check out my page: clivesgoldpage.com
Minelab Equinox “Tip of the Week” #5: “Micro” Targets and Ratchet Pinpointing.”
Use Pinpoint and the depth meter to establish the size and location of your targets. This will stop you from going after “micro” conductors that sound off loudly. To get a more accurate location on a signal take the coil off to the side and press the pinpoint button again. Every time you do this take the coil over the same distance. This will offset the Equinox’s ratchet pinpointing’s tendency to throw off your sizing and pinpointing. What you want is a single “benchmark” to base your other readings (size, location). For more Minelab Equinox Tips, Settings and Information check out my page and blog at: http://clivesgoldpage.com/
4/ Try alternating between both high and low weighted search modes. Each has a different way of responding to targets and the ground. High frequency weighted modes such as “Park 2” and “Beach 1” will have a “bitty” and broken tone over ground that is too mineralized for them. (Fast salt water will have the same effect). With these modes there will be a lighter and more delicate “feel” to the signal tone. In these conditions a low frequency weighted mode will be smoother and penetrate the ground better. Where you want to search for low conductive targets such as gold, you may need to run lower gain to smooth these high frequency modes out. For more Minelab Equinox Tips, Settings and Information check out my page and blog at: http://clivesgoldpage.com/
An ID’ing pass is like an arithmetic sum. Your short, slow coil pass may or may not be enough to produce an ID (or tone) on a deep, masked target. A small coil also increases this “ratio” of signal to noise in your favour. The Anfibio’s processing power “goes further” in relation to the masking.
Anfibio Dense Iron Methods (Excerpt)
… an important tool is to just slow the coil down as you make your ID’ing pass. What this does is it changes the ratioof the detector’s processing power versus the amount of data from the ground, iron and targets it needs to sort through in a given period of time.
So you have:
-the slowness of your coil pass. (Gives the machine more time to do its processing job).
-the width of your coil pass. (How much ground are you asking the machine to process in that time)?
-your coil size. (The larger the coil the more “skewed” the ratio you are working against).
-the processing speed of the machine. (3 Tone versus Deep mode for example).
…in relation to…
-the depth of the target.
-the amount (density) of iron and mineralization surrounding it.
The same “signal to noise ratio” principle can be used to acquiretargets in dense iron–short, slow, even, controlled passes.
It’s not hard to see how high Gain settings can be a hindrance rather than a help for this kind of application–confounding this delicate process.
From: “Successful Treasure Hunting with the Nokta / Makro Anfibio Multi”
3/ Gain, Recovery Speed and Iron Bias all affect one another. Try and get a feel for how each changes the way target sounds come in. This takes time and practice. Running 2 Tone will help here too. Try running each one at full–then minimum–with the others at preset. This will give you a better idea of what effect these features have on the signal. For more Minelab Equinox Tips, Settings and Information check out my page and blog at: http://clivesgoldpage.com/
Quite a good day in the water with the Equinox. “Moonstone” ring is 22k. clivesgoldpage.com
“Try running Two-Tone for starters. This will help you to get a feel for the Minelab Equinox’s signal tone and how quality responses sound. Remember–the more peaked a signal tone is—the more distinct from the ground your target is.” For more Minelab Equinox Tips, Settings and Information check out my page and blog at: http://clivesgoldpage.com/
For more Equinox tips, settings find pictures and info on my 3 Equinox book titles check out: http://clivesgoldpage.com/
A high gain detector that includes high frequencies like the Equinox tends to sound off loudly on small targets. These may or may not be round and solid. A good way to check them is to use the cross sweep to test the consistency. Where you see a dramatic change in sound and meter reading—suspect junk. For more Minelab Equinox Tips, Settings and Information check out my page and blog at: http://clivesgoldpage.com/
At any given time I have around fifteen detectors on hand. They all do different things. Of them them all however, one stands out. This is the Anfibio. Im continually impressed by what a well made, well designed great performing machine this is. Its a deep, powerful machine with great small object sensitivity. It hits tiny gold testers that much more expensive detectors won’t. There’s also the option of running at 20 kHz to get even more gold sensitivity. Probably the Notka Makro Anfibio’s best strength is that it has the ability to reach down into the iron and bring up targets that no other machine can. I’ve proved this many times at the toughest most heavily hunted sites in my area. This is also a very versatile machine. The preset modes are very well thought out and let you do a wide variety of things. There’s 3 tone –a bit faster and good where there’s interference or very bad ground. There’s 3 and 4 tone–both very deep. These let you get precise tone ID based upon your Tone Break settings and also to hear alloyed junk targets by the mixed sound. For this purpose there’s also a 50 tone mode that works well to alert you to “clean” metal mixed in with junk. There’s also a muted tough sand Beach” mode for shorelines. These are just a few of the applications that I’ve used this machine for. I’m also learning a method of running the Anfibio’s “EUD” (Extra Underground Depth) feature at low Gain levels to hear deep targets. I also like the slowed down “Deep” mode that’s gotten me some shockingly deep targets in fresh water sand. This is what I consider to be a great beginner / intermediate machine in that it requires that you learn a few basics and has the performance to grow with over time. Every trick I’ve taken the time to learn with this machine has brought rewards in the field.
A couple of deep coin and ring finds from a “worked out” site. Im convinced that no other machine could have gotten these in the dense “truck grove” type conditons.
Just can’t say enough about the power and versatility of this machine—when I go to a new site and want to get an idea of what is there—the Anfibio is the machine I bring. I highly recommend this detector to anyone who is interested in working old sites.
I liked the performance of this machine so much that I chose to write a book on it. This book details some of the methods that have gotten results for me with this detector—particularly at tough junk and iron infested sites. The book is called “Successful Treasure Hunting with the Nokta Makro Multi.” For more information and some reviews in this book check out my site: clivesgoldpage.com
These detectors all have what borders on gold field capability–responding to very small targets. Their modulated audio acts to make these small objects sound bigger. As well, though some iron can be brought up to sound like its non-ferrous–especially if it has a ferrous component–as do bottlecaps. Many hunters who are new to this type of machine are confused as to how some of these caps may respond in various places in the conductive range.
As well, these machines have so much “Sensitivity” that they can produce unstable target ID’s. This is why we see the Equinox with a narrow (-9 to +40) ID scale–to offset these “wild” readings.
In looking for a way to illustrate just what high gain does to the operating characteristics of a detector, one telling demonstration comes to mind. With a less sensitive machine, when you hear a response and then go to the cross sweep—it’s usually more or less the same. With the extreme “Sensitivity” of a high gain detector like the Equinox, it’s possible to hear a response, go to the cross sweep and have it disappear completely–because the machine was responding to the difference between the ground and target or some configuration of the object’s shape. This high gain “punch” needs special methods to be managed accurately. You could say that with this “hopped up” circuitry, the ground’s signal plays a much bigger role in what you hear though the headphones. I’ve heard them termed “sparky”–an accurate description.
Picture shows some of the author’s gold finds from the last year using the Equinox and several other Detectors.
Precise Reporting
While lots of older detectors have precise reporting, what’s new with these machines is that they operate at such a high electronic standard and speed of processing that they actually report within targets. In the Minelab literature on the Equinox this is termed “resolution”– that is, the machine bases its identification upon a very large number of “data points.” So an alloyed metal object will give readings that represent all of the metals that are present in it. Another way to put this is that the detector is so accurate that it actually “splits” targets. A ferrous / non-ferrous blend like a bottle cap may show only the non-ferrous portion, a scattered mix of both types of metal or a reading that represents how corroded it is–what’s left of the non-ferrous portion. In effect the detector is reading an interaction between ground and metal. Understanding this point is the key to developing your accuracy with the Equinox.
With the Equinox, some have called this an “unstable” meter. However this highly accurate reporting can also be used to advantage–pointing you to the best, “cleanest” signals in just about any trash-strewn conditions. More on this later.
From: “The Minelab Equinox: From Beginner to Advanced”
Its gotten a lot harder to find gold at land detecting sites. One thing that’s helped me is testing. I test every detector to determine:
1/ How they respond to foil / gold range targets.
2/ How some of the various targets read on the meter.
While there will never be a detector or skill set that will let us make conclusive gold / aluminum calls, knowing the various ranges helps you to avoid some of the obvious junk. While it’s easy to “dig everything” at some sites–at others–(often those with the big numbers and activity)–the amount of aluminum would just be overwhelming. I’ve had good success this year by going in to dense junk and learning to spot anomaly responses. Most of these 22k rings were found by going into heavily worked sections and looking for unusual responses. This comes from being able to move past, caps, hairpins and a few of the most common tab varieties.
The two photos show:
1/ Some common tab “categories”. While there is certainly gold to mimic any one of these, knowing the various tab ranges with any discriminating detector you use is an important skill. I divide them into: (from left): small ovals, pear shaped, round ring pulls, square (old style) ring pulls, large ovals and “jumbos.”
2/ Some targets that show up around the gold / foil “line”. I’ve included both “low” and “high” (cake tray type) foils to make the point that this is an important distinction. While there are certainly gold targets that come in in the “low” foil range–these will more likely be chains, bracelets, earrings or very small rings. Where you have an overwhelming amount of foil–recognizing “high” foil range targets is an important skill.
Tension bandage clasps are also excellent testers. Clip one to your hat and test it folded in half. If you are hearing this–you won’t be missing much gold. Round “can inserts” also mimic small gold well. I’ve also included a “zinc” penny in the picture in that these show up close to where a lot of 22k hits–what would otherwise be the “top” of the gold range. I test various 22k rings to see if they come in higher–or lower than the cent.
The two gold testers on paint sticks are “sizers” that help me to have a consistent benchmark for testing any machine’s “range”–how far from the coil a given size target is. Using the same testers all the time will help you to develop these “coil-to-ear” type skills. These skills let you know right away if something is deep or shallow and what size it is –by the tone strength. From this you can also deduce how solid something is. I recently found this nice 22k ring that stood out from the surrounding caps and foils in that it was a small, deep, strong (for the size) signal. These are the two testers I use to develop this type of accuracy on gold range signals.
The idea is to be able to focus on this “small gold” range—but still be able to recognize the obvious junk within this category.
Setting is 7.3 gr. 22K. Spot where a nice band came up last year–it has the numbers–lots of high end cars in the parking, chest deep–still has the numbers but lost items are not so likely to be found.
I like bottle caps because of what they teach. A normal signal–such as dime only teaches you the bare basics. You hear a tone, see a meter reading and dig. It would be great if that was all there was to success with a detector in any conditions—but it’s not. Bottle caps teach you the whole detector. To ID a cap you need to understand a lot more. Caps are composed of multiple metals—so you learn to recognize alloyed targets. These may have broken or with a tone ID machine—multiple tones. These metals may include brass, aluminum, and steel—each with different response characteristics. Where you have gold or silver mixed in with other targets that are alloyed such as screwcaps, tin, or “can slaw”–being able to spot narrow meter responses can help you to zero in on the best, most consistent signals.
Steel in particular corrodes over time and caps will respond differently depending on how rusted they are. This makes them much harder to identify by meter–so a range of skills are needed. Rust, is more like the ground than are “pure” non-ferrous metals and to be able to examine your signals for this similarity or difference is a critical skill. When you switch to All Metal or Pinpoint mode—these rusted caps will be a wide, drawn out signal. This simple iron / not iron confirming test is the most important skill you can have with any detector—especially if you want to run high Gain where there is a lot of iron falses sounding off. When you want to learn the operating characteristics of a new machine—good targets can only teach you so much. If you want to learn how that detector responds to alloys and separates non-ferrous targets from iron—get your self some caps—they’re not hard to find! A good cap test kit should include several–some rusted and some not.
cjc clivesgoldpage.com
A .78 Carat Diamond Men’s Ring. Setting is 14k, 16.6 gr.
Practicing recognizing some basic target types can help you make better use of the patience you bring to a hunt.
I see way too many new hunters who hope to find some gold but think it’s the first thing they are going to find..sorry bad news–its not In most conditions, random digging is not going to do much for you. While its good to dig a lot of targets, the key is to continually work on your selectivity. By all means the way to get used to the target sounds of your detector is to to dig but along with this learning over time it’s important to be able to recognize some various basic target types. In the picture we have a nice array: too big–(cigarette pack), elongated: (Allan keys, glasses arm and bobby pins). too small and weak: (some of the smaller foils at left),, alloys (caps). Not shown here are some iron targets–(bolts, that type of thing). With practice these are all recognizable targets–they have “problems” either on the meter or when checked on the cross sweep or in pinpoint. “There are also several “good” targets–a few coins, and some of the more solid foil pieces. While it might not be as exciting as getting out and digging–just getting a few of each target type and testing them on an upside down cardboard box can increase your accuracy a lot. While there are sites where “inclusive digging” is the way to go–remember–an exception does not make a rule. Learning how good targets respond is a more productive way to learn than “going begging” with weak, elongated or out-sized signals. The “iffy” ones can come later. clivesgoldpage.com
Every Nokta / Makro detector I try seems to have better, cleaner, more informative audio than the last. The Anfibio is also what would be termed a “high bias” detector in that when you learn to listen for extension in the response–you can become very accurate. This sharp, clean audio lets you hear a real lot of detail about what is under the coil. There are several U.K. “YouTube” videos out of hunters placing nails right on top of coins and still being able to detect the coin with the Anfibio. This is a great demo of just what this machine’s fast processing speed and high-bias performance can do for your find count at old sites.
I credit the operating characteristics of Nokta /Makro detectors with teaching me how to effectively use coil control target testing. This has found me a lot of deep gold and silver. With the speed and “clean” metal bias of a machine like the Anfibio this testing is much more effective–that is, when you use the coil to check a signal by going to the “cross-sweep”–iron and other corroded targets don’t “stay in.” Misshapen objects like scrap lead or “can slaw” are also more likely to give a broken tone. Again, good, non-ferrous responses have “extension.” What I learned was that there’s a whole other level of skill building, accuracy and effectiveness available to you with this clean audio and super-fast signal processing.
Other strengths of this detector include a great display that lets you make fast adjustments for more exact tuning or “ID-ing” This also lets you jump from mode to mode instantly to cross check responses. You can move between different frequencies (5, 14 and 20 kHz), audio modes, and recovery speeds in an instant. There’s also a versatile Discriminate package that lets you manage your target selection with accuracy.
This also a very deep and powerful detector with great small object sensitivity. The reason for this is because the Anfibio features high Gain circuitry. Gain acts to sample a tiny part of the returning signal and amplify it. This small sample is easier to manage in software and more of the distortion can be removed. So you have a cleaner, deeper signal. This means that small targets are amplified (or boosted) as they are received. Like many detector features–this is a “two-edged sword.” While small and deep responses are brought up to where there can be heard, other non-so good signals that are just across the “line” into the iron range are also amplified and may be “pulled up” to mimic good signals. For the beginner, this can be confusing as iron targets and even a few foils and crown caps are “hopped up” and may indicate as coins. However, the good news is that once you learn a few simple basic “fixes,” the downside of this tradeoff about disappears and this extra deep object punch becomes your best weapon. This takes practice, bench testing and time in the field. You could call the Anfibio a “Gain heavy” detector in that even at the presets-there will be good sounding false signals–from spikes, deep iron and some bottlecaps. As will be detailed further on–a good beginner strategy is just to “turn it down” and do some familiarization in 2 Tone audio mode. Even running at a Gain setting of “55” or “60” is a not a bad idea. This simplified less “amped up” audio will respond to these falses in more recognizable ways. An intermediate stage is to have one search mode with preset or higher Gain and a second weaker setting–to see how signals respond with less Gain. Going between the two is a great way to really get a feel for how Gain goes deeper–but at the same time brings with it considerable distortion. Targets sound fuller and better at high Gain settings. Where you see a response disappearing completely –or becoming broken in the low “checker” mode–suspect iron. Where a target just becomes weaker–this has a better chance of being a good, non-ferrous target.
Gain also acts to “fill out” small responses–making them sound bigger, fuller and better. This makes for what I’ve heard termed a “steep learning curve” for the novice as there is the urge to go after a lot of sounds that are too small to be good targets. What helps is to gather more information than just “meter and tone” using the coil and the Pinpoint control. This lets you place your signals in context–to focus on the size, shape and location in the strata of each signal. When you learn to do this–each signal feature acts to confirm the others–giving your accuracy and conclusiveness a huge boost. For example there is nothing better than hearing a high silver tone, seeing a “92” on the meter and then getting the confirming narrow Pinpoint response that indicates a non-ferrous object. I call this the “In Keeping” method. (More on this later).
Another effect of high Gain circuitry is that the detector is more likely to sound off on unusual variations in the ground. These can be patches of black sand or anything that represents a big change. So the ends of spikes, twisted wire or aluminum shards can all “sound off” on your first coil pass. This is where coil control comes in in that these are not consistent targets and will change or disappear on the cross-sweep or with varied coil passes.
Another great thing about the Anfibio is its stability. Where there is not much interference from electrical sources it’s possible to run this detector at almost full Gain. However this type of setting has a downside too in terms of the false signals that it brings up. This is where learning some of the basic skills covered in this book can be of help–letting you mediate this high power with accurate signal type recognition and checking methods. Even where you do have a lot of interference–it’s possible to run a “balanced” signal so as to be able to hear good targets though the noise. From:”Successful Treasure Hunting with the Notka / Makro Anfibio Multi Metal Detector. by Clive James Clynick
I like this detector’s raw, powerful signal tone. This combines with its super fast processing to give you a lot of target information–especially in dense iron. This makes simple basic target tests–like using the cross sweep and pinpoint mode to check signals much more effective. Its also very deep and gets a lot of stuff at worked out sites just for that reason. The Anfibio is my dense iron detector of choice and it has come though really well at a local “truck grove” type site that has seen every kind of detector there is. I set a big gap between the two top tone “bins” so as to be able to hear the deepest turn-of the-century silver coins in amongst the iron. I decided to create a guide to some of these effective dense iron techniques. The book is also a detailed general guide to tuning and understanding this versatile machine’s best features. Anyone who wants to learn more about the Anfibio methods that have worked well for me please take a look at my book:
“Successful Treasure Hunting with the Nokta / Makro Anfibio” available at this site under “Products.”
Good Luck Detecting,
clive
From “worked out” sites.A few of my Anfibio finds from the dense iron of the “truck grove.”
Successful Treasure Hunting with the Nokta / Makro Anfibio Multi
Clive James Clynick is the author of some 25 detecting “how-to” books and numerous articles. In this detailed and informative book he shares his 40 years of experience and instructs you on how to become a more accurate and successful treasure hunter with the Notka / Makro Anfibio Multi detector. Topics include:
• Getting the Most from the Anfibio’s Selectable Frequencies
• High Gain Power Basics
• Dense Iron Methods: Recognizing False Signals.
• Coil Control Skills and Methods.
• Deep Silver Coin Hunting.
• High Power Signal Balancing for Depth and Accuracy.
Clive’s books are a treasure trove of information! They open up a whole new dimension to the Equinox. I have all of them.
DH
..a review…
…the two nox books are just what the new nox owner needs. I got my nox back in march 2018 and feel only now that I now how to get the most out of the machine. Don’t get me wrong. On the first day you can put it in park 1/2 or field 1/2 or beach or gold and just start hunting. But to truly get the most out of the machine you need to really study how to use all these new features and put them to use for your type of hunting.
His books were a great help to me. I have read both books twice. Once before really using the nox and the second time after I had about 50 hours on the machine. Learned more on the second reading. MK
I directly attribute my success at consistently finding gold to one of Clive’s books.
MH
I’ve got 6 of Clive’s books. They’ve got some good info in them, helped me a lot when learning to use a PI on the beaches. The Equinox books are good too, he goes way beyond the basic adjustments.
A
I consider myself reasonably proficient, but if I can learn something that makes a difference in finding even one more gold ring or silver coin then the cost of this book is well worth it.
I have many of Clive’s books and always find them very readable and quite worthwhile.
..use the cross sweep to recognize some of those elongateds. Maybe get some practice in 2 tone–listening for solid, consistent responses. Super prime ground with activity if possible–big numbers. Work on your accuracy and go to the middle…and time…
I would add to that with the Equinox turn it down so the modulation does not make all these flyspecks sound solid and big. I usually run at 19. Just seems to be more of a balanced signal–at least in salt water. Let’s you hear everything and still gets great depth.
Going up to “22” or higher brings up rust, steel and stuff that’s too small (like some of those foils) and just too weak of a signal to be gold. Just focusing on the conductivity of a signal doesn’t work that well with the Equinox–“where” and “how big is this object” are just as important. Each confirms the others–adding to your accuracy.
You’ll have an easier time of it if you work on your accuracy first–the high settings can come later.
A few really deep rings I got with the CTX 3030 big coil a few years back by way of signal balancing–some close to 20″.
My CTX had been in the shop for quite a while–it had the old config and leaked more than once. One bulkhead, one set of clips and two lithium cells later she was still drinking brine. Thanks to Minelab I’ve just gotten a like new machine and am very excited and grateful. (…the metal detecting equivalent of a virgin in the afterlife). Anyhow, I do a lot of testing in my basement in that the interference from furnace, household panel and dryer simulate actual tough salt surf conditions. If you can tune a detector inside–you are doing something right. This is especially true of big coils. I have the large coils for my CTX, Equinox 800 and a WOT hardwired for my Blue Tubes Excal. There is a ton to be learned about signal balancing big coils under these high interference conditions. This kind of testing has gotten me a lot of deep, heavy gold in conditions where there is a lot of pro-level competition. First, its amazing how much of a difference in performance loss (even in air) there is between large and stock coils. These big coils just suck the interference out of the air (or water). What I notice is that target sounds have a much more “inverse” .sound–as if the threshold was “taking over.” The higher you turn the Gain–the quieter targets get. In some instances–the stock coil actually hits targets further out. (Talk about a “teachable moment!)”
One thing that’s worked well with the CTX has been to run a P2 version of one of the programs that features one or a couple of reject lines. (Andy’s Beach for example) This seems to balance the signal and reduce all the reverberation-type noise. This works well in the field too–especially of you don’t pile on more interference from current and any incline. This involves a slow sweep speed and working only North / South. I’ve gotten some rings down at the 20″ level this way. The Excalibur–as hard to tune with the WOT coil as it can be–is a simpler platform with less going on–electronically. While it can’t be run that high–maybe at 1 to 2 o’clock is a balanced signal–it does get great depth in discriminate–taking rings at an easy 18″-plus. It’s also stable.
Now the Equinox is one of the hardest detectors to tune with a big coil that I’ve used. My usual 2 Tone method works–but is unstable and gets only moderate depth. My super-sharp responding gold magnet “Undertune” (GB -9 / tone “25”) method is out of the question. Without Ground Balancing–the threshold is lilting, uneven and requires careful coil control. I’ve seen videos of guys running down at “14” Gain–unacceptable. Why bother with a big coil to run that weak of a signal? The sense I have is that this detector has a hard time supporting a coil that size. When I run near-preset B2 with 5 Tones–it seems more balanced and stable. This is about the only time I’ve ever been driven back to the pre-sets to balance a detector. It’s a good coil–but hard to balance–just saying. I see a detection signal as being kind of like an arithmetic sum. When you keep subtracting with say, fast water, Gain too high, (in this case) Recovery Speed too fast, high saline conditions bottom contours / inclines and the work a detector does with a highly processed signal like that of the CTX or EQ–what’s left is not always enough to get any more depth than the stock coil. The larger the coil–the greater the affect these factors have. I’m still learning with both of these detectors / coils but am really struggling to get any respectable depth–especially with the EQ. I’ve a lot of great signal balancing “tricks” up my sleeve–including smoothing out the threshold with a “1” discriminate setting or even bringing up the Tone Break–but have yet to find anything that convinces me that a narrower–more manageable detection field drawing less interference would not perform better. I’ve also been instructed on the forums to keep the Recovery Speed low–down at “4” with the big EQ coil. This is just not that stable in salt conditions unless its absolutely still. Of the two, the CTX wins in terms of stability–but for coils that size–even compared to the WOT–the depth just does not seem to be enough to justify the extra swinging effort–at least not in salt water. I’m open to Equinox big coil salt water suggestions. Otherwise–next trip–the coil at least–is staying home.
Anyone travelling to detect with the Equinox should bring the following:
1/ A very light emery cloth. (A pencil eraser has also been suggested to me although I’ve not tried this).
2/ A good quality contact spray.
When I went to charge my machine–there was no green charge light. I’ve also had the problem of it not completing properly–ie. light continues to flash. Look for the following:
1/ Iron filings on the magnetic contacts interfering with the charge. These can be on either side–machine or cable.
2/ Green ferrigris on one or more of the charge points. I sprayed this with an “okay” points cleaner and hit it with a wire brush–still no charge light. It was only when I actually sanded the points with the emery cloth and hit it with some “Deoxit Gold” that it began to charge. The way to use any of these products is to apply, flick power through the connection for a second–then re-coat. You may need to do this several times.
Especially when you have hunted in salt water–these points develop a film of oxidization on them–completely blocking any current flow.
My CTX coils do the same thing–looks dead until you get some spray on it.
cjc
clivesgoldpage.com
Note the iron buildup on the charger’s magnetic contact. On the machine side the contact points can also oxidize.
Proceeds of a brutal trip–sick half the time. Bracelet is 18k 34.9 gr–a lunker. Also a couple of small bands one 22k and some silver. Kept at it though and had some luck with the Minelab Equinox–running in my 2 Tone “Pulse” mode. Also–I run at “19” Sens–seems to keep the audio more orderly–more of a balanced signal. The big hunk of old silver jewelry was super deep in the same section–a cue to keep going. When the bracelet came up is was very orange–had to have been down a while.
I’m proud to announce my new 120 page book on developing your skills and accuracy with the Equinox.
You could say that this is an advanced book about simple skills. These small, basic skills, tricks and competencies add up to “more than the sum of the parts” in what they allow you to do with the Equinox. It’s my hope that the book will teach readers to:
-develop generalizable skills that can be applied at any type of site–park, relic or shoreline.
-create effective custom settings for your sites by responding to the conditions.
-understand and manage some of this detector’s performance “trade-offs.”
-overcome conditions-related problems.
-get more depth and hunt with greater accuracy using this great detector platform.
-understand and apply the Minelab Equinox “2.0” upgrade.
Clive James Clynick is the author of some 24 previous treasure hunting “how-to” books and numerous articles. In this detailed and informative book, he explains how understanding the Equinox’s operating characteristics and features can help you to find more treasure. Topics include:
Dense Iron Methods and Skill Building
Walk First. How Small Skills Add Up to Accuracy
Managing the Heavily Processed, Modulated Signal
Understanding and Managing the Power Curve
Beyond Meter and Tone
Accuracy and Conclusiveness
Salt Water Stabilization and Depth Tips from Top Hunters
…quite a few actually. During that period I used the CZ20, the Dual Field, The Barracuda, the Goldquest, Sovereign, and more recently the CTX3030. If I had to pick a favorite it would be the Dual Field.
Some of the better ones “little nickels” (a few Edward and Victoria) and some favorites including a Standing Liberty and my one Seated coin a half dime. Holed or not I will take it….
Its unbelievable what these new super fast machines like the Equinox and Anfibio Multi can do at the old sites. Anywhere you have old, original ground that’s produced before is worth “having another crack at” with one of these machines. I’ve had good results with both by doing a couple of things:
1/ If I’m searching in a tone ID mode I make sure there’s a big difference between the silver-range tone and the next one down. This helps me to hear those “bleeding” signals that are something in close to iron.
2/ I don’t always run high Gain as a lower setting makes the iron smaller.
3/ I find that most of the time when I dig a spike or big iron its because I forgot to do something–usually involving using the depth meter to see how the signal size and depth correspond. Getting a good initial pinpoint “fix” on a target is the “benchmark” for this.
4/ Some good advice I got a while back was to “listen for which tone dominates.” Watch the ground as you sweep to see if there is a spot where a high meter and tone correspond at.
5/ I also go from a segmented ID mode to a multi tone one to check signals–this gives a little more information on the consistency of something.
6/ I have a sense that these machines will tell you what’s what a lot of the time. There are a lot fewer “one ways” and “degraded” responses with these fast. sophisticated filtering type detectors.
Some recent old stuff including a 1919 dime, and an 1889 Indian Head. at left. Nothing to shake the earth here but these are all from sites I’d given up on years ago.
My first few gold finds (around 1981 with the Eagle 2–later XLT and CZ5), The signet “C” no less was my first gold– got with a buddy’s Garrett Deepseeker –state of the art at the time. Then I bought the 6DB. The big sparkly white one on the right also started it all. Amazing with how good today’s tech has gotten–can still hunt that park. Behind it is a hunk of brass that had me fooled at the time. .. then a few years later–clearly getting the hang of it…(Cuda and CZ20) in the water.
Clive your 2 books are Excellent and well worth the $15 bucks a piece. I have dug a hell of a lot of GOLD with your advice. More then the $30 I spent.
Good, informative reading,
Still learning with the Equinox but getting better and better results. About 8 of these are Equinox finds. The high frequencies in the mix bring up a lot of ground noises and small micro conductors. It’s a good consistency checker though especially when you learn to use the cross sweep. Kind of wish that there was no “ratchet” feature in the pinpoint circuit though as this interferes with getting a feel for a responses size and depth.
Seeing so many horror stories (and pictures) of damaged coils these day thought I would post this. Even the trunk of a car can be a dangerous place for a coil with stuff being knocked around. This is a good way to protect your coil once and for all. Take a length of pool noodle and split one side of it to secure the pigtail and cable hardware. This is the number one killer–having this squashed flat causing the cable to become intermittent. Then take some bubble wrap, foam neoprene or even cardboard and cover the “ears”. Secure with two tied elastics. These coils can be expensive to replace–why take the chance?
Not a bad haul–1.9 gr. pendant 14k, 8.3 gr. band 18k 4.2 gr. band 14k, and a 14k men’s ring with a little rock 7 gr. Using an “undertune” B2 system with 2 tone to search (very lively–almost like a pulse) and 50 tone to confirm some targets. A tip: I have not tested any gold that shows up above “21” not even 22k or Russian. I set my 50 tone “User” mode with a cut off (notch) from 24 to 28. If a target shows 23–not gold. About $925 CDN.
Got a good question from a guy today: “…wondering the best way to identify, conquer and quit digging aluminum can slaw, its spread all over on some park sites near my home.”
This is a good question to illustrate the value of developing broad based target testing skills–even if you don’t use them all the time. While there are some situations where a quick “hear and dig” strategy is best–where you have a single problem target taking up your time look for characteristics that will cue you in to these objects. For example with suspect “can slaw” use the cross sweep to look for inconsistent meter and audio readings. With the Equinox, using “50 Tones” can help to bring up these multiple sounds. As well, look for a similar meter reading. This can depend upon the size these pieces are being shredded to. Single reoccurring numbers will often be present as the machine “cycles” though. Lastly, watch the depth meter. These will always be surface targets. You can also just move to another area in that sometimes a single can will have been “mowed” over. The important principle here is to combine knowing specific target characteristics with general principles to form a complete picture of what a questionable target is–rather than just hearing a solid tone, seeing a meter reading in the middle range and digging automatically. Taking a few of these targets home to test can give you a more complete picture of how they respond: tone, meter and consistency. Then combine this with your understanding of the site itself. Not paying attention to what the machine is (or could be) telling me is a mistake I still make continually after 40 years of digging–never hurts to be reminded!
More information on improving your accuracy with the Minelab Equinox can be found in my two books: “The Minelab Equinox: From Beginner to Advanced” and The Minelab Equinox: An Advanced Guide.”
Some gold from a couple of hunts running “Gold 2” in high trash areas.
This is an excellent mode (G2) for using the Equinox’s speed and bias to pick out clean metal amongst alloys and iron. I run it with some disc (to +6) to stabilize and use the cross sweep to determine how an object relates to the surrounding ground. (This disc setting is more of a practice mode and can be taken down to “1” to give a smaller gold focus if there’s not too much foil). With some meter skills and ear practice–it’s probably the most accurate consistency checker method of any detector I’ve used. Certainly the best cap ID method for the Equinox. With this system–I head for the worst trash infested area of the beach to make good use of this accuracy. If you try this be sure to turn the vol. down a bit. I’ve given more detailed instructions on how to operate this system in “The Minelab Equinox: An Advanced Guide.”
I’m so excited about this new Minelab metal detector, I’m a newbie, and your “An Advanced Guide”, Equinox series is filled with readable and understandable information and instructions, you’ve made my day!
KC
Great 2nd book for the Minelab Equinox its full of great tips and how to use the machine in different situations. The advanced guide is not just for advanced users. All users of the EQX will find this book very useful. Clive has a wealth of knowledge and testing has gone into the book. “An Advanced Guide” should be your go to book for helping you understanding the machine!
JF
Clive has been able to show some of the best features of an incredible machine, this is an excellent read to assist in getting the most out of the equinox!
-Minelab Detexpert/YouTube personality: Red Beard Relic Hunter -DJ Dowling
I have both books now and they are awesome. I keep them close so I can study them on these cold days. Anyone one that has a Equinox needs these books.
CM
“It is definitely worth every cent. It doesn’t just tell you what it does like the manual it explains things thoroughly like no face book post or you tube video ever could.”
DS AUS
Especially in his second book he goes into more detail how to quiet down this detector using proper ground balance, noise canceling, sensitivity adjustments and recovery speed, mode and frequency selection and iron balance. All of these properly used will result in a quiet machine with little or no adverse effect on depth. In some cases with proper frequency and mode selection along with proper ground balance, noise canceling and sensitivity settings you will actually increase your depth and ability to find weaker targets.
JR
A great read, even more detailed information than the first book. Highly recommended, yes I paid for my copy received about 4 weeks ago. It’s a book that will take several reads and a bit of practical to sink in.
Thank you for your hard work Clive.
DH
This is a great source of reference material that you can go back to again and again as you learn to master the Equinox 800 + 600 on the beach…..
A book well worth the read by Clive Clynick !
Brian Mayer, Jersey Shore Beach and Surf Hunters
I also have both books. I am in the midst of the second one now and it has lots of interesting approaches to consider. Clive is able to set out complicated technical concepts in ways that make them accessible to people (me), who are not technically adept. His writing makes learning fun. Highly recommended for folks who are looking to get the most out of their Equinox.
FM
Ive bought both of the books … absolute top reading,very easy to understand…. totally recommend them …. i keep the advanced book with my detector … awesome reference material and a handy size.
IH is 1898 two Lincons 1919 and a 10 K GF with sterling band from down at the same level. Quite a good hunt for a heavily worked site although some silver from that era would have been nice.
The Minelab Equinox: From Beginner to Advanced” (Book Reviews)
Reader Feedback “The Minelab Equinox: From Beginner to Advanced” by Clive James Clynick (2018)
Received the book. Excellent information within! Great for beginning with the Nox, as well as advanced settings and techniques for experienced users.
CG
Great reference that I will refer to often. Very in-depth on the capabilities and functions of the Equinox line. Pleased with this purchase!! Recommended for all Minelab Equinox users, and potential buyers.
SE
Brilliant book well worth getting it gives you a better understanding of the machine than the manual alone.
PS
Clive, enjoying the hell out of your book. It is a must have for any Minelab Equinox hunter. $ well spent, thank you Sir.
RL
Very informative. I would highly recommend.
LG
Clive! Received the book. That was quick shipping thanks. Excellent read and informative. This will truly help.
Best of luck!
RG
Clive, I have you’re manual & I read it over & over & learn more each time. Nicely done sir.
JJ
After reading your (Minelab Equinox) book I concentrated much more on the sound quality of targets. I very quickly started to understand which sounds to dig. Have found several ancient coins already.
GL
So this is not a find to shake the earth but where it’s from makes it a biggie for me. We have a truck grove here that even Victorian stuff comes out of. It’s hunted to death but there’s a lot of iron. Ran Tadpole 4 with Ghost as a checker and right were I had walked up and down with the EQ running “Winkler” last week– nice “18-46″ at 3” (must have been right on top of iron–slow sweep and FE / Coin separation just processed it up) high tone in Ghost and bang! A ’47 war quarter. Kind of a “breakthrough” find –the one that tells you you have figured out how to get a lot more! I dug a lot of signals that were not complete sounds–none were good. Now for the Victorian stuff….
I recently got a note from an AUS buddy who asked:
” have been working a site for the last year, it’s a site that’s had hundreds of people camping weekly from the 1850’s to 1960’s. I have managed to clean out hundreds of silver coins along with 40 silver rings. I know there are gold rings and coins but can’t get through the thousands of pull tabs and foil. Can you recommend anything?”
While there are a lot of sites where just showing up with a detector will get a few finds–there are also other tough locations where random digging is pretty much a waste of time. When I say random I mean just relying on the tone and meter. At these types of sites there is no avoiding the need for broad-based basic skills. Similarly I saw a recent post by a guy complaining that his new 15″ coil was only getting 4″ of depth. He had no understanding of “signal to noise” issues, interference or how to tune a detector for the conditions as they are–not what you would wish them to be, in mind. With many hunters–it’s only when they go to a larger coil that the need for this kind of conditions based-awareness becomes apparent.
The Equinox has the features to operate effectively in dense aluminum but because it tends to stack these responses into a narrow ID band–it’s necessary to gather more information than just the tone and meter readings. This includes: shape, size consistency, relationship to the surrounding ground (solidity / corrosion) and depth. These are the signal features that will make your digs more accurate and give you the ability to spot anomalies.
Another way to operate is to work “systematically.” by this I mean to break down the site’s trash matrix into manageable segments. This may involve starting by digging all of the responses that are just below “penny” from say “19” to “23”. You might also want to try initially getting rid of the distraction of low foils (less than “6”) or clad coins–“24” to “30”). Another method I’ve used is to begin by knocking out the most common one or two tab varieties using the “notch” feature so as to focus upon any unusual responses. It’s also not a bad idea to take a few of the most common trash targets home and bench test them to learn all of their features. For example in some conditions oval tabs will hit twice–because they have two circles.
My point is that trying to go in and sort though the entire range of sounds and ID responses is a difficult and unfocused way to operate-a sure fire recipe for frustration. Another key is to let the site’s features themselves guide your digging. When you recognize those high traffic high activity sections of a site–your digging efforts will be more productive. I call this “wide net / narrow mesh”–best ground, best targets, and cover a lot of it.
These are some of the kinds of focused approaches that will allow you to make gold finds at sites with a lot of aluminum. Over the years I’ve heard a lot of hunters go on about the value of “digging everything.” I can only say that at some of the sites I hunt–picnic sites especially–you would be in a seniors home long before you found any gold. These kinds of skills–(that many chose to try and ignore) are what distinguish a skilled tough site hunter from a “hacker”. A favorite saying that applies well here is that “even a blind pig will find an acorn once in a while…” It’s when you begin to let the conditions (ground / site features / trash matrix and ratio…) dictate your settings and methods that these aluminum infested site conditions can be overcome.
Also, I can recommend a series of books for you by Clive Clynick the only books I’ve read on the Equinox so I can’t comment on the rest but this I can and it’s an amazing book full of useful information every page.
Saw a new Equinox 800 user asking for some solid basics to get him started. While these ideas are hardly specific to the Equinox–they apply much more to this type of a high-gain low-conductor-sensitive machine like the EQ.
-Listen for the more solid, centered responses. Unless you are hunting in dense iron, clipped skewed or broken responses are the machine breaking up on trash. Use a few coil passes to check targets for consistency. When you can “turn” a signal by keeping the sound at a slightly different angle–this means something that’s solid and consistent. As well, use the Pinpoint control to check if a signal is wide (iron) or sharper and narrow (non-ferrous). These simple basics will help you to develop your accuracy better than just random digging based on the audio. Try and develop the habit of using a broad based approach to examining your targets–you will progress faster that way and be surer of what you are digging.
For more information on improving your accuracy with the Minelab Equinox check out my book: “The Minelab Equinox: From Beginner to Advanced.”
16/ Accuracy and Skill-Building with the Minelab Equinox
I can’t say enough about the importance and value of learning some theory and basic skills. These form a “template” upon which all later learning about accuracy and site-specific applications can be ordered. As well, this basic knowledge helps you to make sense of the large amount of information that the Equinox gathers and reports.
As touched upon in “The Minelab Equinox: From Beginner to Advanced” what we have with the Equinox is a high gain detector. This simply means that there is a lot of amplification going on. This includes a “hopping up” of the ground’s signal. So that the signal is not raw noise–it’s heavily processed (or filtered if you prefer)–down to a manageable audio form. In-ground this means that there will be a lot of ground noise that still comes through in both audio and meter form. Random numbers will jump onto the screen and there will be sound offs that disappear when you change the coil sweep angle. Many who have read “The Minelab Equinox: From Beginner to Advanced” saw the “Signal Quality” chart I sketched out. (Pg. “61)” When this was posted on a few “Facebook” forums there was always a few guys who responded by saying that: “I dig every signal.” The idea behind learning some theory and a variety of target testing methods is not to try and be “hair splitting” accurate with your target calls. The idea is to “know the tolerances”–to be able to spot obvious junk and be able to conduct a few tests if you need to do so. (And know which ones to apply). This way the good signals stand out more. Then, if you want to dig every signal you can. Armed with these basic skills–learning will be easier too. The general sense I have with the Equinox is that there is quite a bit of random information that comes in–especially at higher “Sensitivity” levels–some audio and some meter–call it “signal to noise.” Anything that will help you to make sense of it is a plus. The idea is to be able to gather and interpret more information–even if you don’t always use it.
There’s also the effect of running multiple frequencies–these cross-confirm–making for a higher standard at which signals are examined. Basically something has to be a very “clean” signal to produce a “clean” (unbroken, not “skewed” or “clipped)” tone. You could say that with the Equinox–you have a new, higher definition of what a “clean” signal is. This is a machine with rigid and exacting “ID” standards–and there are a number of things that follow from this. With an “old-school” analog type machine–any non-alloyed metal would make for a smooth sound. With the Equinox–to produce a smooth tone a response must be:
-not corroded as would be tin or a rusted bottle cap (although these may sound pretty good at times).
-round–or at least not elongated into the “too big” range.
-more or less solid (depending on what you consider to be a good tone).
This is what sophisticated filtering and the cross-confirming effect of multiple frequencies does. In effect–much of the “ears” work is being done for you–in software. At the very least you have this tool to determine how each response relates to the surrounding ground–is it rusted or not?
This relates to “constancy” as discussed above. A “constant” response is one that is a closed loop–not necessarily a ring–but something that is electrically distinct from the ground. The Equinox can alert you to these. Let’s look at some methods which will let you use this sophisticated processing to learn more about what’s under the coil.
Kind of old news but a good picture. Cross is 14k 18.9 gr. Whilte gold lunker is also 14k 18.5 gr. Try my pre-hunt mantra–“big heavy gold–big heavy gold…” clivesgoldpage.com
I recently gave a talk on the Equinox to a group of mostly amateur hunters–prospective buyers. Minelab’s National Sales Rep was in the audience. Amongst the first things I said was that (having read some of the online “Treasure Talk” tech rundowns on this machine), that it was “…the first detector that I’ve ever had to translate to English!” In that manufactures like to promote their machines as being “turn on and go,” I’m not sure if the Rep liked me saying this. Probably not. It’s true, though some of the language used in explaining “Multi IQ” and how it accomplishes enhanced noise reduction and target ID accuracy can only be called “eye-glazing.” This talk of “data points” “resolution” and “frequency weightings” is a lot to digest and I’m still weeding through some of it. My point here though is that the end result is a detector that’s pretty simple to operate and get great results from. One idea I tried to emphasise in “…From Beginner to Advanced” is that no matter how complex a detector is–the most important thing is to have a good grasp of some very basic ideas of theory (the different characteristics of ferrous versus non-ferrous signals for example), and some simple ways to apply these. A while ago I got a text from a hunter asking if I could give him a “quick rundown” on how to run the Equinox in a sentence or two. I guess this kind of thinking must come from being used to simpler detectors–hunters want specifics–“now.” Similarly when I first got the EQ I was also looking at “YouTube” videos for “tricks and tweaks” that would help to solve particular site and target problems. The idea was: “…if I collect enough of these…” Looking back I see that 99% of these “instructional” videos were of little or no real value.
I’ve also heard guys on the forums dismiss my first EQ book saying that more could be learned from “guys on this forum”–sharing quick tips. To me this represents going in the wrong direction. It’s general and basic knowledge that allows you to address specific challenges–not the other way round. If I had called this book: “The Minelab Equinox: Theoryand Practice” it would probably still be on the shelf–but it is theory, basics and general machine skills and features knowledge that provide the background for learning. It’s this background learning that lets you adapt, tune, recognise “quality”’ responses and draw your own accurate conclusions in any hunt situation. These generalizable skills represent a huge advantage. One only needs to take a look at some of these “YouTube” videos to see this principle in action–people just plain “using the Equinox badly” –not bothering to engage in even the most simple target testing. This detector was not designed to help you find flyspecks of aluminum, “too big” objects or random misshapen targets. Any cheap “stick beeper” can do that.
The “theory” I’m talking about is not that involved–or stuffy. The starting point is the simple idea that the ground forms part of the signal. Rather than “punching” down though the ground to hear metal–what a detector actually does is to separate metal from ground. You could say that by way of processing–a detector separates the “order” of a clean metal target from the “chaos” (or “noise)” of the ground’s signal. That’s it. With a sophisticated detector like the Equinox, what you have is the machine responding to the relationship between ground and target with great precision. The last thing is that at a certain point–all detectors fail to accomplish this separation—and there is a lot of valuable target information to be gotten from this failure. The idea that’s served me well has been to learn to recognise the junk–and work backwards from there.
Let’s take a look at how the Equinox’s features combine to create its remarkable performance.
In the Caribbean this week –really having to work for my gold here with a number of pros working the same sites. I feel very lucky to have had some good teachers who showed me how important it is to be versatile. Ive done some pulse hunting in the deep low sections–usually works but not this time. Yesterday–because the locals are slow fanners I tried some coverage with my new Blue Tubes / WOT –got two bands. Today, owing to how heavily worked the place is–had to go deep–got my safety float on and brought out the Minelab Equinox for some deep water precision. Because I have my scoop–I can grid accurately in these deep sections by keeping my feet planted and jumping up to breathe. In that there’s a lot of coral chunks under the sand–the local fanners have a very hard time digging targets out in 6 to 8 feet of water–but I can. Running the Equinox let me select which signals to spend time on digging–staying off a lot of the 23+ coin responses. Being versatile allowed me to do what they cant–making for a good day–two more bands. My advice to new hunters is to take a broad based approach and develop as many new general skills as you can. Having a choice of methods to operate with in keeping with the challenges present at a site can save the day. Couple of things I like about the Equinox in sat water:
1/ changing the recovery speed is kind of like the SAT on a pulse–you can smooth it out on the hills or where there are a lot of seabed noises.
2/ you can adjust the Tone Break in Two Tone to stabilize the unit–even in all metal.
The first thing I would point to is coil control. With this detector–coil control is the activator of all the other target info coming in. When you learn to use the Equinox coil to perform tests (sweep direction, length, speed) the results will be there in the audio and on the meter. Try some practice hunting in G2 with a low block rejected (0 to 6) to settle the audio down. Test each signal on the cross sweep and note how caps and anything odd shaped will “stutter” and hesitate. Smooth responses will be clean metals (not alloys or anything with iron / steel content like caps). Using this method has upped my beach accuracy by miles and at the most heavily hunted site in Canada–I now look for the areas with the most junk to pick though using this method. (Take the volume down a bit–it’s sharp and loud). This is also a good way to learn to listen for responses with extension in the tone. The Equinox’s gold field quality noise reduction and iron rejection are amazing tools with some practice.
Two Tone in Beach 2 is interesting to experiment with as well. B1 is a lot harder to stabilize but it can be done–certainly in fresh water but in salt there is this “bittyness” to the tone–its harder to listen for extension in a good response. B2 has great stability in salt. Not crazy on how the low tones stand out in 5 or 50 but if you run a Tone Selection of 20 (T2 in Two Tone) gold sounds off really well and carries better– deeper–try it! Kind of like the Jays Gold Program middle tone for the CTX–perfect. You can also custom tune the Tone break (both models) to up above the seabed ground noises. Running 2 Tone is also a better deep water method –louder all around.
For more information on improving your accuracy with the Minelab Equinox check out my book: “The Minelab Equinox: From Beginner to Advanced.”
I’v e been looking around for some really solid advice to put into a post and what seems to come to mind is to recognize that a detector does not “punch down” through the ground to detect metal. What it does is to separate ground and interference from metal. When you do a lot of pulse hunting it becomes clear that no machine is invincible–all detectors lose depth under certain conditions. Point being don’t expect too much from any VLF. A good demo is to run a VLF near a known source of interference–like a furnace or TV. Notice how when you increase the Sensitivity–target signals don’t disappear–they get “flatter” –that is–they go into the background and become harder to acquire. This is what happens in the field. What will get you more targets is to work with a moderate Sensitivity level and a slower sweep speed. This is what will allow you to go into “prime ” ground behind other hunters and make finds. With a VLF–try basing your settings on how the unit stabilizes in all metal mode–this is very telling–where you have “lilting” sounds or “nulls”–this performance loss will be even more pronounced in Discriminate–whether you can hear it or not. With these multi frequency machines–there is such a bias towards stability that they are capable of loosing depth but still having a smooth threshold. With a pulse you hear these threshold changes. A pulse teaches the tuning and coil control needed to get performance from any detector. Pulse hunting teaches you the reality of interference–and just how much of an effect it has. The more sophisticated many of these detectors get–the less aware we are of just what we are missing. Unfortunately–there’s no such thing as an “idiotproof” detector–conditions always dictate. If any of you VLF hunters have the chance to borrow a pulse–try it–a real eye opener. Another thing that’s worked well for me with VLF machines is not to be afraid to put in a reject block around “zero.” This will reduce the interference from targets in the ground that fall on both sides of “zero”–making for cleaner assignment of responses. The Sensitivity you run will be more usable–and you can set it higher with out so much of the kinds of problems described above. It will reduce “cross-feeds” making for more stable performance.
Special Delivery of a WOT! Been looking around for one of these for quite a while got great service and deal from Serious Detecting in MI. Every time Ive sold a WOT it becomes clear that another one needs to be gotten. This is the coil that taught me about signal balancing and as I see a quite a few hunters posting that their new big coil purchases are not getting the depth they had hoped it becomes clear that these kinds of tuning skills and knowledge of how the signal to noise problem operates is not being taught or learned. It’s as if people think these complex digital platform detectors are immune to the laws of simple physics. The reality is that they obscure the problem even more by maintaining threshold–while at the same time–losing depth. I have the 17″ coil for my CTX but find that it’s too complex a platform for the kind of black sand “bottom of the gully” type environments that these finds came from. The same goes for fast salt. There is such a thing as a platform / coil combination that can’t be tuned for a particular environment. With the simplicity of BBS this rarely happens.
Some of the “old gold” found running my first WOT in all-metal.
It’s only when you begin to experiment in all metal that the effect of the ground and any surrounding interference becomes evident. The first thing you see is that you have more threshold than signal and any targets are becoming lost in this skewed ratio. It took me a long time to understand and address this. Basically how the all metal response sounds is your guide to where to set the sensitivity. A great demo is to test your machine in all metal beside a known source of interference–like an electrical panel, TV or furnace. Notice how your target responses will become better and more distinct as you turn the sensitivity down. When you increase it–they become flatter–more into the background. This is the same thing that happens in discriminate. Guys who used to post on the Findmall such as “BB. Sailor” taught me a lot about tuning big coils such as the WOT. Most of the deep “old gold I’ve found has come this way. It’s a shame to see so many hunters who lack basic skills in such a hurry to make big finds but not prepared to do their home work. When I first got the WOT I was getting not even half the depth it was capable of. Properly tuned in all metal– hitting dimes at 20″+ –no problem. Never even turned it past 12:00 o’clock. Not surprising to see some of the most successful hunters such as Joe OBN running the Excal in all metal–using this same kind of tuning skills. This coil will initially go on my Sov X2 Pro–the most stable of the line.
cjc
1/ Any rotating of the coil on it’s bracket causes the hardware to wear. This might not be evident but it is happening. Once the pigtail wears and breaks –the coil cable is not far behind. If you see this happening try and epoxy it solid to prolong the life of the coil. A couple of thin plastic washers cut out of drink bottle tops can keep the coil more solid on the isolator without you having to tighten the screw to the point where it may strip or break.
2/ Use some silicone grease on your coil jack threads. If they start to corrode it will be harder to get the thread to catch–and breaking a pin while trying becomes more likely. These are surprisingly small and delicate pins by standard–nothing more sickening than hearing one snap.
3/ With either bulkhead configuration, leaks can be a problem. If you are having leaks despite your best gasket cleaning efforts suspect the clips / pins themselves. These can wear–reducing the strength of the seal. Shimming the sides of the battery where the clips seat is an option to temporarily increase the seal. Be sure to put tape or an elastic around the bulkhead as they will now be more prone to opening. I sometimes tape around the entire seal to prevent sand from entering the gap. The grey gasket that the new bulkhead design has does not do much and is prone to being moved off the crack.
4/ If your stem cam lock wears and stops holding the isolator solidly, put two zip ties–one under each hinge. This will solve the problem permanently.
5/ Always, always bring contact spray with you if you plan to hunt with the CTX. It may be because I run it in salt, but when these co-ax plugs oxidize they are dead as a door nail. Only a spritz of contact spray will restore them. You might get away with some toothpaste (Coca-Cola?) and a toothbrush but I haven’t tried it and would not like to bet a hunt on it.
More general detecting tips and some great CTX 3030 programs are at my site:
I have purchased virtually every book that Clive has written. All have paid for themselves many times over. These are not rewritten user manuals, these are well written books that teach you what questions to ask, and teaches you how to answer them. A good critique of a machine thru the eyes of an experienced detectorist, outlining strengths and weaknesses of the machine in question, is a very valuable resource.
I have already ordered his book in the Equinox, and I have not even received the detector itself. His books are that good.
Thank you Clive for all you have taught me thru your writing.
…a few points that I found to be central to skill building with the Minelab Equinox.
1/ Stay away from 50 tones to begin with—especially with Sens over “20”–too many sounds. Later on, 50 Tones can help you to learn how to listen for consistent sounds but to begin with this is easiest in 2 Tones. With either of the multi tone modes high Sens can be frustrating Listen for complete sounds which stay in on the cross sweep. Even those sounds which start or finish abruptly should be suspect.
2/ Try some practice in Gold 2. Turn the volume down, and reject up to “5” to make the audio more orderly. Use this mode to learn to listen for extension in the tones and to practice examining responses with the cross -sweep. Work at mixing up these coil passes to determine the consistency of responses. Making changes to the Sensitivity, Iron Bias and Recovery Speed will alter how those signals with extension stand out.
More generally look for settings which balance the machine’s power in relation to the ground’s signal—that is—target sounds which are solid but not clipped or broken. An unbalanced signal (Sens too high) will also bring up a lot of partial sound that may sound good initially and need to be chased down with the coil. This is more noticeable up over (Sens) “20”. “18” is a good beginner setting that makes it easier and less frustrating to sort out the Equinox’s sounds and recognize quality signals.
3/ When you are first starting with this machine keep the wand short and do narrow, smooth coil passes. Watch the ground to see where each sound you hear is coming from and how your coil movements are affecting the tone and meter. When you are reaching way out, and not in touch with what the machine is telling you it becomes harder and more frustrating to learn. Begin with these simple coil-to-eye-to-ear-type skills–they will form the basis of later learning. With these, the accuracy will come over time.
For more information on improving your accuracy with the Minelab Equinox check out my book: “The Minelab Equinox: From Beginner to Advanced.”
Excerpts from JR’S full review…
Both books in his Equinox series are in 110-120 page range and small standard format of 8 ½ x 5 ½ inches. Don’t be fooled by the small number of pages. A lot of very specific Equinox information is packed in these two books that as of this review, is not found elsewhere.
Due to the tight TID range of the Equinox that tends to stack different targets in a small range, you really need to be up on what I call “filter” tests. These are tests with different settings, coil sweep methods, meter readings, and audio responses to further ID a target as junk or dig. Clive digs in and spends a fair amount of time showing you how to learn to recognize the many common forms of junk we encounter so we can ignore them and dig the targets that are likely to be the targets we are searching. Of course he does explain no “filtering” tests are 100% fool proof, but what he explains should cut down on some targets that the “filtering” test indicate are recognizable as junk targets.
One of my suspicions is that there may be a lot of people giving up on the Equinox. It is a very, very capable detector, one of the best ever made at its selling price. But the other price you pay is a very high learning curve that some will just not invest in. In the hands of an experienced detectorist who has taken the time to learn and understand how to use the Equinox’s powers, they will probably match up very well against a similar experienced detectorist using other brands of detectors in this price range and the next higher price range. Newbies tackling Clive’s two Equinox books are more likely to continue in the hobby than those who do not study his books.
Both books are priced fairly for the amount Equinox specific information they provide. In my experience a lot of metal detecting books have included a lot of filler fluff to increase the page count so as to inflate the book price. There is no fluff in either of these two books. Every Equinox owner will gain some useful information from either one. Me when I buy a reference book for something I am interested in, I read it and keep it for future reference and often end up re-reading them.
Here is an update to my review of Clive Clynick’s The Minelab Equinox: “An Advanced Guide”.
I think this book goes deeper into the 600 and certainly the 800 than his first Equinox book. This is because the 800 has some more useful options over the 600. The other reason Clive has more time on the Equinox than when he did on is first book on the Equinox.
Again, I will say I don’t go over his books topic by topic because you need to buy and read the book for this information. But I can tell you about a couple of areas that has been very helpful to me.
As you should know by now that this detector is a high gain detector that reports darn near everything that passes under the coil. Thus this is where its chatty reputation comes from. In fact the first 2 weeks before I read Clive’s first book I thought my detector was broken.
Especially in his second book he goes into more detail how to quiet down this detector using proper ground balance, noise canceling, sensitivity adjustments and recovery speed, mode and frequency selection and iron balance. All of these properly used will result in a quiet machine with little or no adverse effect on depth. In some cases with proper frequency and mode selection along with proper ground balance, noise canceling and sensitivity settings you will actually increase your depth and ability to find weaker targets.
The next great area of book two is his detailed instructions on how to correctly ID trash targets by using proper filtering coil sweep techniques. Following this topic is a list of Target ID Numbers and ranges and what junk you will typically find in certain ranges and also what he calls anomalies (good signals among the junk targets) and what to watch for depending on the nature of the site you are hunting.
He also explains the nature of some of the Equinox’s bias toward round coin sized objects. Finally someone gives us a lot of detail on Identifying junk targets and separating out the good stuff from the junk by various methods.
I have heard bits and pieces of the above information in metal detecting forums and videos, but it is very nice to have all of it in a small book form.
JR
Thanks Kindly, JR.
clive
…more reviews here:
http://www.clivesgoldpage.com/shop/publications/the-minelab-equinox-an-advanced-guide/
Announcing: “The Minelab Equinox: An Advanced Guide.”
By Clive James Clynick
Our postal workers here in Toronto have been ordered back to work—clearing the way for me to begin a full-on book launch of the new one: ”The Minelab Equinox: An Advanced Guide.” Thanks to those who have shown interest in the couple of dozen proofs so far. What I’ve tried to do in this book is to lay out the Equinox’s strengths. These are its operating characteristics: good noise reduction, effective built in bias, good target ID at depth, good low conductor sensitivity–to begin with. The general theme of the book is how to get the most from these strengths in the field—both depth performance and accuracy. This is a detector that gives quite a lot of information–audio and meter. Understanding some basic detector theory can help to make sense of this information–what it means. This theory is very simple and has to do with the fact that the ground forms part of the signal—and that there is a ton of information to be gotten from these “ground noises”–the amount of difficulty that the machine has in separating targets from it.
I believe that the way to become more accurate with the Equinox is to have a good grasp of these basic general skills that are applicable to all situations. With this in hand—accurate, effective applications become much easier to develop. Although there are several “beach” programs detailed in the book—these are more for teaching purposes—they illustrate skills and principles that are generalizable across situations.
Years ago when I got my first Sovereign–all you had was your manual. There were a few seasoned hunters who posted methods on the Findmall forum. I cut and pasted these and read this one sheet multiple times. This gave me a good general knowledge of how this detector operated. These methods—things such as coil control target testing (the various types of target test passes), all metal signal confirming, (tone and location on the ground) for example increased my accuracy dramatically. With the Equinox’s sophisticated processing and filtering—these kinds of super quick tests are much more effective and can give you a ton of target information. So this would be one general idea that’s covered in the book—skill building and developing your accuracy by understanding what the machine is telling you.
Good Luck Detecting,
Clive
November, 2018
(Picture Caption: “The Equinox’s Strengths)”
18/ How to Run “10 kHz” as a Cap / Iron Identifier
A lower frequency like “10 kHz” is what can be called a “plodder.” It responds slowly, makes sure its reporting accurately and only shows a couple of numbers to describe what it sees. When you run “10 kHz,” make sure to give it the time it needs to do the task. Switch over, wait for the threshold to return and make a slow, even coil pass. Just as with “Multi” the first numbers that appear may be cap or gold-range indications–in the teens. However, when you go to the cross sweep (or even a slight angle) the ground becomes apparent in the forum of a ”20 plus” reading. This change will be a lot more definite than with “Multi.” So go slow to let the slower frequency process, use the cross sweep and watch for the “wild” high number indicating a cap or iron. “10 kHz” produces a more defined, more “general” meter response. This response takes into account more of the ground’s signal–making “10 kHz” a great cap identifier. (This is also a great illustration of the dichotomy between what the high and low frequencies actually do).
The idea though is to work on your coil and meter recognition skills so that having to make the change-over is a last resort for only those caps that display a very narrow band of numbers in “Multi.” These are in the minority. I especially go to “10 kHz” where the indication shows “14”–again–a good gold number.
(Note: If you are using the 800, in “5 Tone” a high “Tone Break” of around “19” or “20” will produce an intermittent high tone on caps with this test.
Another interesting lesson to be observed when running “10 kHz” is that if you make multiple passes on a target sometimes the slowed response speed will cause the meter response to “double up”–that is it gives a “cumulative” high number. This is something to watch for in that a response can be falsely “ID’ed” as higher than it is–in this case a worse signal. Referring back to our “coil control pass types” above, this kind of a response comes from making “keep in” passes–instead of letting the target leave the detection field each swing (so as to “reset” the meter). Both have value in identifying responses but it’s good to be aware of the difference.
It’s important to recognize the parallels between this machine and the CTX. With the CTX this “grounded” number comes in the form of a “1” or “30” “off screen” response–indicating iron or steel (non-constancy). I’ve heard these referred to as “cross-feeds” In that they initially sound good as the two parts of the response “connect” on the first pass–but this electrical “join” is then rapidly processed out with subsequent coil passes.
With the Equinox these indications are more centered on the meter–“10” for rusted caps or “20” plus for steel caps. It’s more like where you have a coin next to iron–pulling the response down (or up towards the “wrap” zone). With an analog detector–either of these (CTX or Equinox “outlying” numbers) would be the low tone (or “nulls)” of iron mixed in to the audio response, or a high “sound off” or “false.”
From: “The Minelab Equinox: An Advanced Guide” (2018)
Clive James Clynick is the author of some 22 previous detector “how-to” manuals, numerous articles and product reviews. In this detailed and informative book he explains the Minelab Equinox’s ground breaking technology and how it can help you to find treasure. Topics include:
• Using Theory and Basic Skills to Improve Your Accuracy
• Depth and Target Acquisition.
• Applying the Equinox’s Strengths to Your Sites.
• Using the Equinox’s Target Information to Learn Problem Targets.
• Methods and Applications: Creating Custom Search Modes.
I thought I would include an appendix with some information on surface hunting in order to impart some general “treasure awareness” to my readers. Surface hunting is not (for most of us) about finding arrowheads although that may be what comes to hand. Surface hunting is a mindset—or rather an open mindedness to the possibility of finding treasure by eye. As a beach hunter, about half of the gold I find comes from just being in the right place and remembering to look as I detect. It’s worth noting that most of these finds are ones I just barely saw as I stepped forwards to begin another coil sweep. Point being that the more open you are to eye finds the more of them you will make. As well, part of being versatile is having other ways to recover treasure than with a detector.
What can you find by eye?
You can find: valuable bottles, old tools, caches of liquor, or redeemable empties, native artifacts, clay pipes, coins, paper money, jewellery, valuable artifacts, designer sunglasses, scrap copper, brass aluminum and lead, electronics that have scrap value—the list is endless. Anyone who had watched an episode of one of those “Storage Wars” type shows knows that a big part of defining what treasure is involves recognizing the sale-ability of something—having the contacts to move it. A pal of mine posters neighborhoods asking for any scrap lead batteries, then drives around the following week to collect them. He then scraps out the lot for usually about $500.
Another pal of mine did a lot of eye searches of old areas. One of his best finds was a large ball of soft drink labels bearing the name of a local company: “Wilson” (c. 1930). John (see below) found this ball of labels and quickly recognized that there were about 25 complete sets of all the half-dozen or so varieties of pop that the Wilson company made: Ginger Ale, Cream Soda, Root Beer and so on. John soaked this ball for months to separate these labels and pasted each set into frames. These very rare sets sold for $900 to $1200 each—quite a haul.
Point is that treasure is in the eye of the beholder.
What equipment do you need to surface hunt?
The most basic tools are a pack-sack to carry what you find and a stick—to literally “poke around” with. Each year the large beach near my house hosts several fireworks displays the attract huge crowds. Because people don’t really sit and formally “beach-go”–there isn’t much in the way of coins to be detected. However, several of us walk around with packs and sticks just examining what’s on the ground. Some great finds have been made this way including big gold bracelets, designer sunglasses, paper money—all kinds of things—just with a stick.
Edge Sifting / Boarding Kit
Other equipment can include: a shovel, light plastic buckets (to carry dirt), polarized sunglasses (to see under water), flashlight, rubber boots, bad weather gear, shoulder length gloves, a hand sifter, a full sized “rack” sifter, a heavy duty garbage bag for beer cans…
These are all handy tools to have and once you get the surface hunting “bug” they will be made good use of.
Where can I find surface treasure?
When I first started detecting I was sure that this was the best way to find valuable items. As I began going to the appropriate places it became clear that detecting was only one of many ways to find treasure. Years ago I met what I can only call a surface hunting “mentor”–an older fellow named “John,” This guy was (as I recommend you become) an “all arounder.” He dug bottles, eyeballed historic finds in the underbrush and sifted at a local shoreline incinerate dump by finding where the heaviest objects were being channeled, (placing a sifting rack on stones in the water and shoveling material onto it). He had found two gold coins and a ton of silver this way. The point is that he was able to go to locations that others had been walking past for years and see the potential. He was then able to develop methods that worked. Other surface hunting sites include:
old home-sites, shorelines, rivers, (especially where you have high, flat ground nearby and access to water for horses as colonial campsites required), rail spurs, (insulators, padlocks, artifacts), creek beds, dumps, incinerate waste, excavations, snow dumps, curbs, parking lots, cellar holes, swimming holes, cleared house flats, stone walls…
There is just no end to the number and variety of places where there is treasure to be found by eye.
It’s also important to recognize that at shoreline sites, there is constant change. Wind, rain, tidal erosion—all these act to expose treasure. Also, as touched upon earlier, often classification can sometimes do part of the work for you—bringing the heaviest, densest targets together into certain areas of shoreline. My surface hunting “mentor” John, specialized in digging bottles at the outside corner of rivers. These were bottles and ceramics that had been carried downstream and deposited on the outside corners. Some of the ones he found this way were contents intact and very valuable.
A 14k ring fragment spotted amongst incinerate scrap.
At many locations its possible to discover patterns as to where certain types of objects are carried by the current. At one Caribbean site I hunt a local guy has found a “sunglasses mine” where hundreds of designer glasses are carried by the current. He is there daily in a sea kayak popping in and out of the water retrieving them. I have a spot nearby where beer cans from a peninsula are carried to the mainland by the current. These wash up in a single spot and I fill a garbage bag with about $10 worth every visit.
As with detecting, all these ways of finding proceed from observation—and awareness.
Methods:
Walk, Grid, overturn, peer though brush, dig, eye melting snow…
On the beach–just as with detecting the key is to get into the high traffic areas—at first light if possible.
When you are at the right location at the right time, eye and detector searches are interchangeable.
Sifting and “Boarding”
These are mainly methods for finding small objects in sand or soil. A well made sifter can be used with floats to detect in the water with too. While I won’t include plans for one, materials used can be wood, a “bread rack” or PVC pipe. It’s best to avoid any metallic materials so that it can be used in conjunction with a detector or pinpointer to locate objects on the mesh. The mesh itself can be square grain 1/4” plastic “chicken wire” available at Home Depot and other stores. For in-water use, “pool noodles” can be attached around the outside with “zip ties” and these can be removed for inland use. This sifter can be placed upon four rocks in shallow water, or suspended using a long pole anchored at one end, two upright struts, and four suspension ropes to keep the sifter up and clear of the ground so that material can drop though. This is a great system for examining large amounts of dirt of sand for artifacts.
“Boarding” is something that’s widely done in England on the tidal flats of the Thames River. A large board is placed on a dry area of the mud and material is shoveled up onto it. This material is then examined by hand and / or detector. This can be a bit messy but it’s a great way to search for treasure. An alternative is to place your board up on the beach at an old or busy section of beach then wade out into the water and fill buckets with sand. Then walk these back and dump them onto the board. When the board is full, rest your shovel and go in and sort though the material by hand. At my local shoreline, incinerate was dumped from the 1920’s through to the 1950’s and we have found a lot of gold jewelry, silver coins, brass, copper and lead scrap and artifacts this way, where as to operate a detector would be impossible.
How do I develop my surface hunting skills?
Part of developing your “eye” is to know what you are looking for. When I met with John at a coffee shop—he found a gold earring right there where the lineup stands. I recently found a gold ring in several feet of water at this incinerate site. While it was a small ring—I’m still surprised by just how much the color stood out. This ring had been there since the 40’s or so and had long since lost it’s gold shine—but just the pale yellow was unmistakable—when you know to look for it. Anther thing to look for is “ornateness.” At this site, a lot of objects of interest are distinguishable by just how intricately patterned they are. These will be the “designer” objects of the day and more likely to be jewelry, embellishment, or other objects that are interesting or have value today. While many of these aren’t of any value, it’s fascinating to see the degree of care and craftsmanship that went into everyday household objects in those days. I also look for paper money—in parking lots, snow piles, after events. This is a real skill too in that not all of a shining $20 bill will always be there for you to see. More typically you will spot a mud-covered—corner or shape. The key is to learn to break what you are looking for into components—the edge pattern of a bill—the numbering, the color, the shape, the size (even folded in half). When you can spot a bill by any one of these features—you have some solid eye skills. I do this in the water too. Where there are big crowds I often lie down and scan across the top of the weed mass. Quite often there will be paper money rolling around with the weeds and other debris.
Also, on the beach, when you are walking into the sun quite often anything shiny will flash up—something to be aware of. I’ve found a lof of gold this way—often at day’s end when the sun is low in front of me.
The key is to have certain “markers” in mind—green, gold, unusual, anything out of the ordinary should attract your attention and warrant further examination.
This kind of hunting carries with it certain ethical considerations though. To begin with it’s illegal to trespass and even if you get permission to search private property the owner may still have claim to anything you find. There are however, salvage agreements that can be entered into for any high potential sites you encounter. At the same time, don’t let anyone else steal all of the benefit of your efforts and treasure hunting savvy.
Also, anything you find by eye on the beach is more likely to have been recently lost. Be prepared to look for the owner and to return items when possible. It’s really the thrill of the find that counts anyhow.
Finally, keep safety in mind—especially if you have any young hunters in training with you. Old areas can be full of hazards—spikes sticking up, falls, sharp objects…be careful. This is especially true of snow piles. These can be very dangerous as well—especially in spring when they are melting. These piles can have soft spots or deep mud around the edges. Always walk with a sick or spade and carry a cell phone. No find is worth courting disaster.
That said, surface hunting and Artifacting is a great hobby in and of itself. I mention it here though because of what it has to teach. When you bring heightened awareness and a focus upon key areas of a site to your detecting you are bound to have more success. Surface hunting teaches you to find these locations and look for ways of searching that others had not considered—to consider the possibilities.
This is wholly in keeping with our central theme of “knowing that something might be there and finding a way to recover those targets.”
A Few Surface Hunting Finds. The coiled lizard paperweight is a fave.
From: “Water Hunting:Secrets of the Pros Volume 2” (2017) by Clive James Clynick
While my first Minelab Equinox book “…From Beginner to Advanced” suggests that you use a couple of tester to get the hang of looking for solid middle range signals, this same kind of testing is also valuable to teach “hand to eye to ear.” By this I mean the ability to be able to hear a response and have a pretty good idea of its size, solidity and distance from the coil. With the Equinox’s high frequencies in the “mix” this becomes even more important. This kind of testing should not be done on a bench but involve free swinging the coil–to make it as “hands on” as possible–replicating field conditions. Tests should include:
1/ Very small target: (foil or weak other conductor) close medium range and edge of detection range.
2/ Medium sized target: (quarter) close, medium range and edge of detection field.
3/ Large target: (vertically crushed can sized), close, medium range, and edge of detection field.
This is some of the most important skill building you can do to improve your accuracy with this detector.
If there’s one bit of advice I would give to intermediate Equinox hunters–it would be that this detector has gold field quality target acquisition. You don’t have to become frustrated by opening the machine up to every “flyspeck” in the ground just because “Joe” in the Internet found a micro gold earring that hit at “1.” Running lowered “Sensitivity” or some “Discriminate” lets you cover more ground and dig more solid, quality signals. It’s also less frustrating. Walk first. Don’t get bogged down by foils. At the same time–there is small gold around to be found–and the key is to base your settings and digs upon where you are. Running right down to zero–or alternating between “All Metal” is a good way to increase your chances of finding these small targets–if the “odds” are with you.
From: “The Minelab Equinox: From Beginner to Advanced.”
“The Minelab Equinox: From Beginner to Advanced” (Readers Write…)
Reader Feedback “The Minelab Equinox: From Beginner to Advanced” by Clive James Clynick (2018)
Received the book. Excellent information within! Great for beginning with the Nox, as well as advanced settings and techniques for experienced users.
CG
Great reference that I will refer to often. Very in-depth on the capabilities and functions of the Equinox line. Pleased with this purchase!! Recommended for all Equinox users, and potential buyers.
SE
Brilliant book well worth getting it gives you a better understanding of the machine than the manual alone.
PS
Clive, enjoying the hell out of your book. It is a must have for any Equinox hunter. $ well spent, thank you Sir.
RL
Very informative. I would highly recommend.
LG
Clive! Received the book. That was quick shipping thanks. Excellent read and informative. This will truly help.
Best of luck!
RG
Clive, I have you’re manual & I read it over & over & learn more each time. Nicely done sir.
JJ
After reading your book I concentrated much more on the sound quality of targets. I very quickly started to understand which sounds to dig. Have found several ancient coins already.
GL
Highly recommend Clive’s book on the Nox. Very informative and helpful. Thanks!
Class ring up front 11 gr. 10k next to it 6.7 gr. 18 k back row some 2 point somethings 14 and 18k and assorted silver and glasses. Mostly with the CTX and some with the Equinox 800the conditions required both accuracy and coverage–Im normally a pulse hunter. Did a ton of testing on the Equinox — some 2 Tone settings–and found that “20” is a nice tone selection for gold–try it! clivesgoldpage.com
I recently asked a top local hunter for any tips that might go into my next book. He replied: “Get yourself a big box of Q-Tips and clean all the wax out of your ears so you can hear the deep ones…” Thanks–I wish it were that easy.
I include some of these maxims because of their value in teaching course correction and good judgment. They represent tried and true general principles that can make you a more effective treasure hunter–”old school wisdom” –if you will.
If I could point to one maxim or idea that’s helped me to find treasure it would be this:
“If you want to find some gold with a metal detector, first find some gold, then place the detector directly over it”
Simple–but brilliant. The point is to expend your energy at the locations with the best chance of producing what you are looking for. When you have put some thought in to why the location you are searching should have what you are looking for–half the battle is done. For example–look for the areas of a site where activities overlap or pedestrian traffic is funnelled into a particular section. The part with the detector and scoop are only the last part of the operation.
Well-known “Western and Eastern Treasures Magazine “Tech Talk” columnist Ty Brook also touched on this idea when he stated another idea that’s central to treasure hunting success:
“…whenever I feel that some good targets have to be in a particular area–I don’t give up until I figure some way to detect those targets.”
(Inside Treasure Hunting, by |Ty Brook, 1999, Confederate Rose Publishing).
For the beach hunter, these two ideas mean one thing: “Know thy sites!” Where have gold and silver been found before here? Or at a new location: “What site features remind you of places that you have found gold and silver before?” Which of the equipment and methods that you have to work with will give me a better shot at recovering what’s there? What clues are evident at a site that indicate the place is worth some effort? One of my early experiences illustrates this: Behind my house there was a vacant lot that was a cut-through between two busy streets. At one point I went out there with my first detector–a White’s Coinmaster 6DB. After hunting for a while and finding nothing I noticed the bent over links at the top of the low chain link fence. Clearly this was where people got into the lot by climbing in. Hunting below this section of fence produced several dozen quarters. The point is–play your hunches–thoroughly and to completion.
An understanding of human action is also important here—the patterns of how people interact with a site over time. This comes from observation.
I would also add to Ty’s hugely valuable advice: “…to find a way to separate those targets from what they are mixed in with.” (More on this later).
One saying of mine that’s been quoted a lot is that:
“Detectors don’t find gold—observation does.”
So the question is not just “Where is there some gold and silver to find” but– “How and why did it come to be there?” Let’s look at an example of these principles in action:
At one busy Caribbean site I hunt, there’s one length of beach that’s always produced gold. The resort is high-end, and this one section is the busiest water entry point. The sidewall is steep so people clamber to leave the water. A lot of gold is lost this way. Also, it’s a section where the waves can be quite rough—it’s the “head of the bay”.
Over time, observation and past success have taught me that if I just work this small section hard enough–some gold almost always turns up. While much of the surrounding beach looks similar–even the number of swimmers–it’s this one section that always produces. When you can consistently identify these perpetual “hotspots” and direct your efforts accordingly you are light years ahead.
Where you have areas that are almost similar with one producing finds and one not–this represents a key learning opportunity in that whatever differences there are have great importance. These represent vital clues that teach us exactly where to look for gold.
It’s this kind of full-field, detailed observational focus that I hope to encourage with this book.
“Where there’s one, there’s more.”
A top pro buddy of mine says this often. While there are certainly such things as “anomaly” finds, where you have ground that produces gold and silver consistently, there is always more to be found. These finds may be currently out of detector range. This is another important area of observation–understanding the overall strata of a site, and watching the grade of these busy areas for changes. At inland sites, changing moisture levels can also bring up new signals where there had been none before. More generally, the precise set of conditions that are needed for gold to be present at a location are not that common. Your best clue to where gold can be found is where it has been found before. This is where experience comes in. Every gold target you find has valuable information to tell. How many people had to enter the water or sunbathe at a spot for a gold item to be lost? What sand levels were needed to expose it? Was it lost at that spot or moved by the current? All of this information comes from that first find–pointing you towards the next one.
From: “Water Hunting: Secrets of the Pros: Volume 2” by Clive James Clynick
By Steve Herschbach (Detector Prospector Forum Administrator)
“The Minelab Equinox: From Beginner to Advanced” by Clive Clynick is the first book available about the new Minelab Equinox metal detectors. The 8.5″ x 5.5″ format book is 111 pages of densely packed information that is intended to help new Minelab Equinox owners get the best out of their new detectors.
The early part of the book relies of screen shots to illustrate the various controls on the detector, and then switches to hand drawn pictures to illustrate various concepts described in the book. In this day and age of slick graphics the hand drawn images lend a “homemade” feeling to these books.
I can’t really fault Clive for using the hand drawn images however. A picture does often easily get across some idea that might be very difficult to describe in writing. I personally can sketch out a useful image quite easily, but turning that sketch onto a slick computer generated diagram can be time consuming. In the end the hand drawn sketches get the idea across, and that is what matters most.
The first roughly 40 pages of the book basically go over the controls, adding some details not found in the owner’s’ manual. The real meat is in the last 70 pages of the book. Clive goes into great detail emphasizing important details about the Minelab Equinox meter and audio characteristics. There is a lot of information here about how to use the Equinox features along with good handling skills to get the best performance possible out of the Equinox.
The book has an emphasis on coin and jewelry detecting both on dry land and beach. I therefore think the book will be of most use to people looking for information more specific to these subjects. Information specific to relic detecting or nugget hunting in particular is more in passing while discussing coin and jewelry detecting.
Much of the information presented does assume basic detecting knowledge along with basic knowledge from the Equinox owner’s manual. Clive tries to avoid repeating information already found in the owner’s manual, and so from this perspective I would rate this book as being applicable for detectorists with moderate to advanced detecting skills. People who are totally new to detecting may feel in a bit over their heads initially. That is fine because any detecting book worth having usually needs more than one reading. Things that do not sink in at first make more sense after getting some hours of experience before they “click”.
The book may be challenging for true beginners on the first go, but that is because there is meat here to satisfy more advanced operators. Anyone that perseveres with fully understanding the information in this book will no longer be a beginner, and the good thing is the skills learned will apply to many other high performance metal detectors. The bottom line is I recommend this book for people looking for information that goes far beyond what is offered in the Equinox Owner’s Manual, and which is of primary interest to coin and jewelry hunters.
Clive is an accomplished writer with several titles to his credit that qualify as “classics”, especially as regards jewelry detecting. Visit his website at http://www.clivesgoldpage.com/ to see all the titles he currently has available.
Ed. Note: Thanks kindly for your review, Steve. Your “Detector / Prospector Equinox Fan Club” forum is a great source of information on the MinelabEquinox.
Had some luck with the Minelab Equinox and Cuda last week. The Equinox is a great edge cherry picker–gets right in amongst the caps and pins. Trick is to recognise the junk first–especially those “cap patterns.” Cuda is a great workhorse deeper than any VLF.
A tip I would give is to always look for the deepest water closest to shore. The same gully can have nothing if it’s ten feet further out but in close it can have good marl access. Track along to find this type of ground–this has worked for me many times. Biggest ring is (all 10K) 6.6 grams, and a no-date George the 4th quarter down so deep it sounded like a pin with the Cuda.
cjc
clivesgoldpage.com
When you go to the lower uSc ranges–its necessary to do certain thingss to mediate the micro conductors. This may involve coil control (determining the solidiy) using the cross sweep and multiple passes, or doing some “foot digging” to make sure the target is not a small target on the surface. It’s also important to look for ground that itsn’t “silt” carrying this type of micro conductors around–oval tabs, foils, pennies and caps. This is the “tradeoff” for the additional depth you get running down at say 10 uSc. Where you have a lot of targets, there is more of an emphasis on checking the general features ofa response–size, shape and where it is sitting in the strata. To a certain extent, understanding the sand texture is one thing that helps you recognise what an object is–by how deep it’s sitting. People ask why I have a large number of pulse machines. This is because they all do different things and are suited to different condtions. My small coil Cuda is great in black sand of harsh, fast salt conditions. It also has great audio to keep off the caps and pins. The Dual Field also has great audio and gives a long “tune-out” sound on iron. The Aquasearch has great optimization and adjustable SAT–for sidewalls or fast water.–to compensate for interference. More generally the idea with a pulse is to incorporate site knowledge and a number of target features into your dig selection. While iron will sound off–it doesent “carry” to the surface as well. Looking for small, sharp, narrow responses that don’t give a double tone on the cross sweep can reduce the amound of iron you dig. As well, when you turn the Gain (or de-tune) a pulse, the response to iron is reduced more than is the response to gold. So in dense traash going to a lowered “discriminate” mode, combined with carefull listening to the strength of your signals is another way to increase your accuracy. I’ve made all my best finds with pulse machines and although its great to have the fidelity and accuracy of a CTX or EQ, where there is any serious competition or changing “sanded in” type conditions a pulse is the way to get down deeper, find “strip outs” and hit those big lunkers. Pulse hunting teaches you to examine responses fully, and pay attention to the strata, grade, bottom contours and sand textures. These skills in turn will help you with any machine you use. cjc
clivesgoldpage.com
Scored a band today 18k 9.6 gr. with the Minelab Equinox 800 using Gold 2 / confirming with Park 2 A/M. set as “User Mode”
Qiite like this sytem G2 is super deep and tells the size well, P2A/M tells the consistency and also makes a nice search mode in iron or where the signals have mixed content (ferrous / non-ferrous). clivesgoldpage.com
As touched upon above, the Minelab Equinox has the built in feature of promoting round, solid, non-alloyed objects, while inhibiting responses from elongated, odd-shaped, corroded or alloyed metals–like tin for example. These come in as rough or broken tones. There are dozens of “U-Tube” videos out of guys hunting with the Equinox– hearing random sounds, digging them anyway and finding garbage targets one after the other. Many then blame the detector. This machine was designed with very sophisticated signal processing to help you to recognise this junk–why not listen to it? If you hope to go into areas with dense aluminum and other trash targets and pick out those signals which have the best chance of being gold–this is one Minelab Equinox feature that can be a big help. Using the cross-sweep can work well here too–bringing out the inconsistent elements of a signal if it’s junk or staying stable—a more likely gold target. This built in feature of the Minelab Equinox is especially useful for determining foils. Many of these just don’t sound solid–they are weak, thin or hollow-sounding responses. One trick I use to get a quick idea of a target’s consistency is to do a slightly angled second pass. I then watch the meter and listen for any tone changes. A high gain detector will often hit loudly on an object because of its shape. When you change your sweep angle this is altered.
Picture Caption: “A quick, angled second pass tells you how solid a target is. Listen for tone changes and watch the meter for erratic readings. This is an effective way to recognise foils and “can-slaw” and generally offset the tendency of a high gain detector like the Equinox to sound off on odd shapes. “
From: “The Minelab Equinox: From Beginner to Advanced”
Some gold and silver from the last few hunts using the Minelab Equinox and the CTX 3030. Largest band is 14k 10.4 grams, a GoPro Hero 5 ($200 US resale), and a 3 oz. vermeil Russian chain. Getting good results with the Equinox on land (no w/p phones yet) on the small gold. Oh and a brass grill…
I have purchased virtually every book that Clive has written. All have paid for themselves many times over. These are not rewritten user manuals, these are well written books that teach you what questions to ask, and teaches you how to answer them. A good critique of a machine thru the eyes of an experienced detectorist, outlining strengths and weaknesses of the machine in question, is a very valuable resource.
I have already ordered his book in the Equinox, and I have not even received the detector itself. His books are that good.
Thank you Clive for all you have taught me thru your writing.
The Minelab Equinox: “From Beginner to Advanced” (2018)
I’m proud to announce my new book on the Minelab Equinox. This is a very versatile and exciting detector. It’s of special interest to me because of its clean signal transmission, high gain “punch” and low conductor sensitivity–a great gold and silver machine. It also has superb audio. Because it processes so fast–you can actually hear more than one object under the coil at once. This makes for great performance in dense trash or iron. The stability is great too and as a sometimes fresh water hunter I especially like the black sand features. I’ve put a few basics and some of the more advanced methods for having success with the Minelab Equinox into a “no-nonsense” 111 page guide. The emphasis in this book is upon skills that are transferable–across applications–inland, beach and shallow water–learning to become more versatile and accurate with the machine.
The Minelab Equinox: “From Beginner to Advanced”
Clive James Clynick is the author of some 20 previous detector “how-to” manuals, numerous articles and product reviews. In this detailed and informative book he explains the Minelab Equinox’s ground breaking technology and how it can help you to find treasure.
Customizing the Equinox for your Conditions and Targets Sought.
“Multi IQ” and High Gain Detector Operating Characteristics.
Understanding and Applying the Equinox’s Features.
Audio, Meter and Coil Control “Skill Building.”
Beach, Shallow Water and “In-Iron” Skill Building with the Equinox.
Received the book. Excellent information within! Great for beginning with the Nox, as well as advanced settings and techniques for experienced users.
Great reference that I will refer to often. Very in-depth on the capabilities and functions of the Equinox line. Pleased with this purchase!! Recommended for all Equinox users, and potential buyers.
SE
Brilliant book well worth getting it gives you a better understanding of the machine than the manual alone.
PS
Clive, enjoying the hell out of your book. It is a must have for any Equinox hunter. $ well spent, thank you Sir.
RL
Very informative. I would highly recommend.
LG
Clive! Received the book. That was quick shipping thanks. Excellent read and informative. This will truly help.
Best of luck!
RG
After reading your book I concentrated much more on the sound quality of targets. I very quickly started to understand which sounds to dig. Have found several ancient coins already.
GL
Book review- Water Hunting: Secrets of the Pros Volume 2
I recently had the opportunity to read Clive Clynicks latest book called Water Hunting: Secrets of the Pros Volume II. If you have ever read any of Clive’s books you will understand that he is a very passionate and traveled Professional Hunter and takes the hobby very seriously. I know Clive personally and I’ve had the opportunity to detect with him and Im always amazed of his depth of knowledge in the hobby. Clive bases his books and writings on actual experience detecting alongside some of the world’s top Pro Hunters and I knew the book would not disappoint!
From the first few pages I noticed very quickly Clive begins to entice the reader down the proverbial rabbit hole into the world of water hunting with a well structured and reader friendly format to follow. The underlining tone throughout the entire book is truly to teach or improve the readers skills to become a proficient water hunter. For a 101 page book he covers an impressive amount of topics on detectors, reading beaches in depth equipment observations and safety in and out of the water. Along the way you will notice Clive weaves in and out personal detecting stories which are very intriguing, inspiring and at times very comical. There’s also a multitude of pictures, charts and diagrams throughout the book that give good visual explanations of the topic being described. I personally love this because Im a visual learner and some of the personal diagrams throughout the pages are excellent.
Along with the wonderful pictures and great stories in this book my favorite part is definitely concerning one of my favorite Pro Hunters Roland Dalcourt whom we affectionately call the king of the Caribbean. Roland is definitely one of the most proficient Water Hunters on the planet, a true gentleman and friend. Anyone who knows Roland or has had the opportunity to hunt with him knows his experience and techniques in Caribbean waters is second to none. As one of Roland’s closest friends, Clive has had the opportunity to hunt with him extensively throughout the years. I can’t think of two other individuals who have pulled more gold out of the water then Clive and Roland and Clive graciously brings the reader along their adventures into the final pages. In conclusion I would highly suggest reading the book from front to back if you are interested in the hobby or at least to enjoy some of the fascinating stories Clive takes us on. Informative well-articulated and fascinating! Great book
As touched upon above–some sites just need to be covered. The trade-off here is that the large coils which cover ground best, are usually heavy, and exhausting to drag though the water or swing. With proper preparation (stretching beforehand, using a back brace, frequent breaks…) it can be done though.
It’s worth noting here though that coverage need not just mean searching great tracts of land. The most effective coverage can often just be running one pattern over a small section again and again. This is something a top pro taught me. He measures his hunts not by how much ground he’s covered but by how much time he has put in at a location. This may involve searching one line ten times over. I don’t mind admitting that this guy has out-hunted me many, many times by doing this.
This lesson was made crystal clear to me on one hunt where I did my usual “three passes across “ in the deep section and concluded that there was nothing there. My buddy Roland put six or eight rows along the same lines and found this massive 195 gram silver chain. (See picture below).
Putting in multiple rows along the same deep water-line got my buddy Roland this massive 195 gram chain that I missed. (Scale coin is a quarter).
When I tell him that I didn’t find anything at a site (having given it my most thorough grid-type coverage) he says: “…you need to pass more time there…!” This is because (as I’ve begrudgingly learned), complete coverage is a myth. Coil control lapses, target inclination, ground changes–all of these adverse factors will never let you get everything.
It’s important to be aware of the trade off that comes with your choice of coils. Whereas a smaller coil may give better audio and penetration in the interference zones, the reduced coverage may cause you to miss targets, lateraly, or to have to do multiple passes on the same section to accomplish the same level of complete coverage. I once hunted for a lost small ring with my Barracuda that has an 8” coil. I was given very accurate directions as to where the ring has been lost– a 10′ x 30′ square. Even still it took over an hour to find.
It’s also important to remember that at some sites, the activity is very localized. At this type of place, coverage won’t help you that much. There is a seasonality to this kind of decision-making too in that during the peak on-season, more area of a beach will be used. When you get to the off season, only the busiest main sections will be worth working.
As with any detector, getting the best performance from the CTX requires that the operator understand and mediate a number of “trade-offs”. These consist of a choice and one or more ways (adjustments or method changes) that allow you to affect that choice:
Noise / Stability
-can you hear and identify targets?
-is the machine getting as much depth as possible?
-choices: Auto Sens / Manual (reduce), Open or Closed Screen. (see below).
Auto Sensitivity versus Manual
Characteristics of Auto:
Plus: stable, less falses / cross-feeds / “clean” responses, better target ID
Minus: less depth / harder to acquire targets / less awareness of ground conditions & changes / may drop Sensitivity level too low in extreme ground ie. “ black sand.” / constant changes represent more for the machine to deal with.
Characteristics of Manual:
Plus: deeper / sharper responses / better “notch” capability for closed programs / gives you the ability to run at the “limit”/ gives you a better idea as to what the ground conditions require. / alerts you to more marginal signals
Minus: less stable / more falses, cross-feeds / needs more attention to coil control /
more likely to be too high for the conditions / more “partial” responses need to be checked.
Open Screen versus Closed Screen Methods
Characteristics of Open Screen:
Plus: generally deeper / more small & odd shaped targets , chains, earrings / allows “full” audio on responses (complete and accurate).
Minus: less stable / less distinct target sounds / requires more attention to coil control / more checking of cross-feeds, falses, “partial” target sounds.
Characteristics of Closed Screen:
Plus: more stable / allows higher Sensitivity levels / sharper audio / alerts you to good responses in trash.
Minus: less depth / “sluggish” responses / harder to acquire targets / some targets are only heard partially (bottlecaps for example).
From: “The CTX 3030 Gold Hunter’s Guide” by Clive James Clynick
The first time I took the CTX 17” coil out was both a “rude awakening” and the beginning of an important learning process. I jumped into a deep section with it, swished around for a while and heard absolutely nothing. Later when I returned with a pulse–the same section “came alive” with signals. “Wasn’t this thing supposed to be deep as “all get go?” It certainly “looked deep.” There were a few things I needed to understand in order to become an effective gold hunter with the CTX 3030’s 17” coil.
First, with any detector that processes a complex signal there is a “disconnect” between the machine and the ground. This “no man’s land” is the actual process–the electronic “work” that allows all the fancy things it does. In effect, you are not hearing the actual ground. What you are hearing is a reproduction in digital language of the ground’s electromagnetic properties. What this means is that these machines (BBS, FBS…) can lose depth but at the same time–not loose threshold. That is, they can sound stable but still be being affected greatly by the ground’s properties. A stable threshold is the default. As will be explained in more detailed below, the larger the coil you are using–the greater this ground affect will be.
Secondly, when you run a larger coil, everything is magnified. This coil is attempting to process a larger chunk of ground and this brings more work to the machine’s processor. Now, keep in mind that the CTX already has “a lot going on.” Add to this more ground noise, more targets, and more EMI from various sources. The result is that targets are now smaller by relation and take more time to respond.
It was only when I learned to become more aware of the conditions, run appropriate Sensitivity settings and focus upon coil control that this loop began to show its strengths…
From: “The Minelab CTX 3030 Gold Hunter’s Guide” (2018)
by Clive James Clynick
clivesgoldpage.com
A couple of good hunts using the 17” coil to scrub the edge with Jay’s Gold program. I used the P1 to search and P2 as a checker. The large band at left came up green from at least 18” in a section hunted almost daily with Excaliburs and other machines.
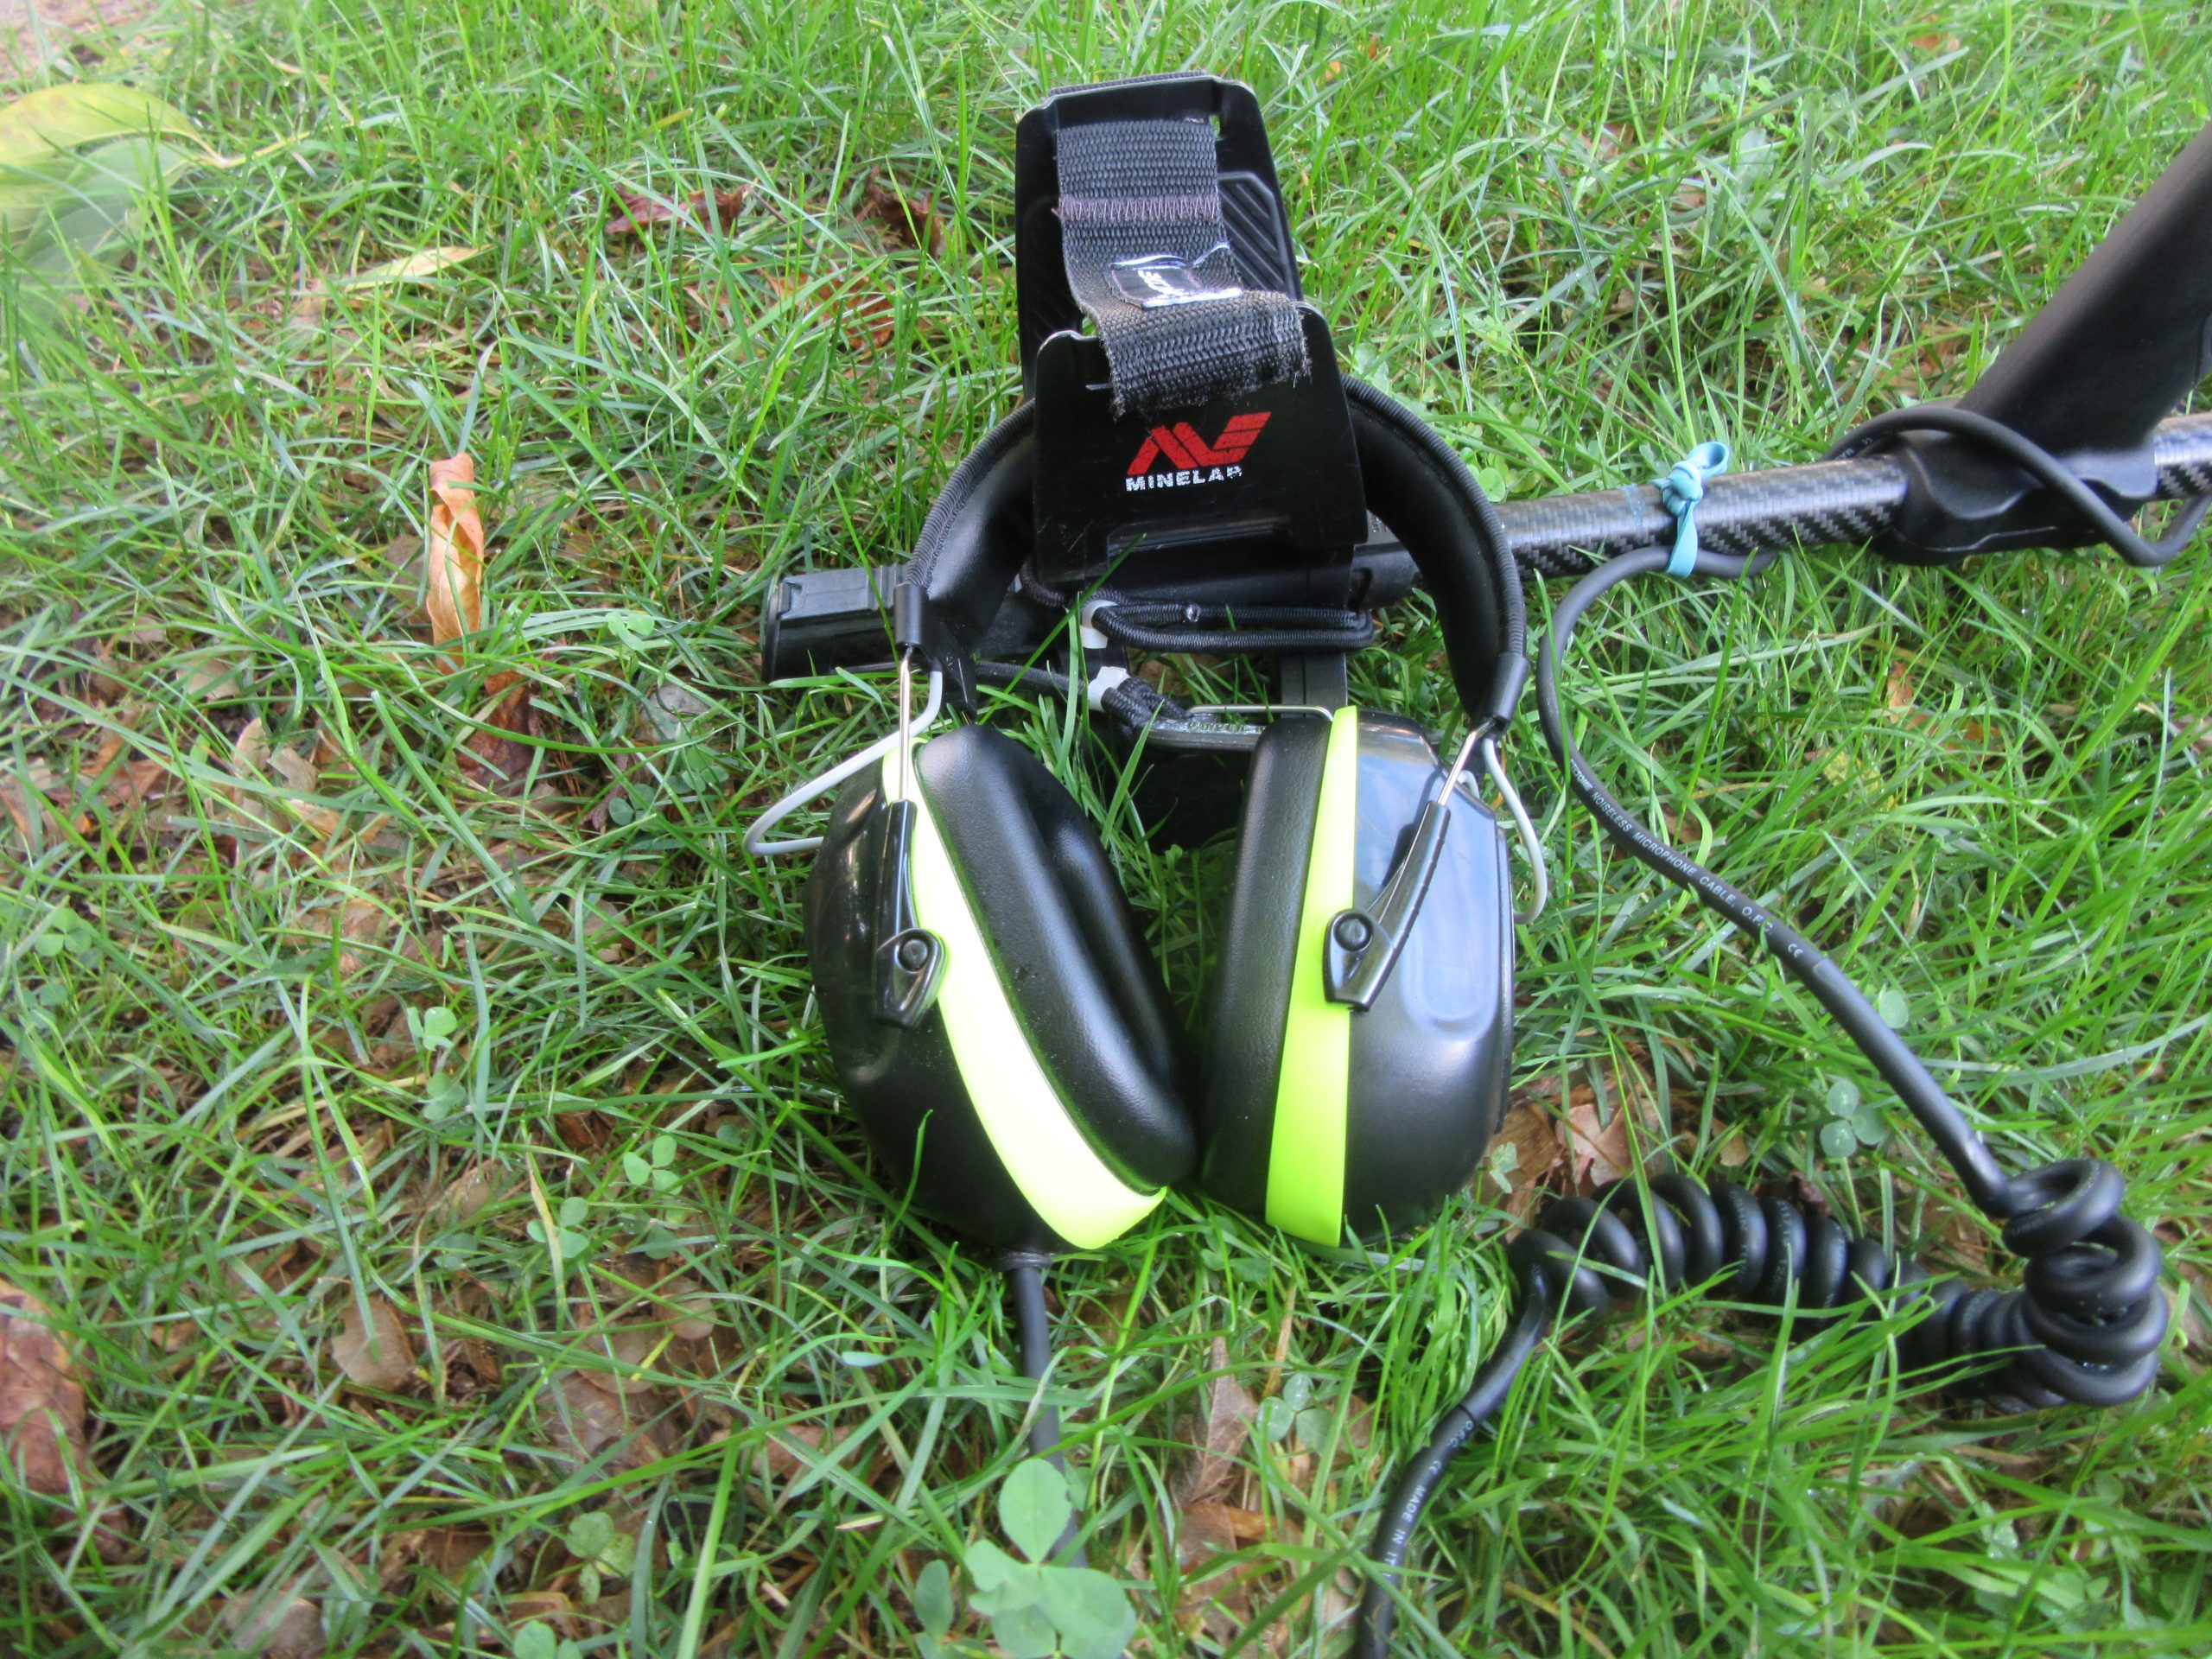


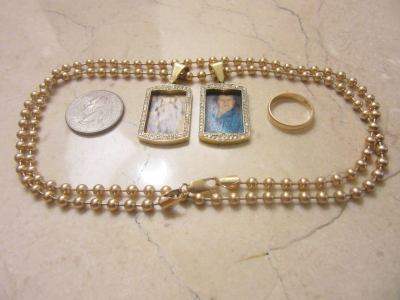
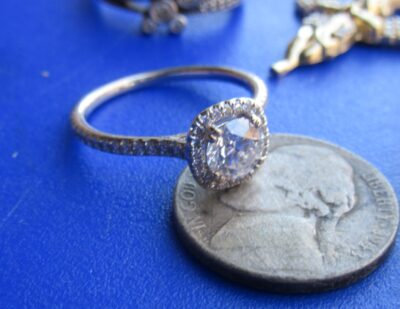
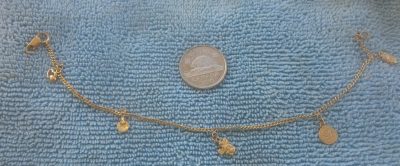


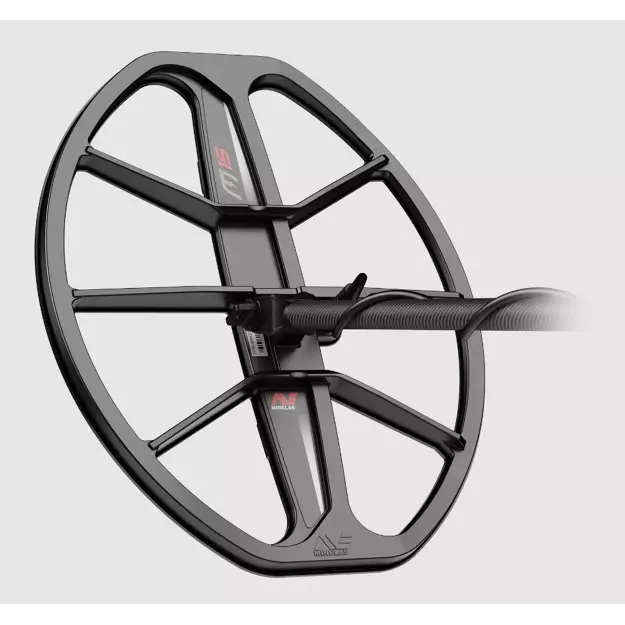
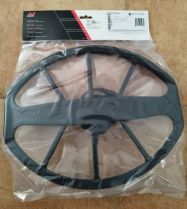
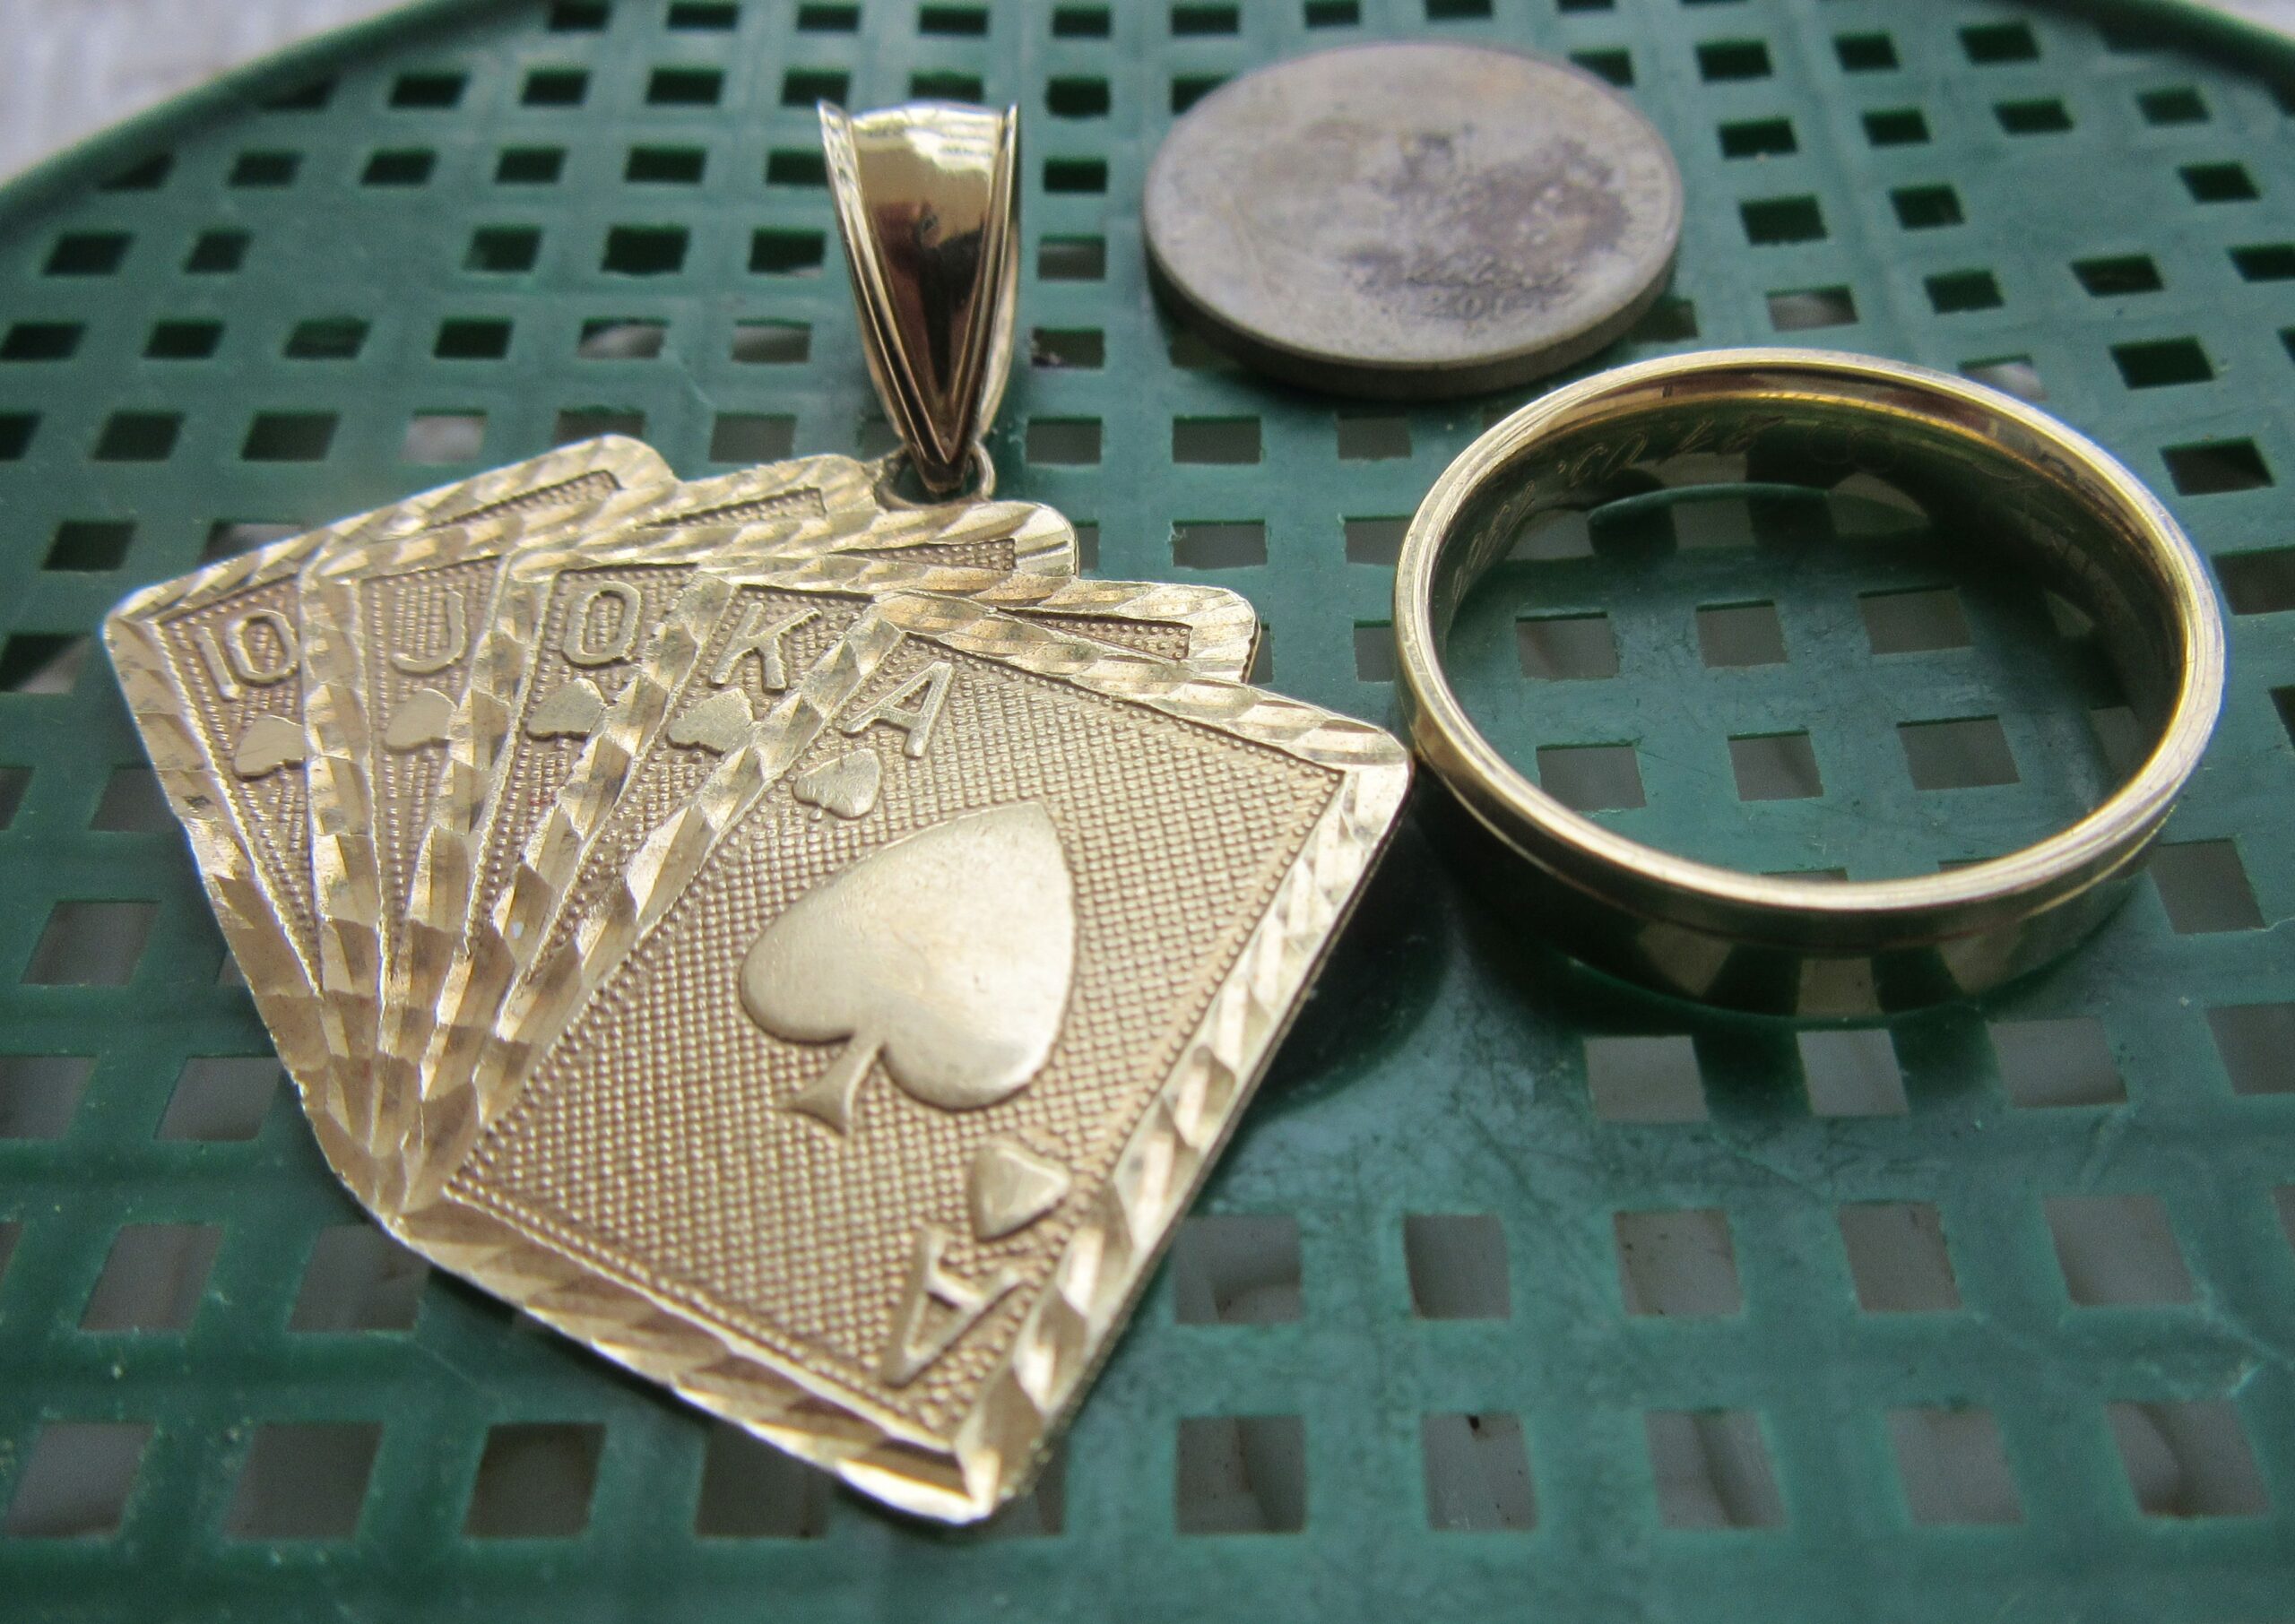
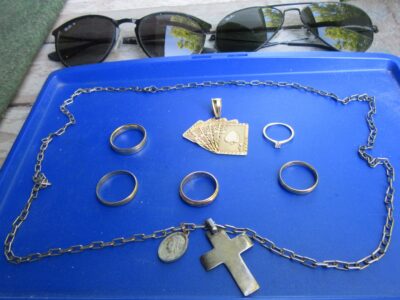

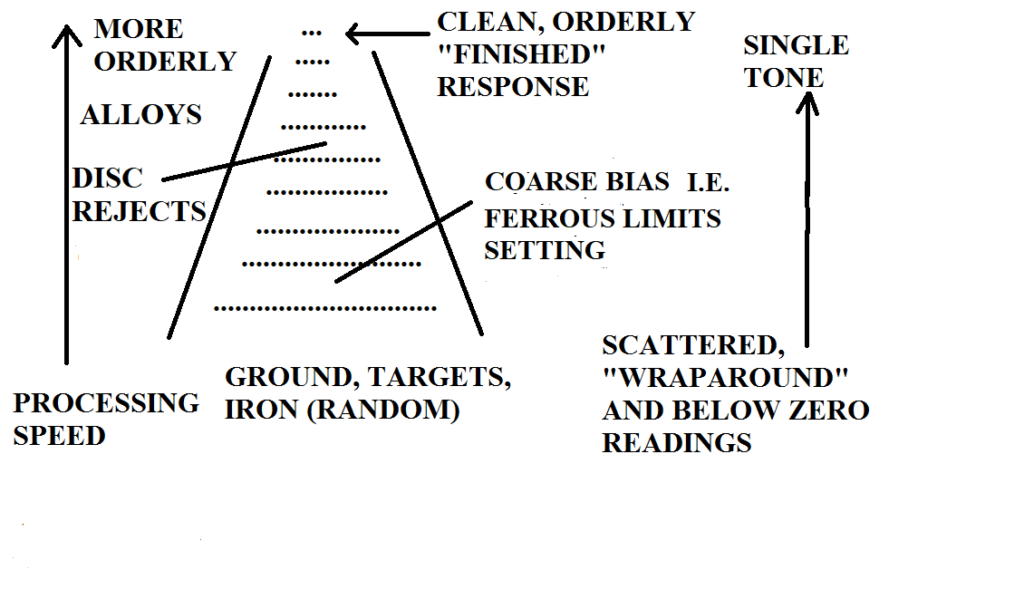
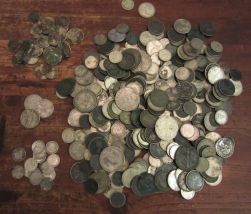


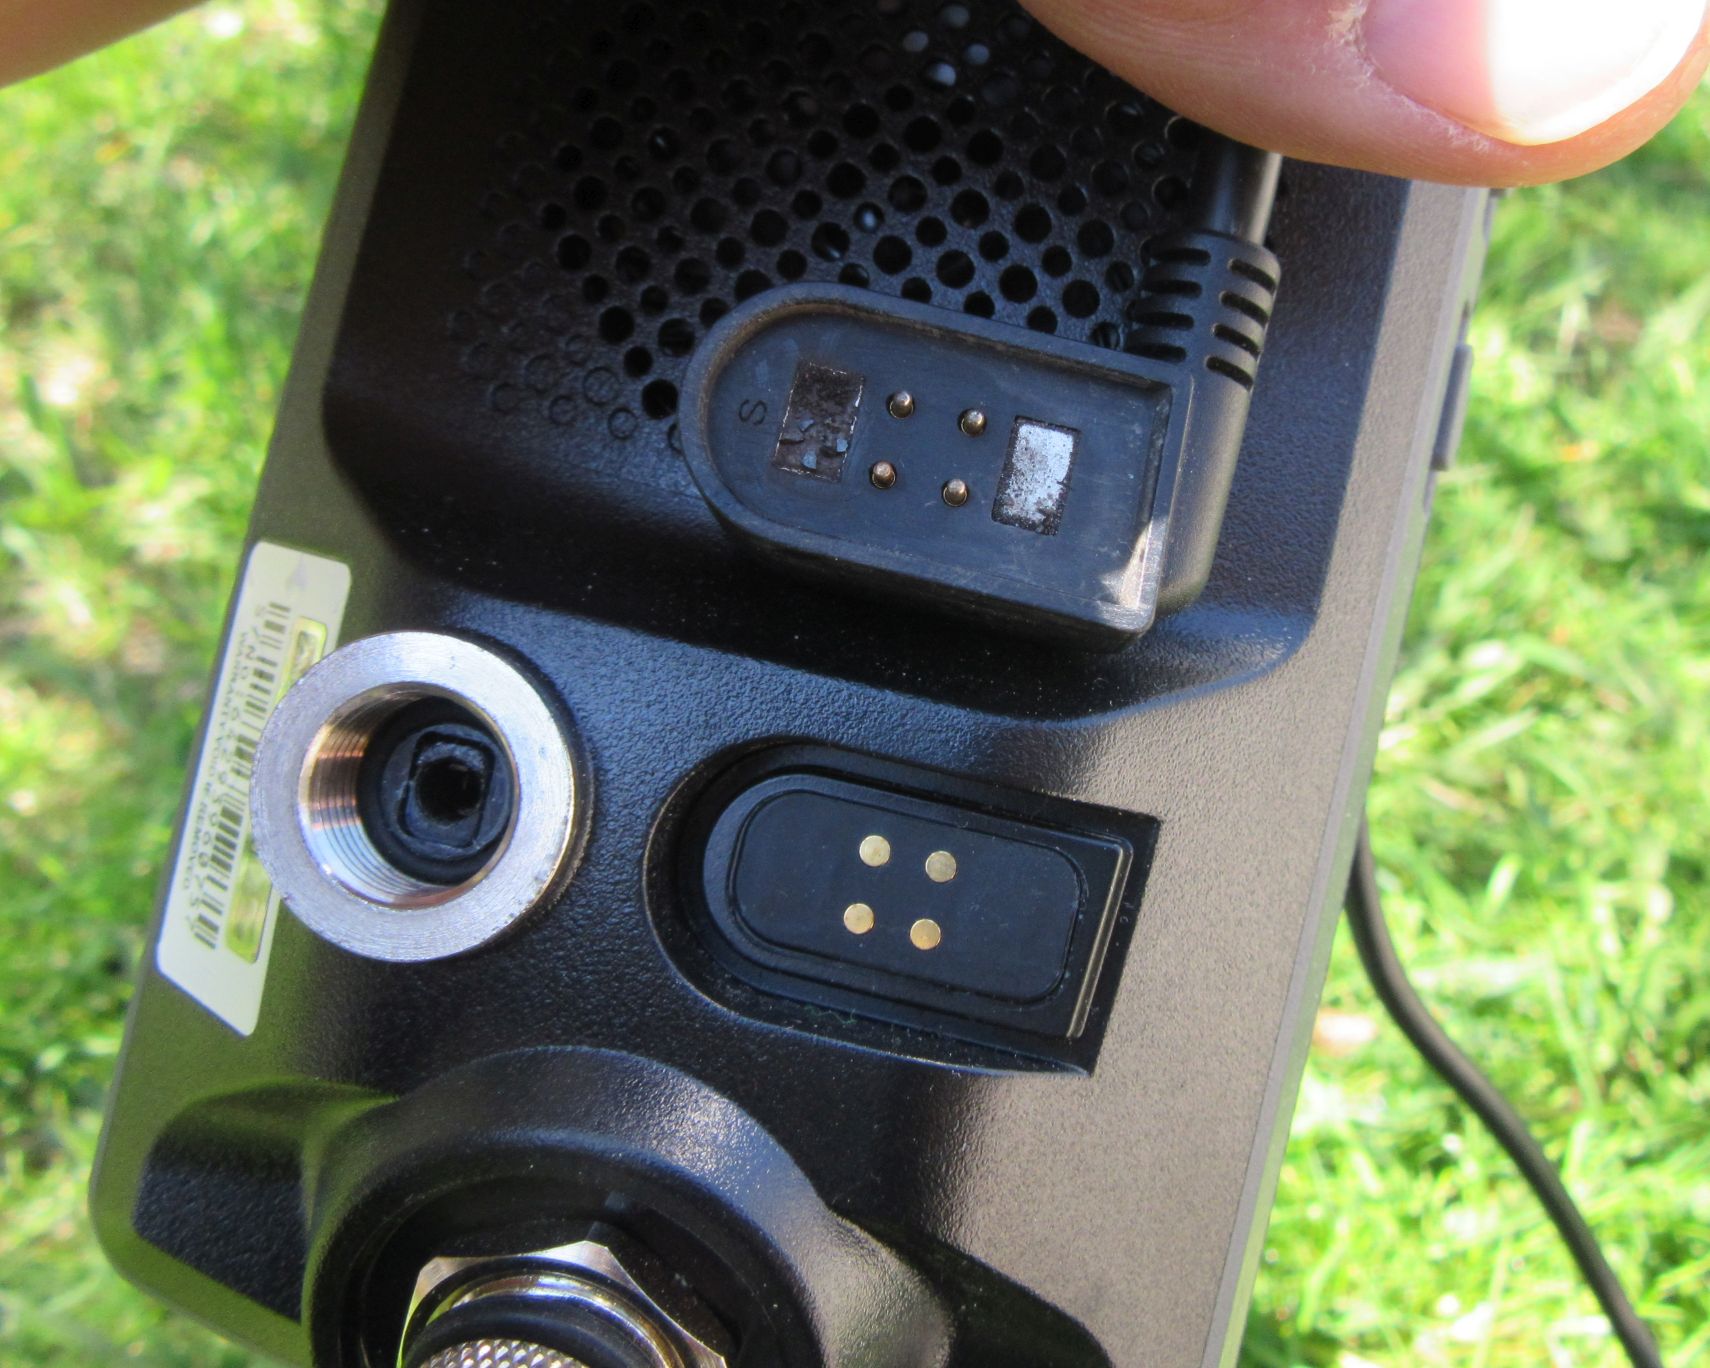


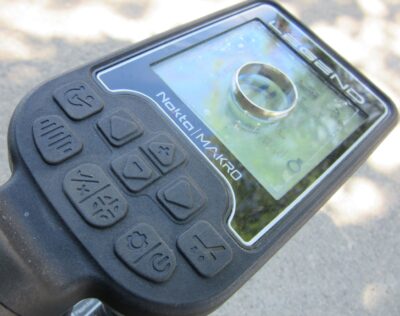


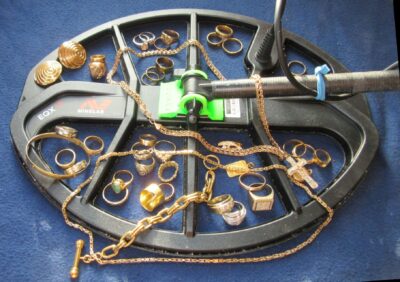


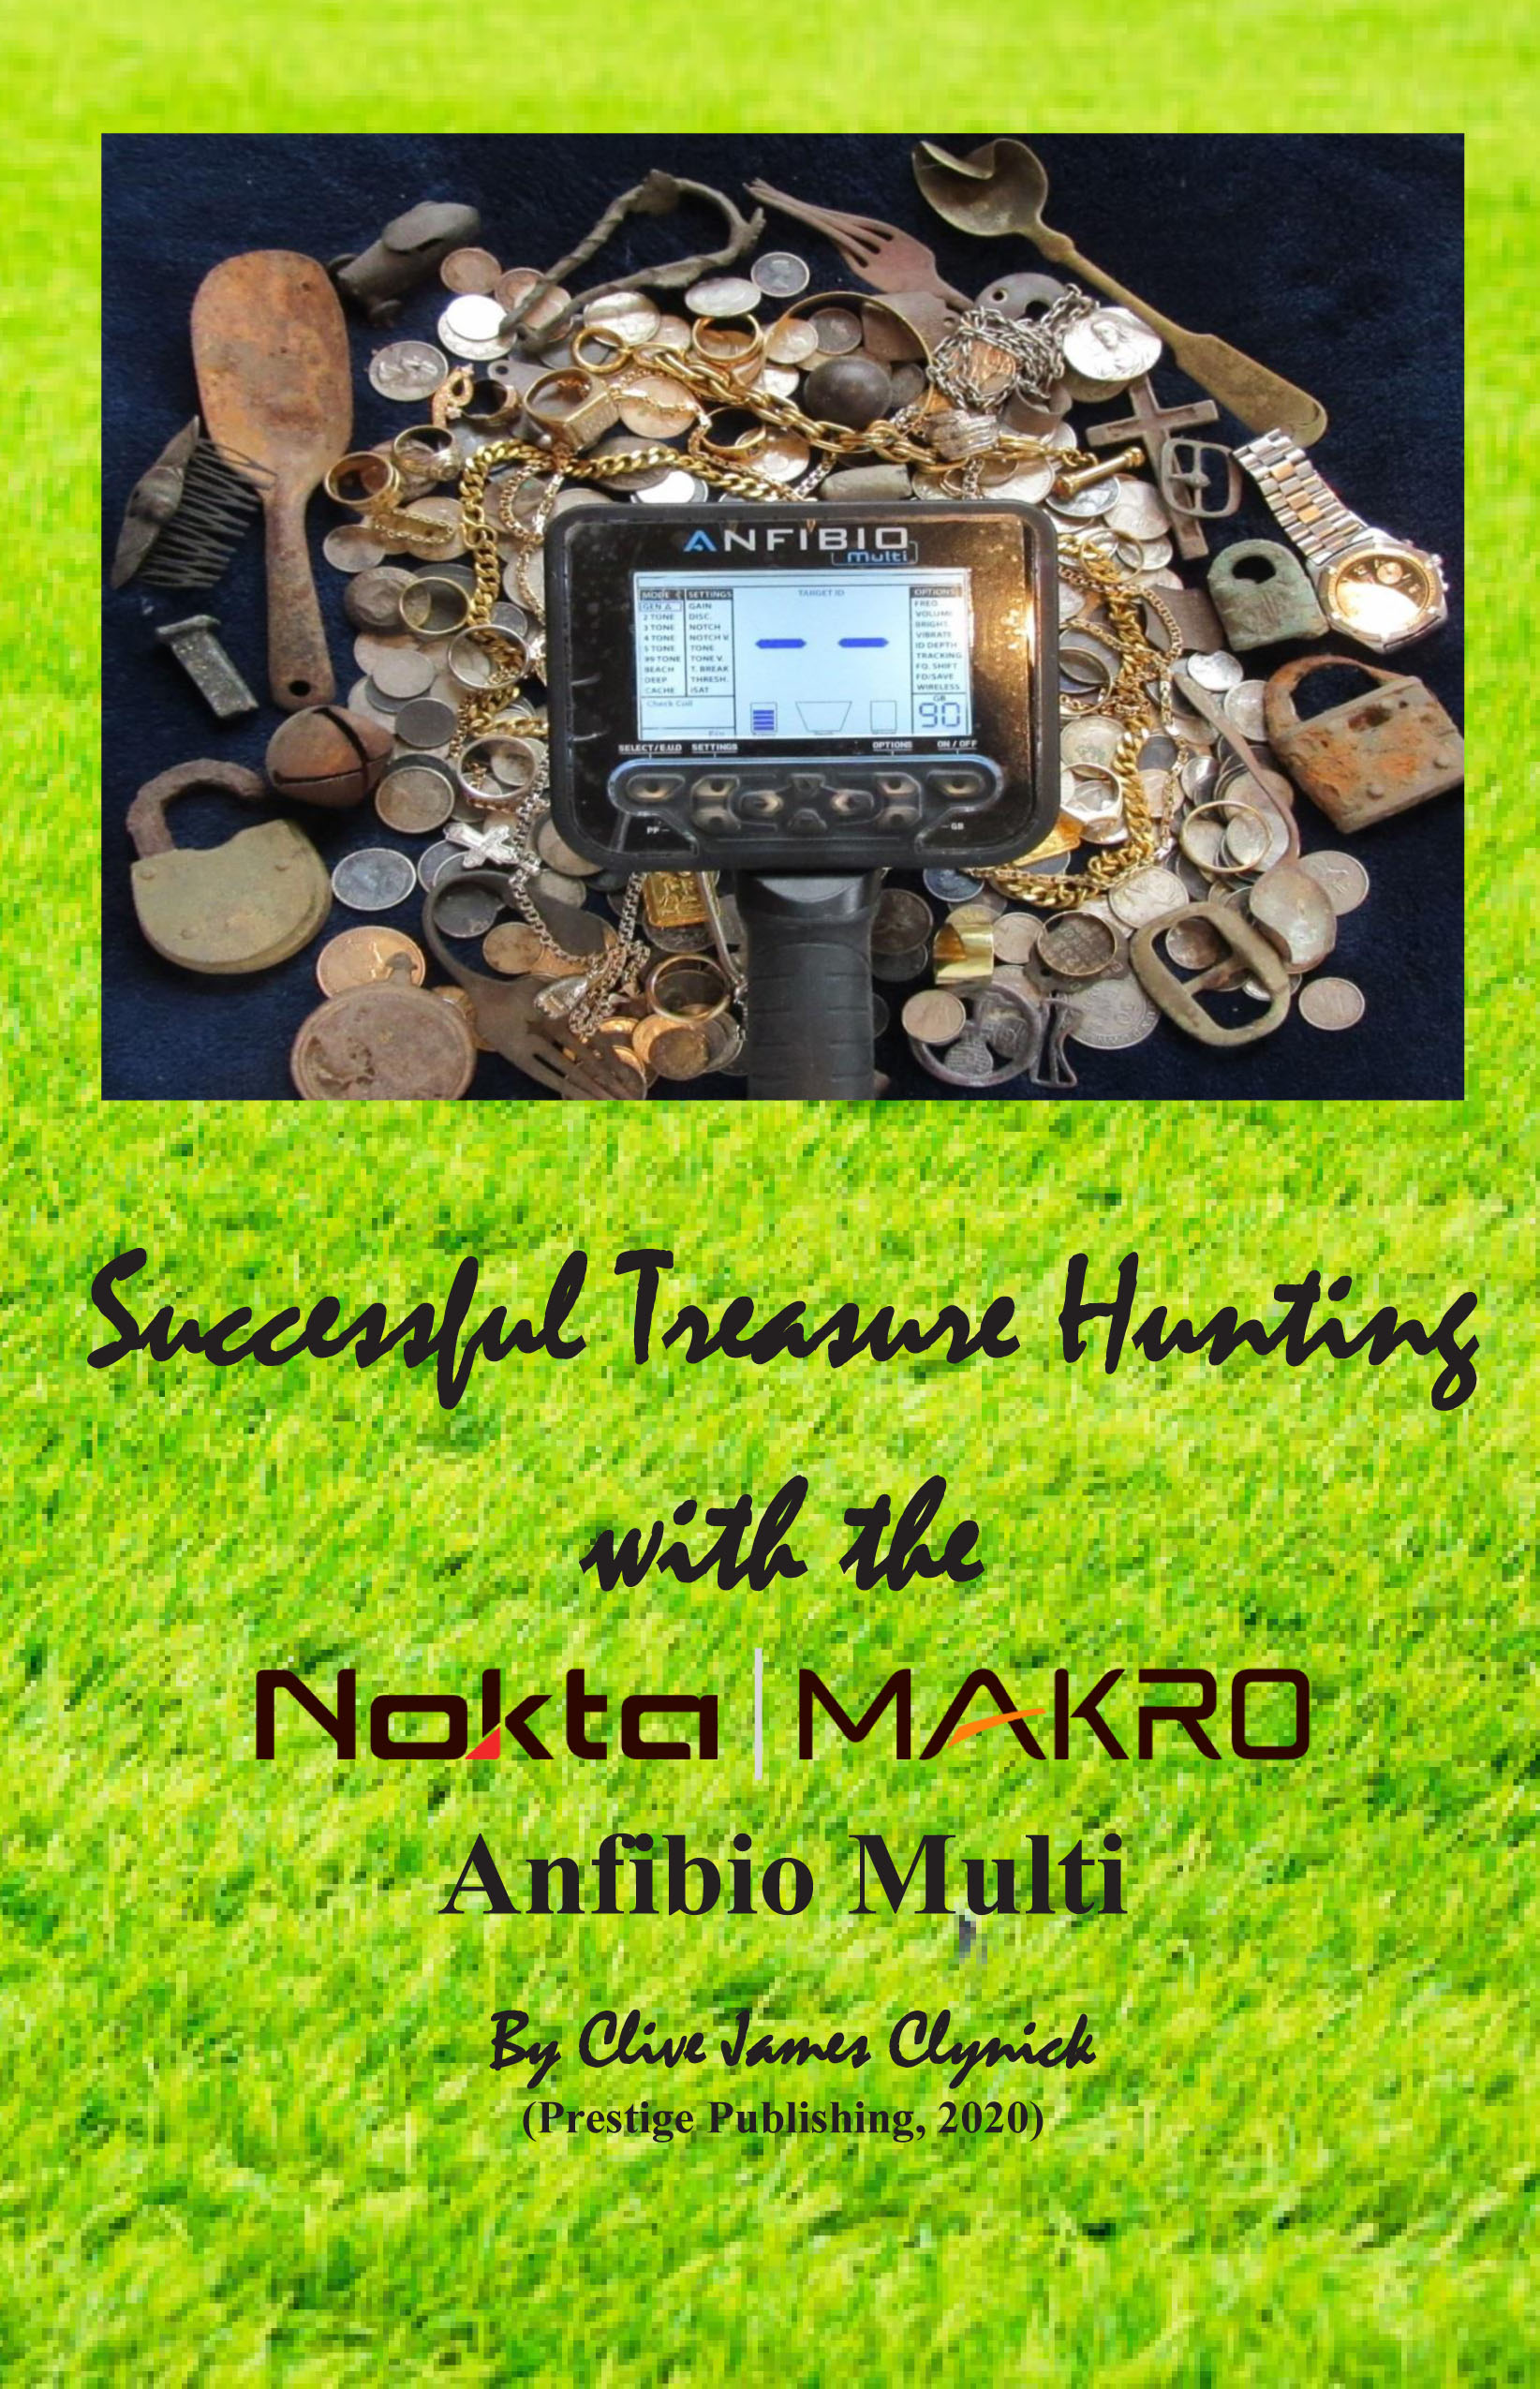


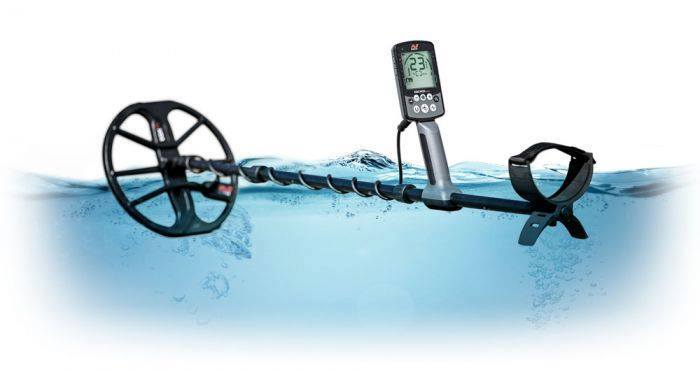

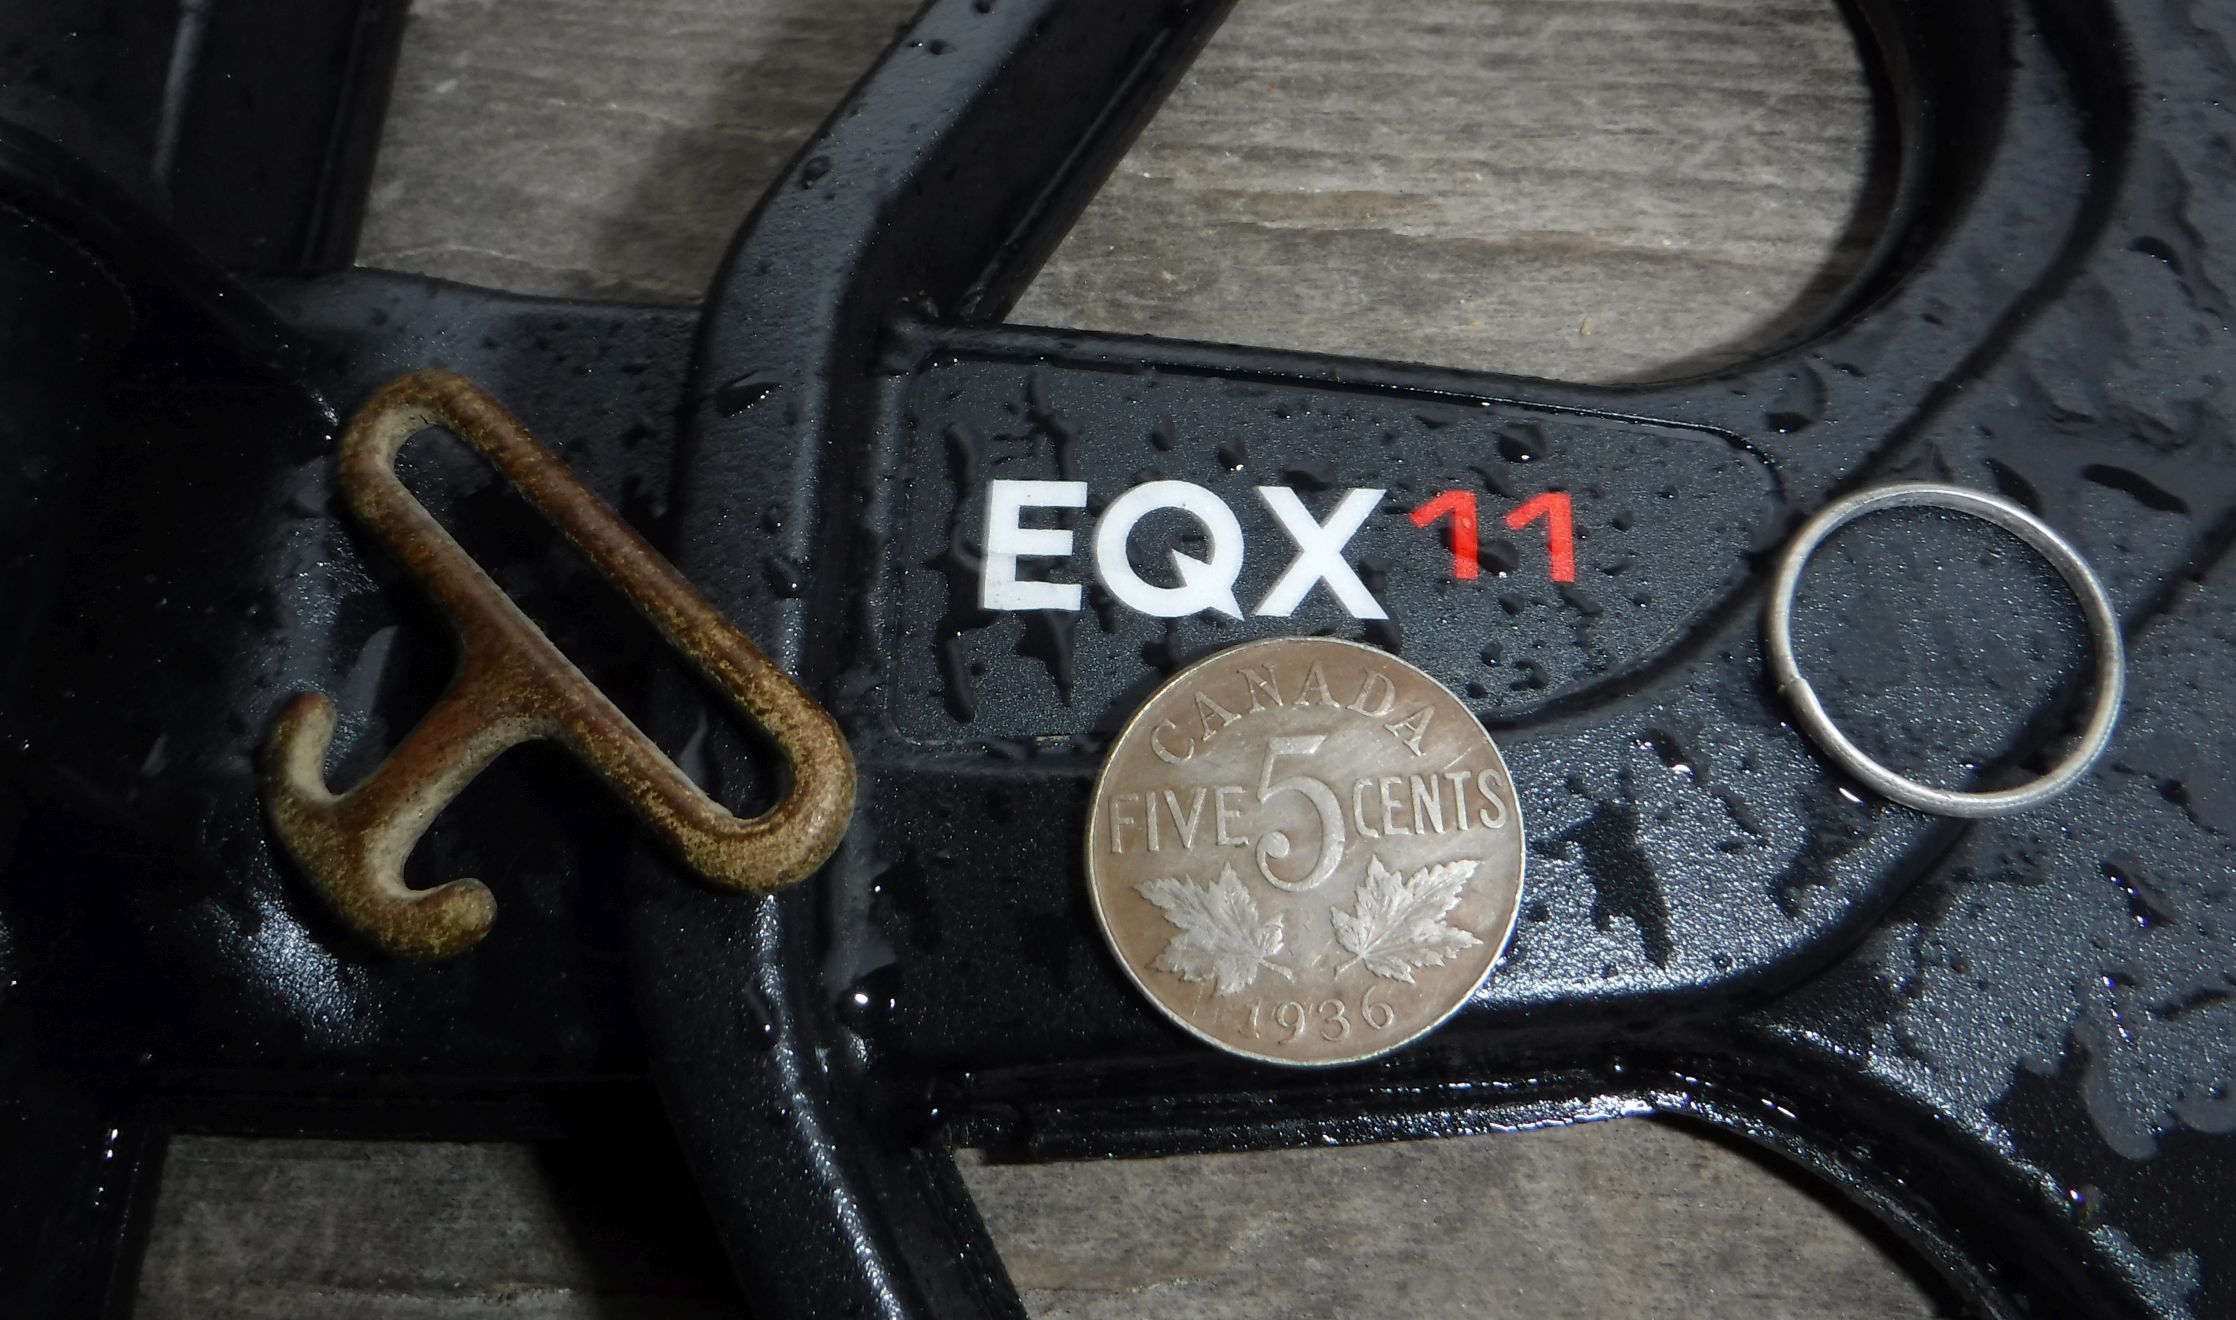

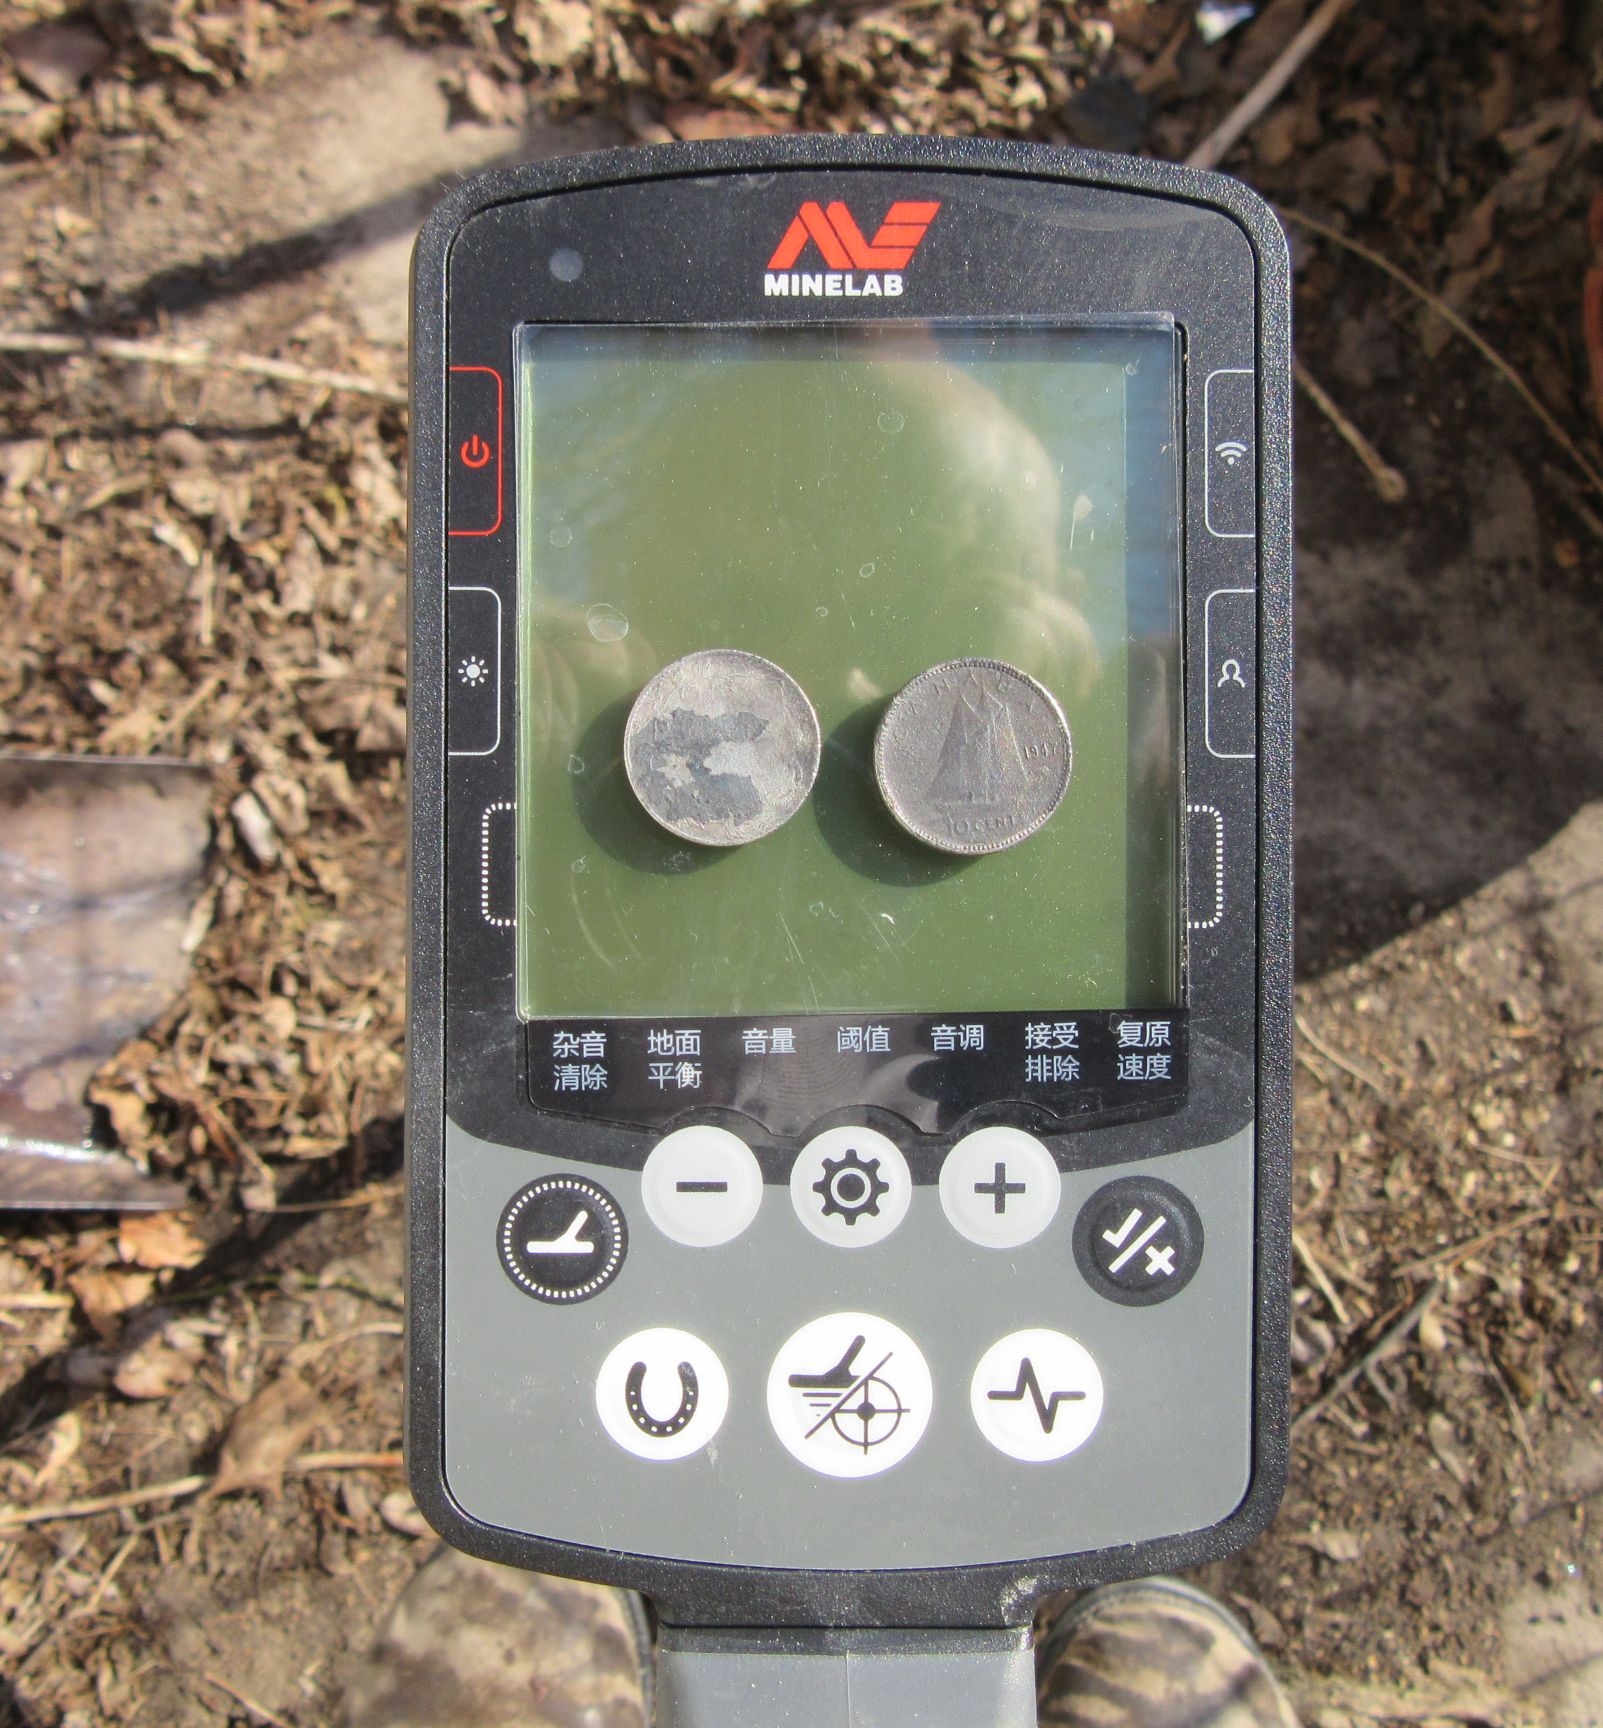
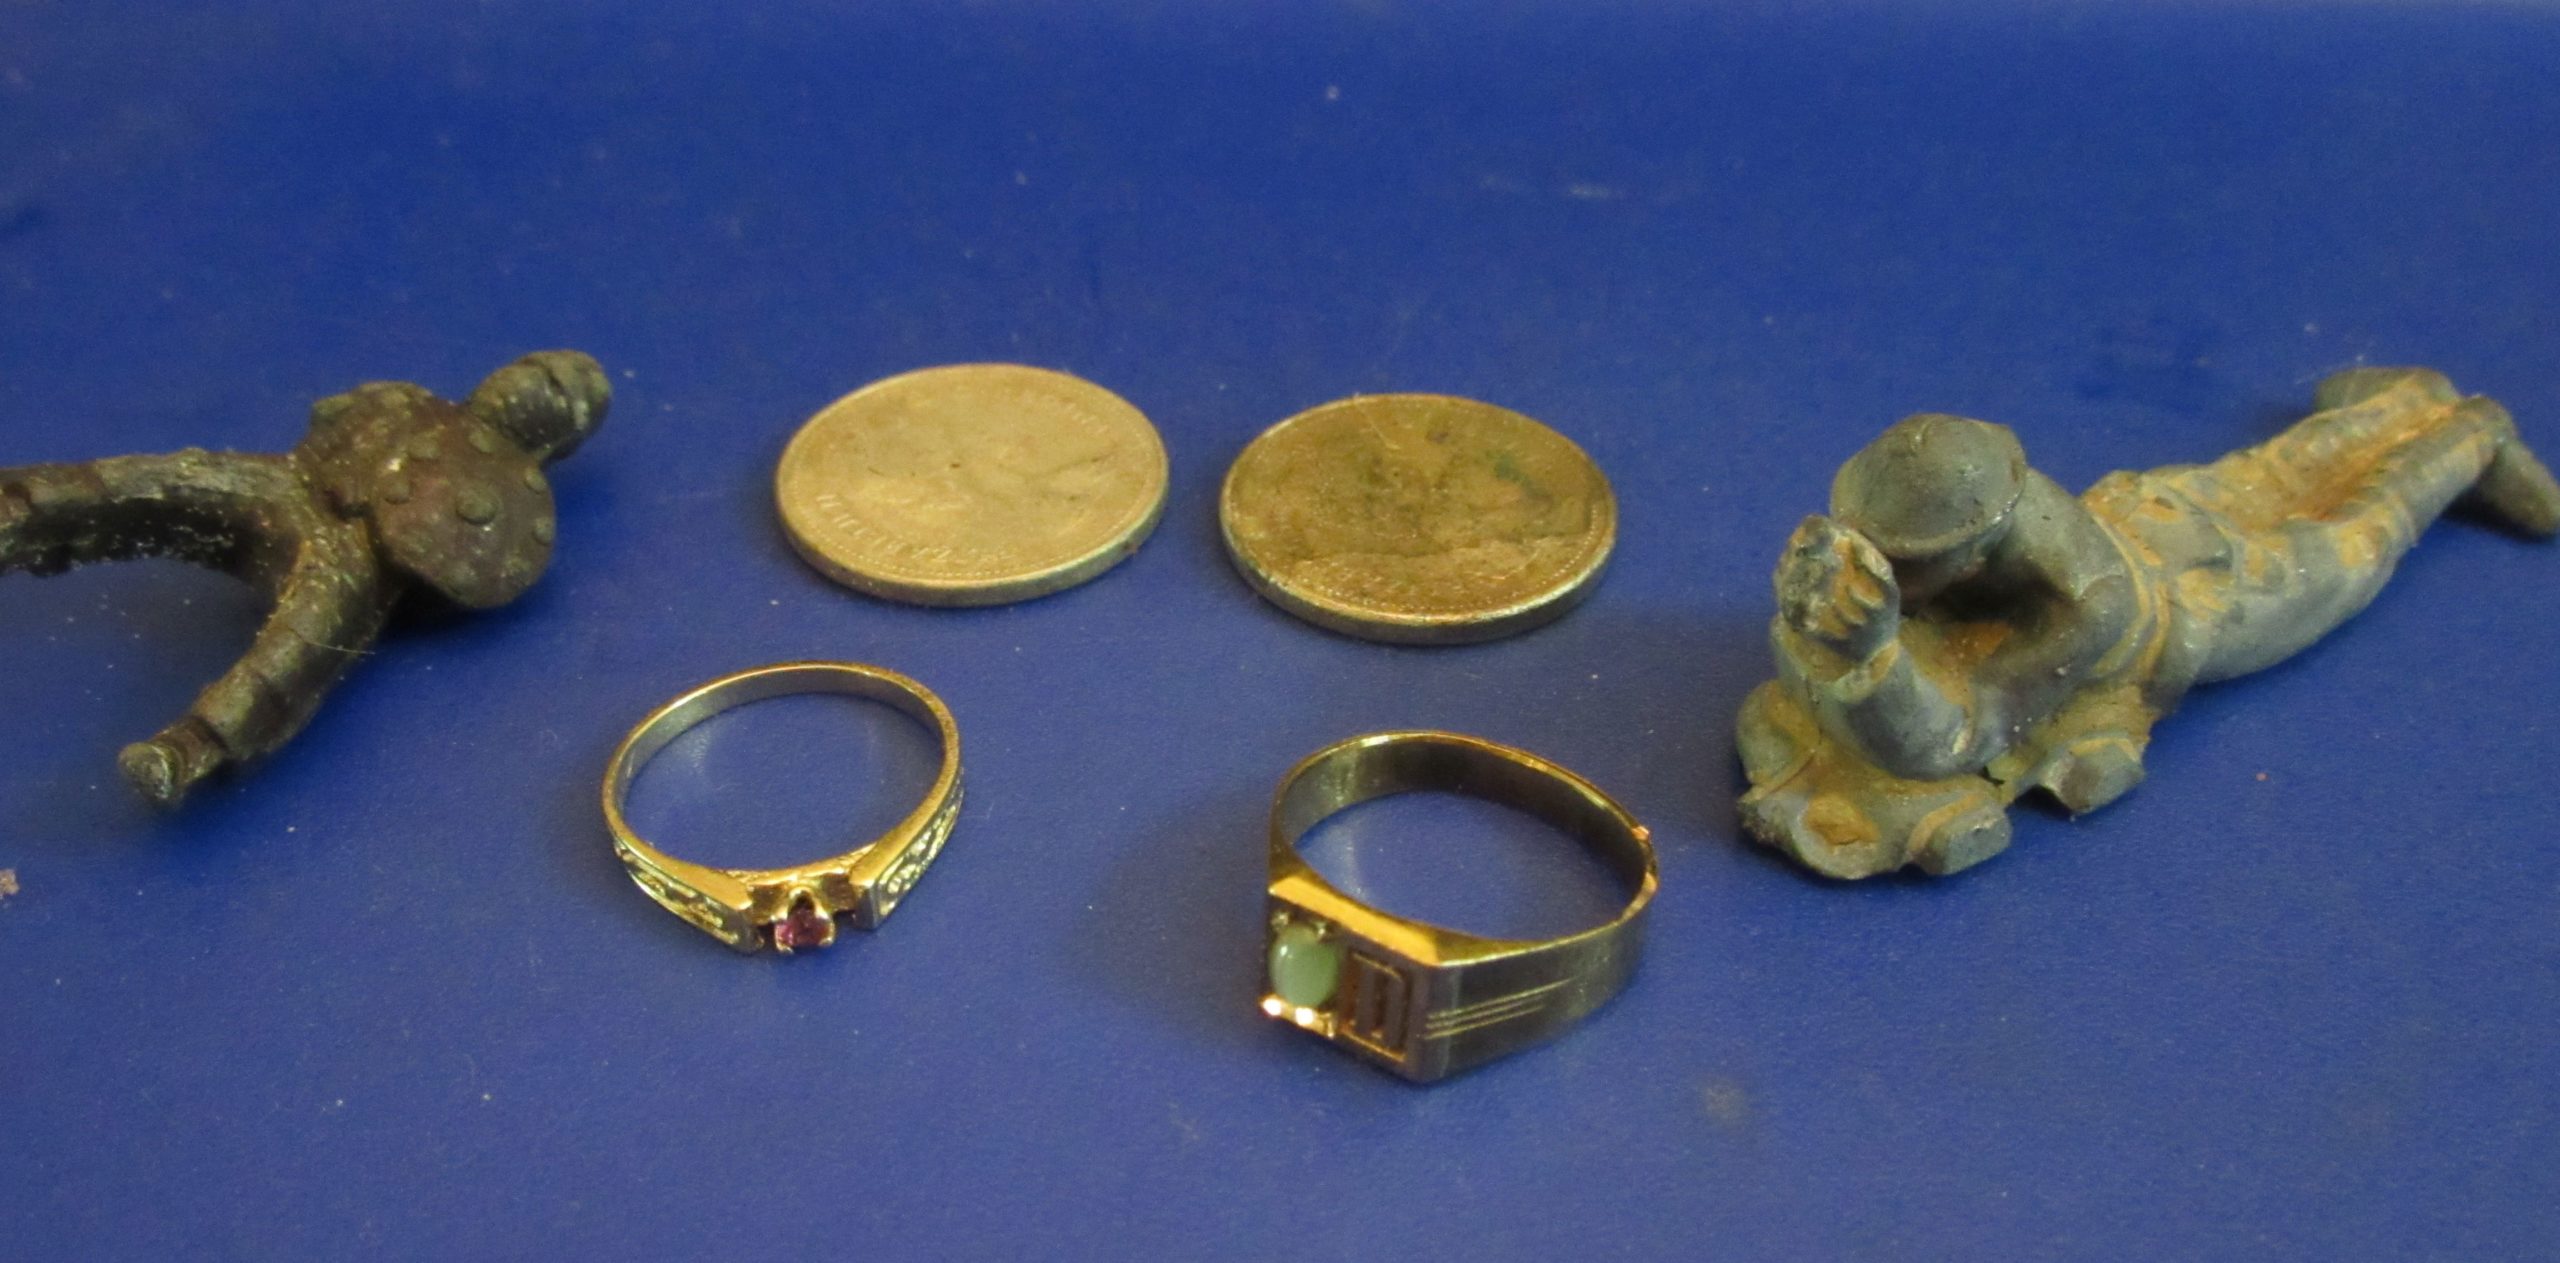
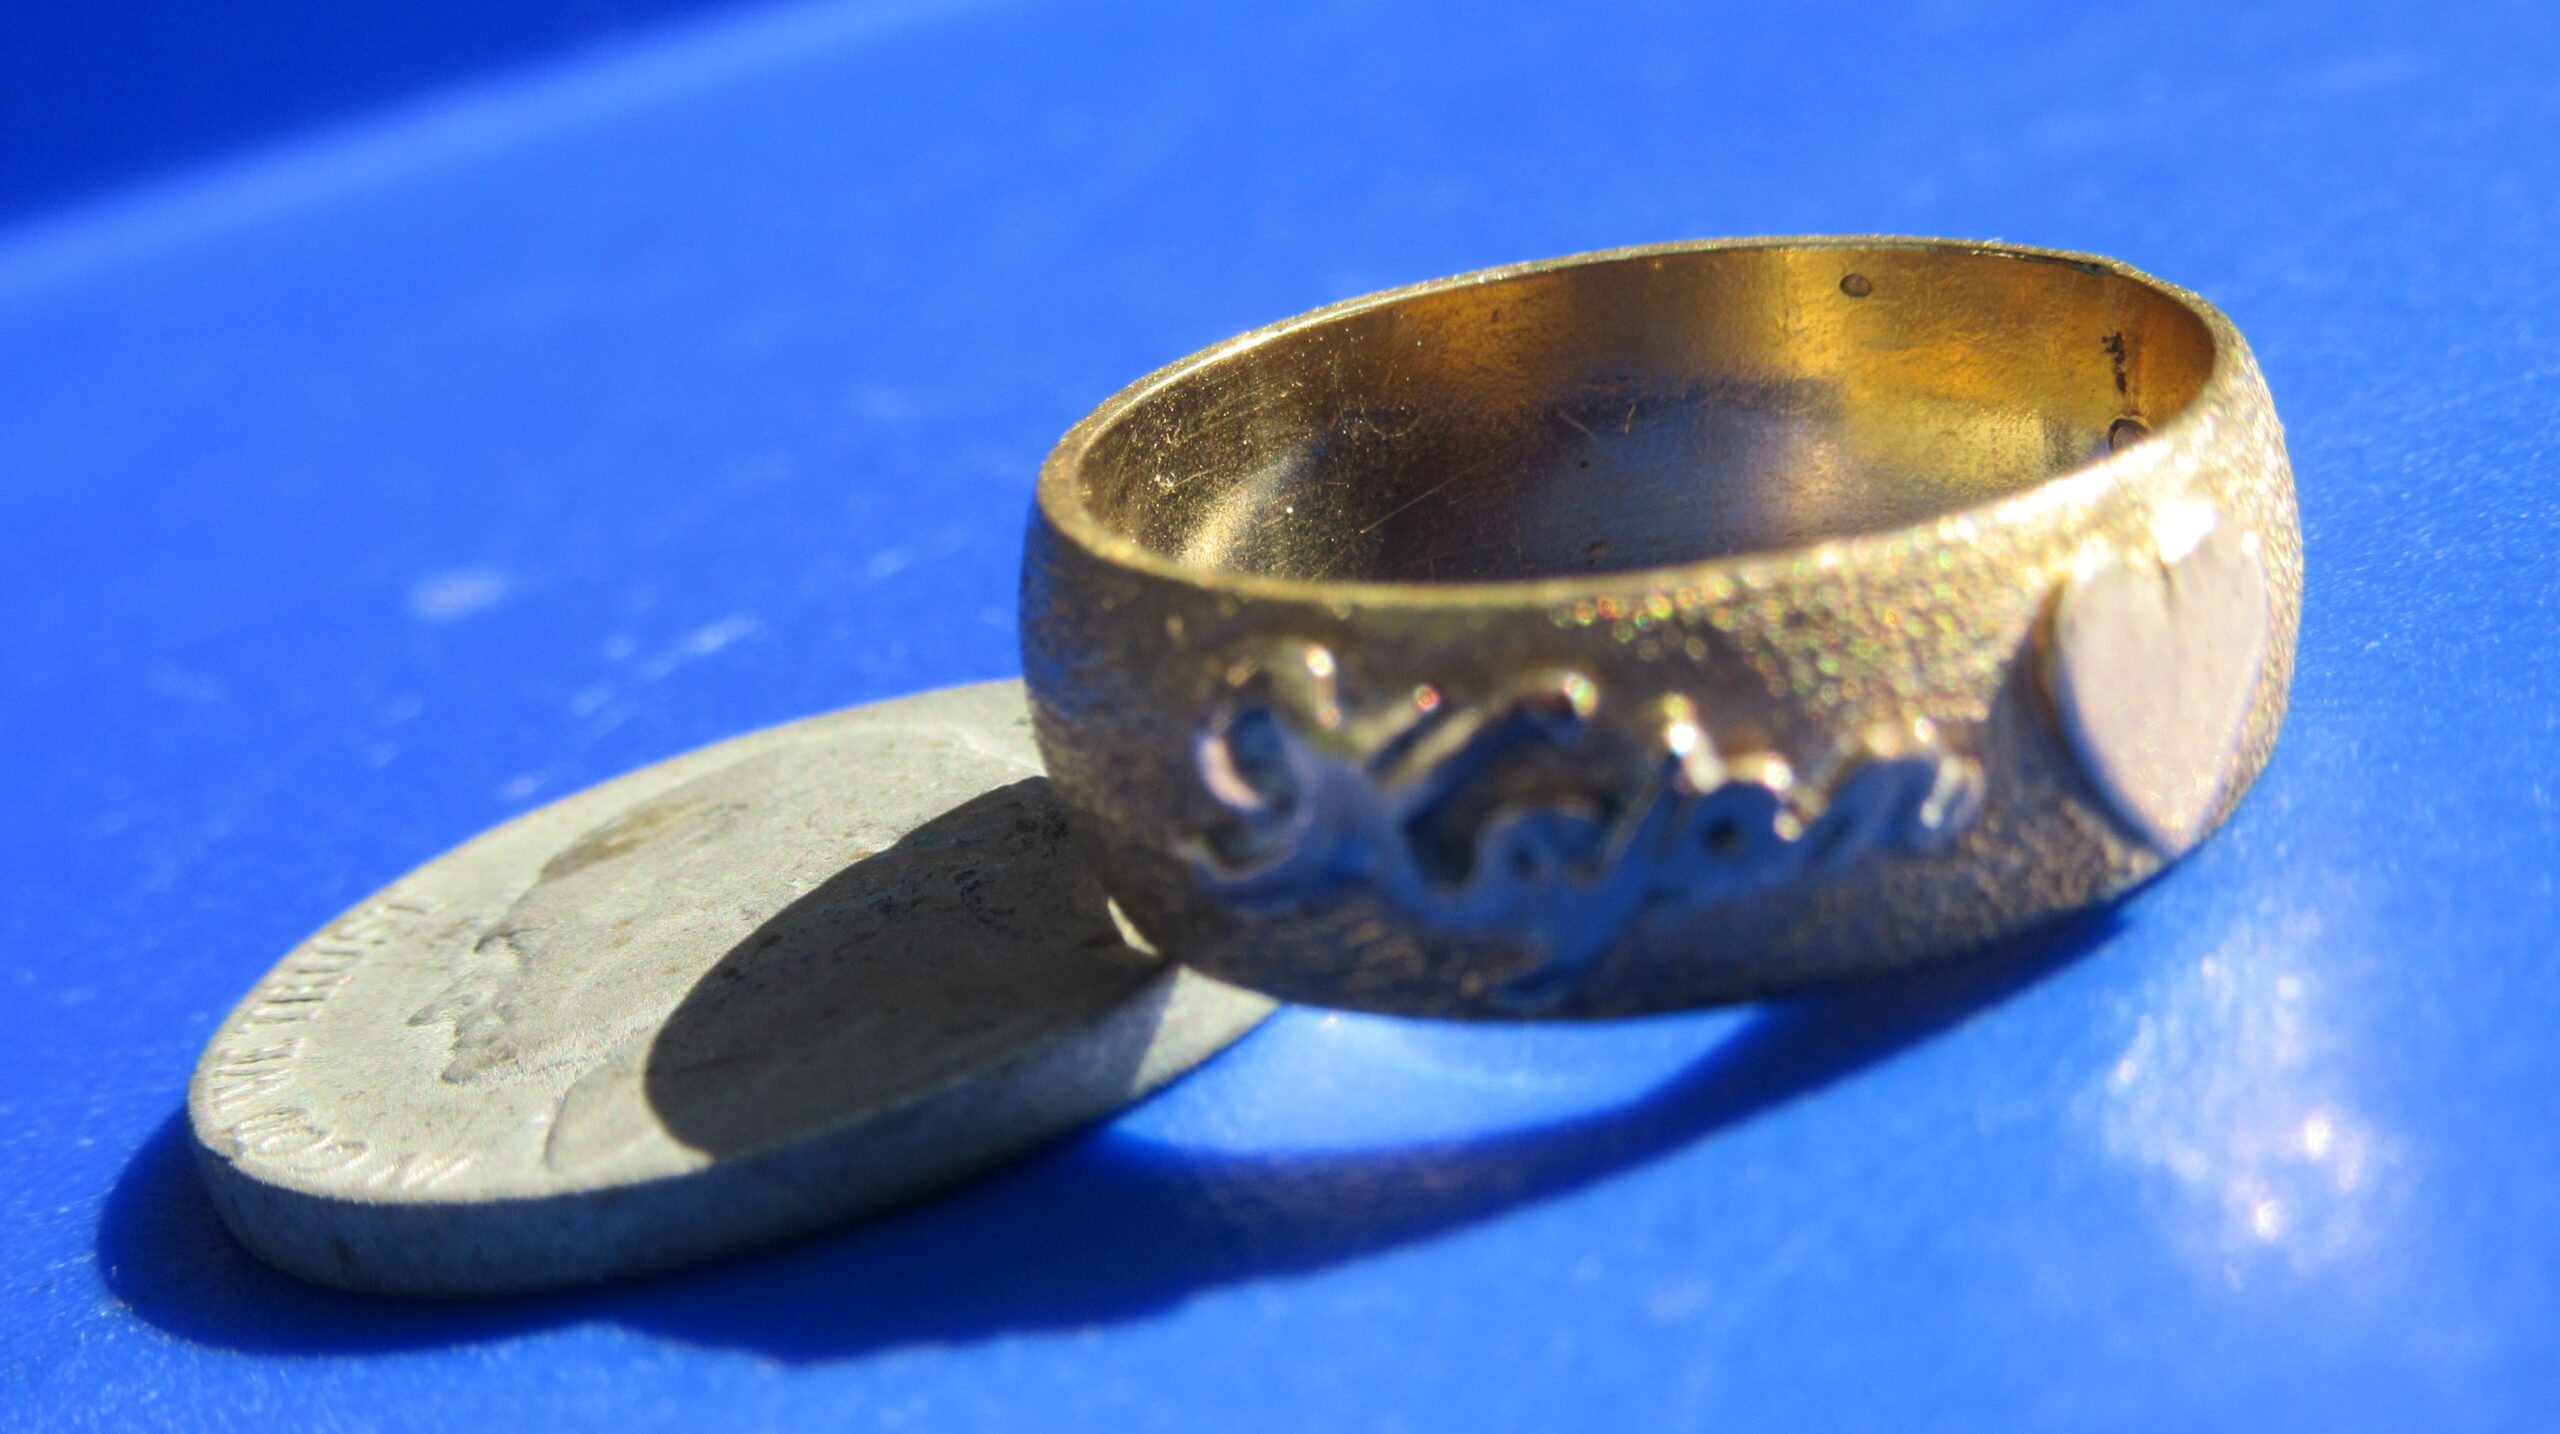

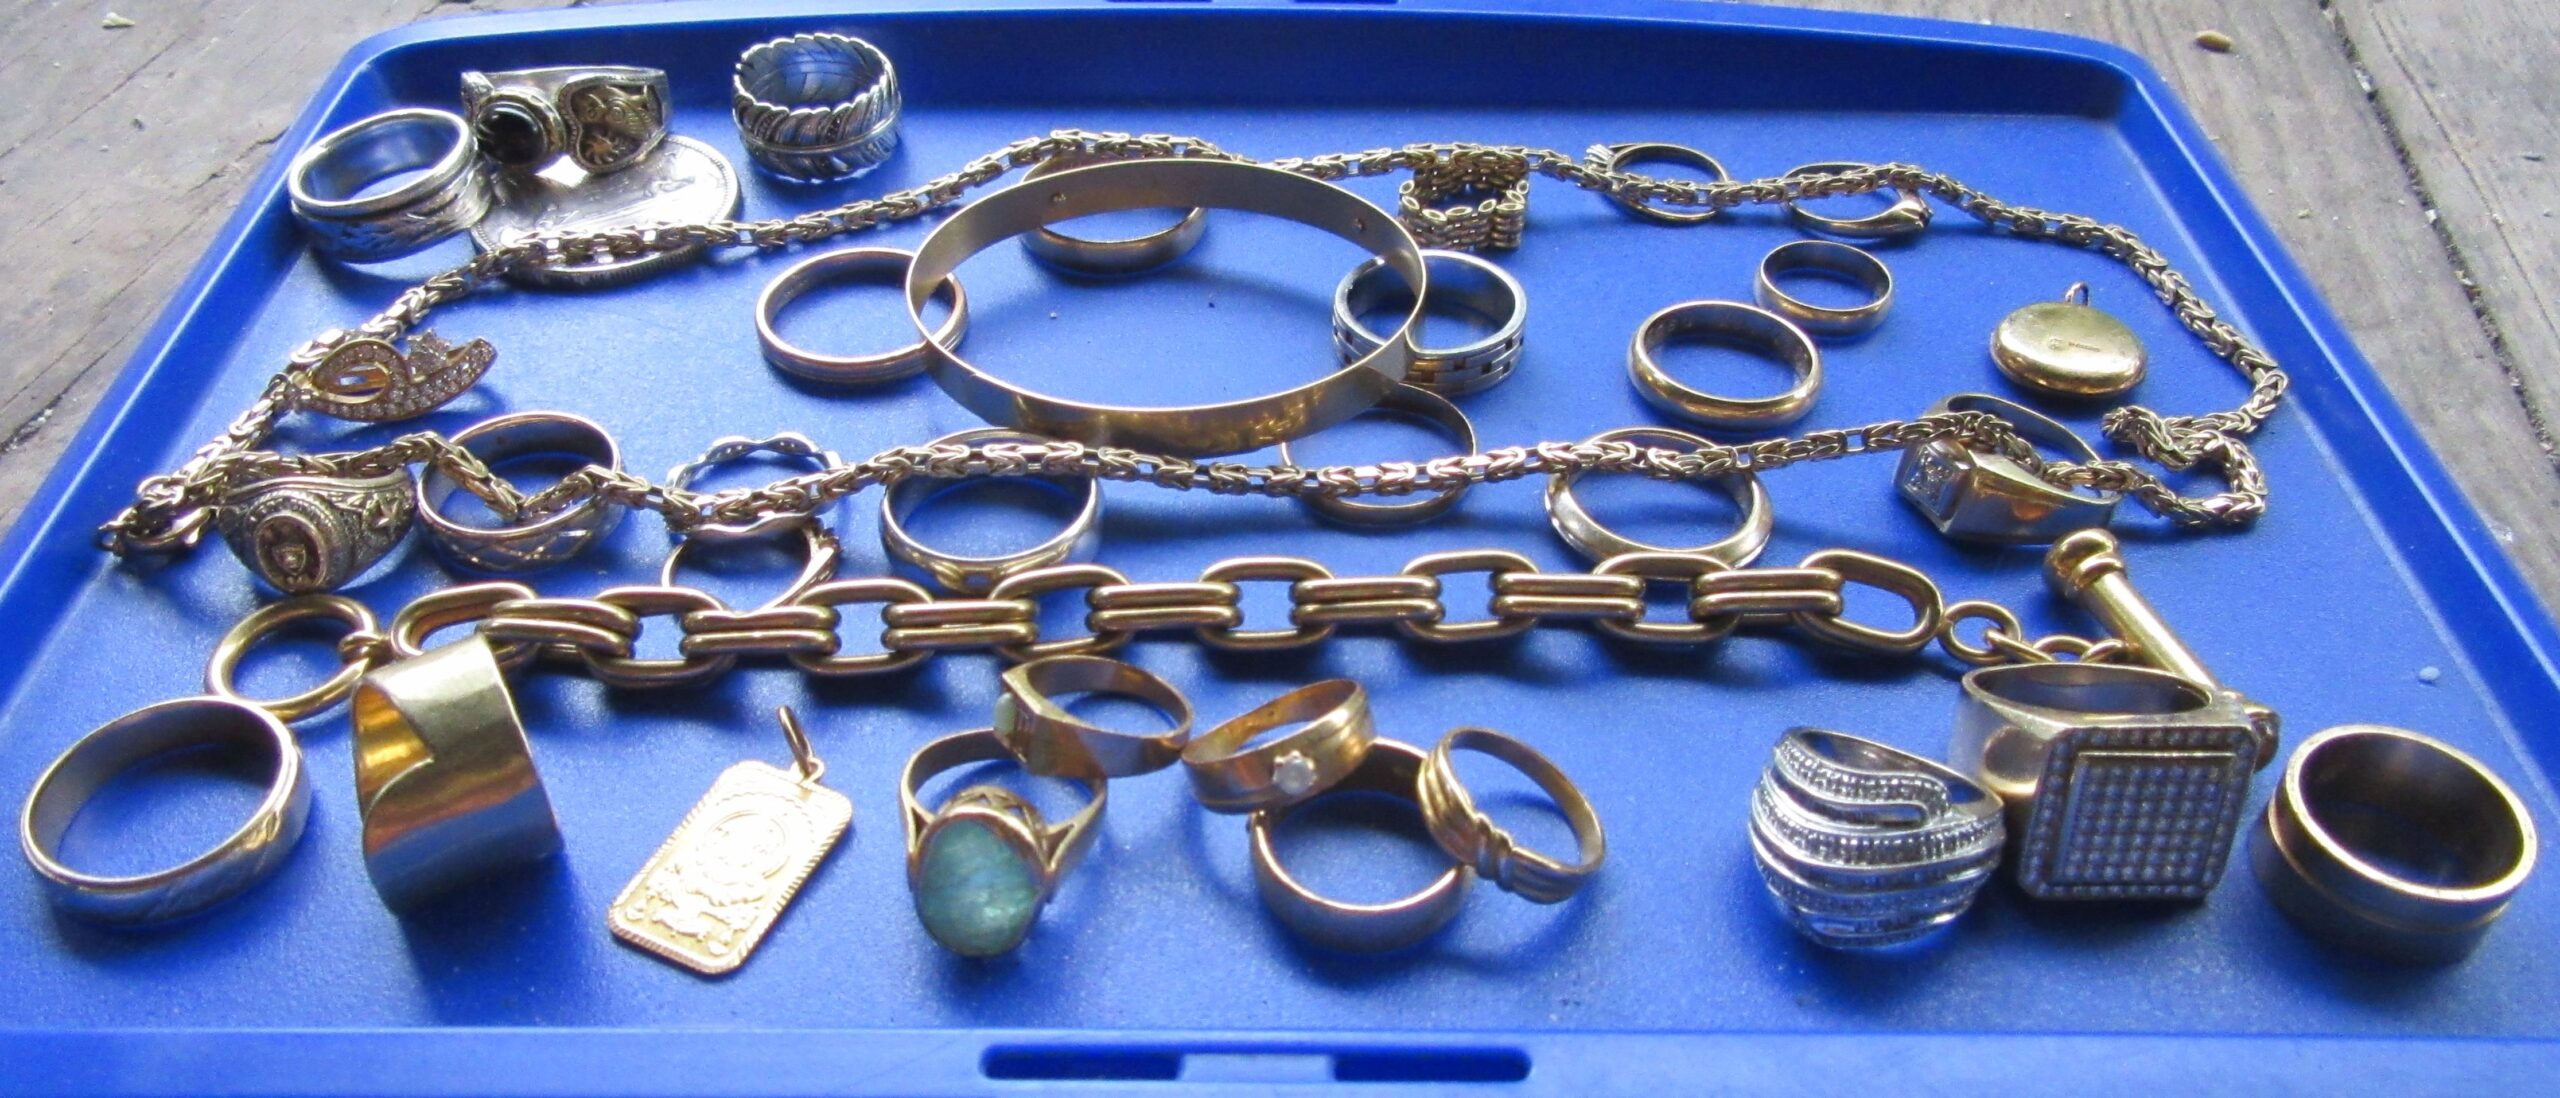


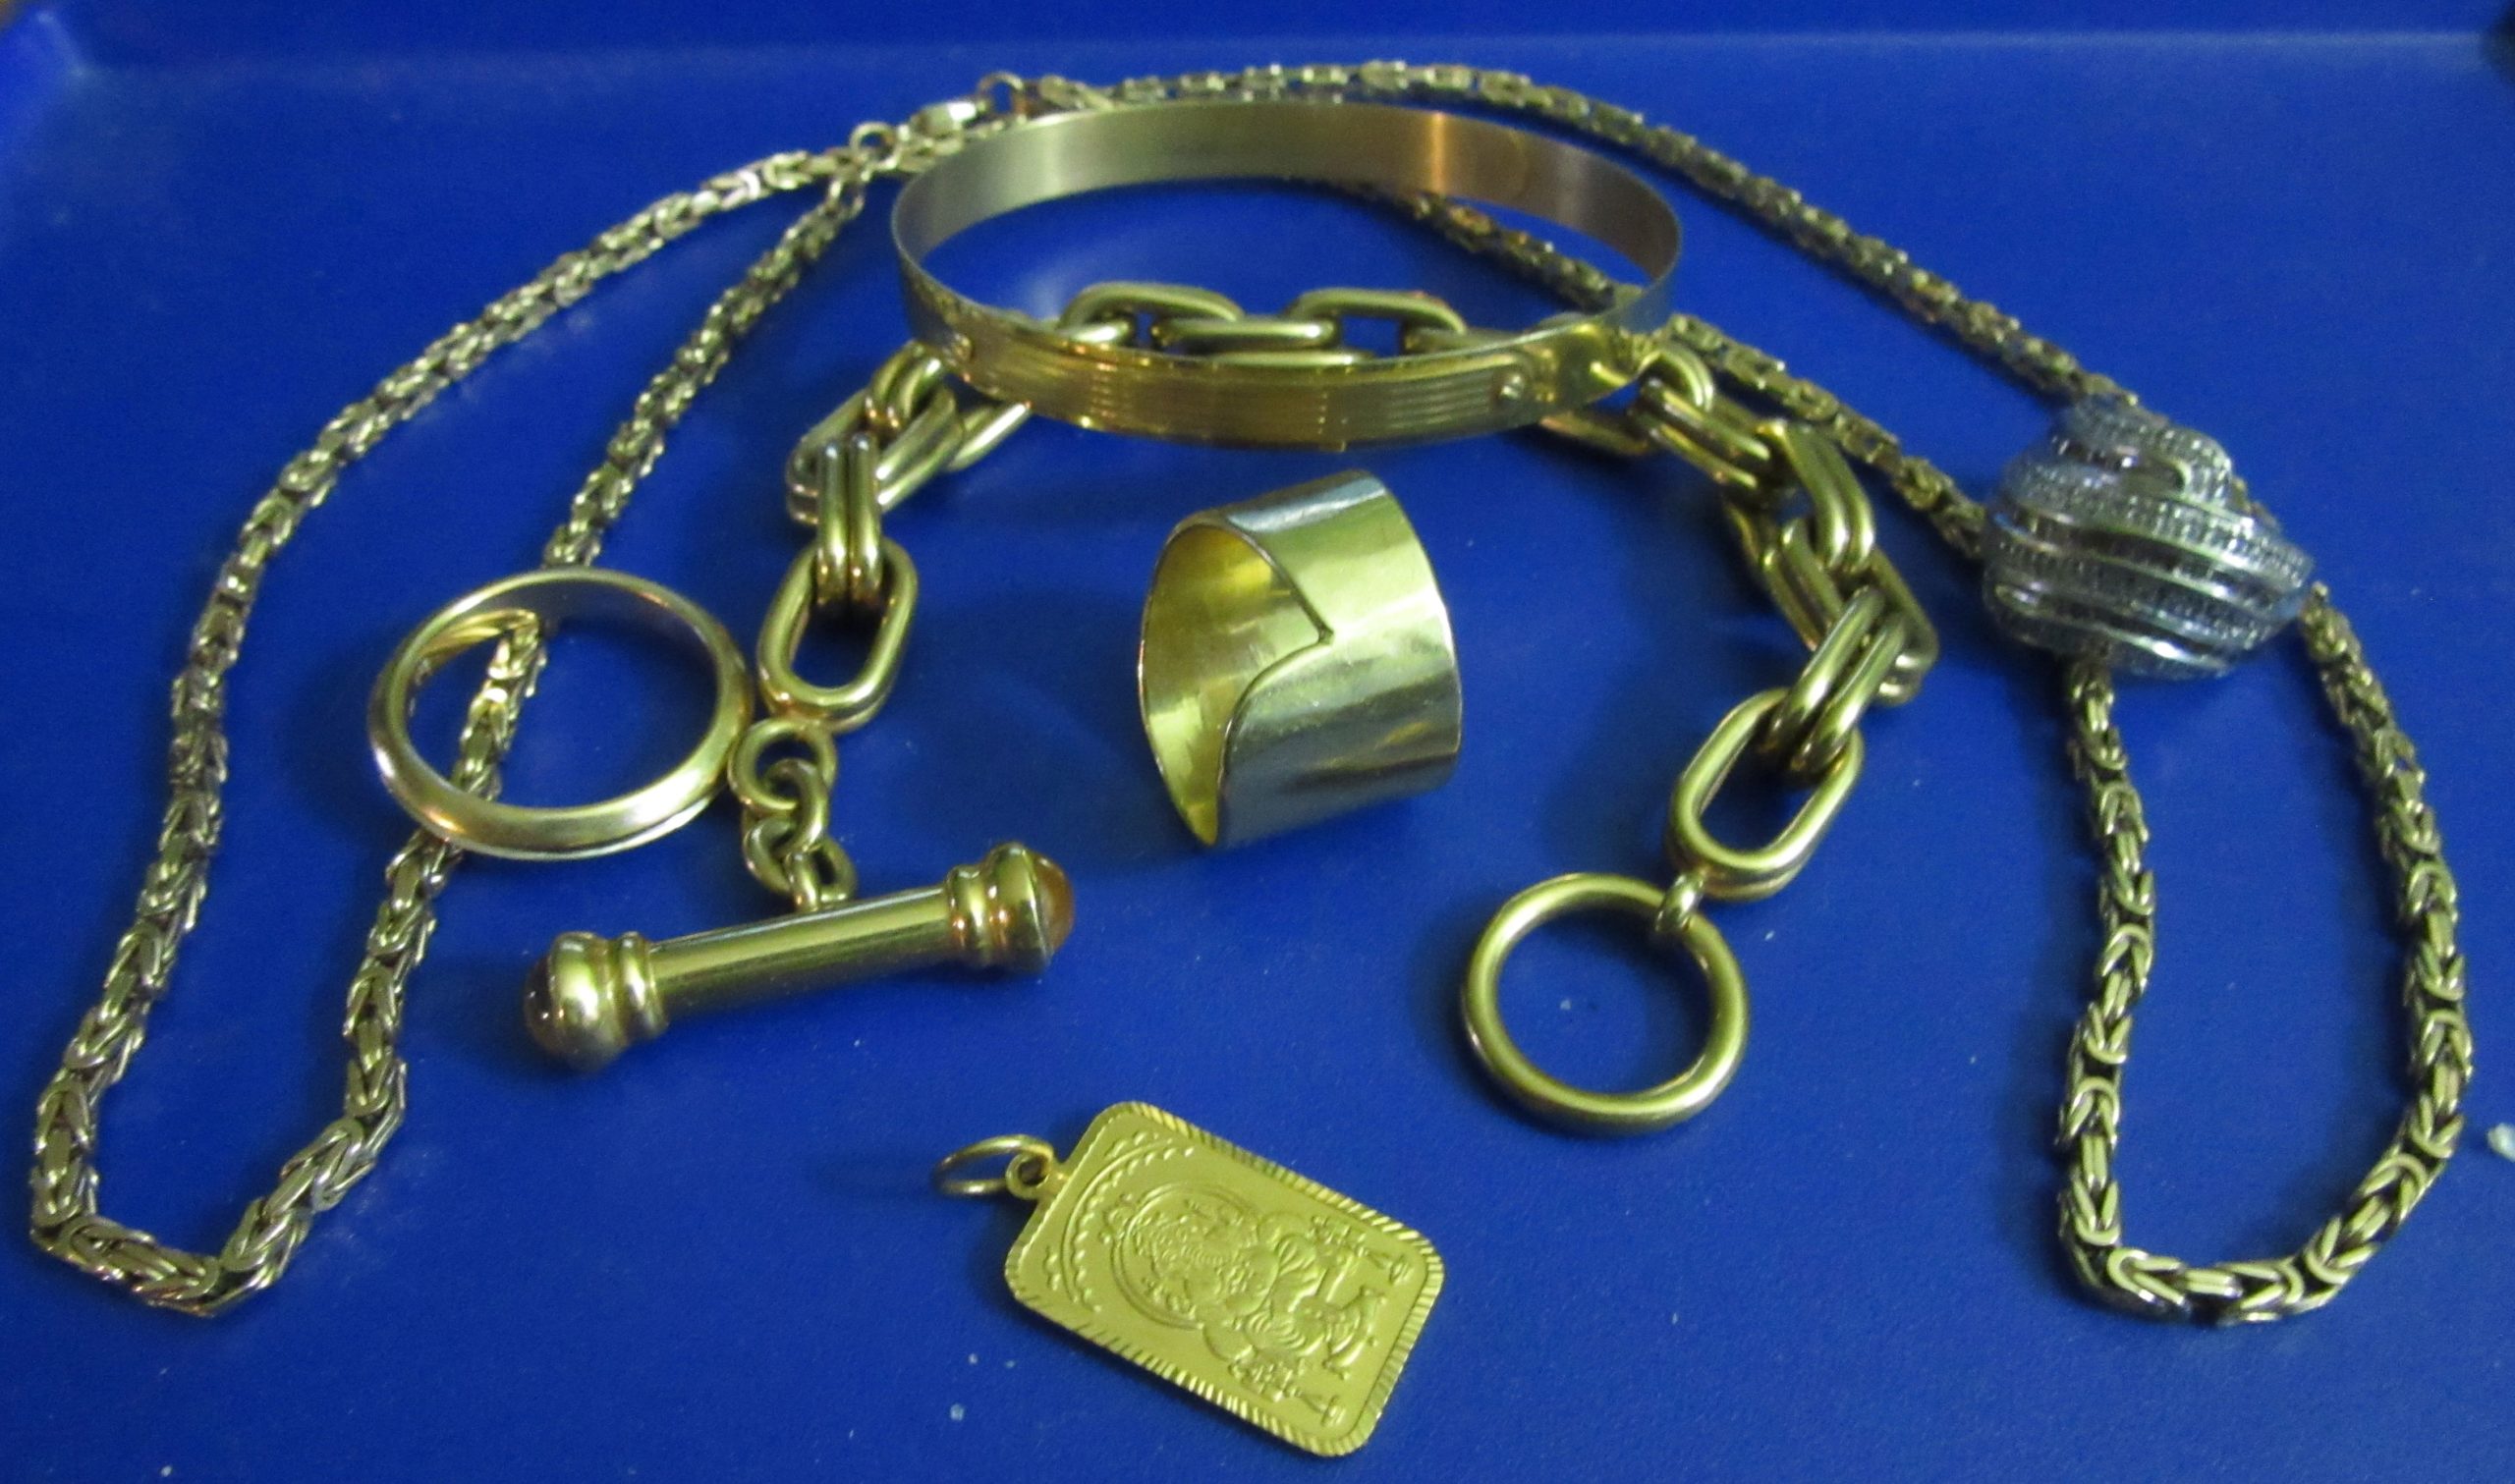

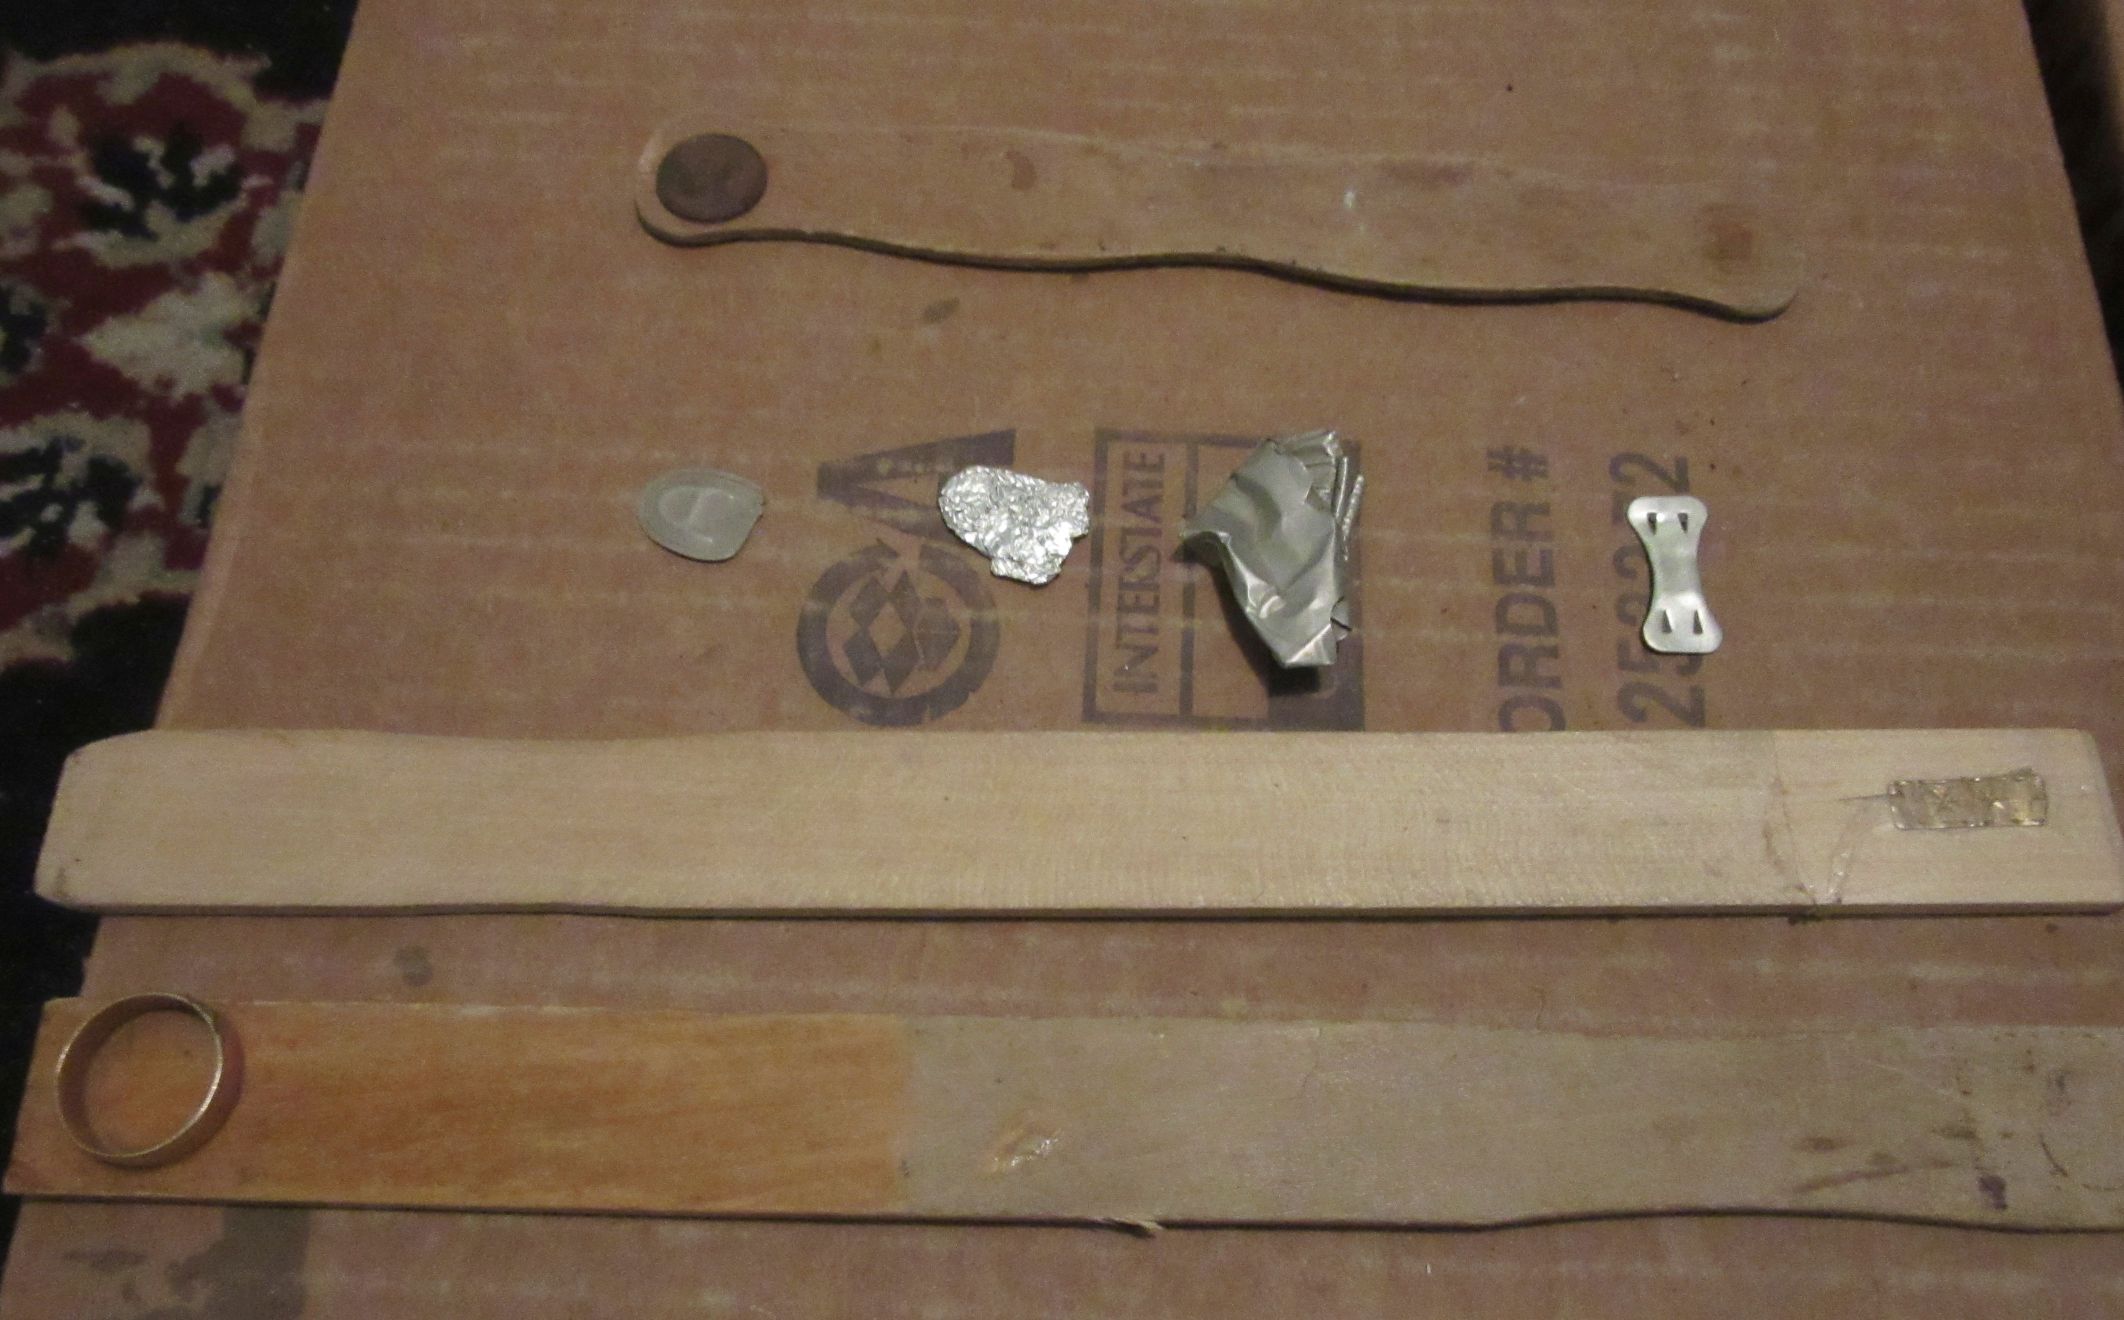
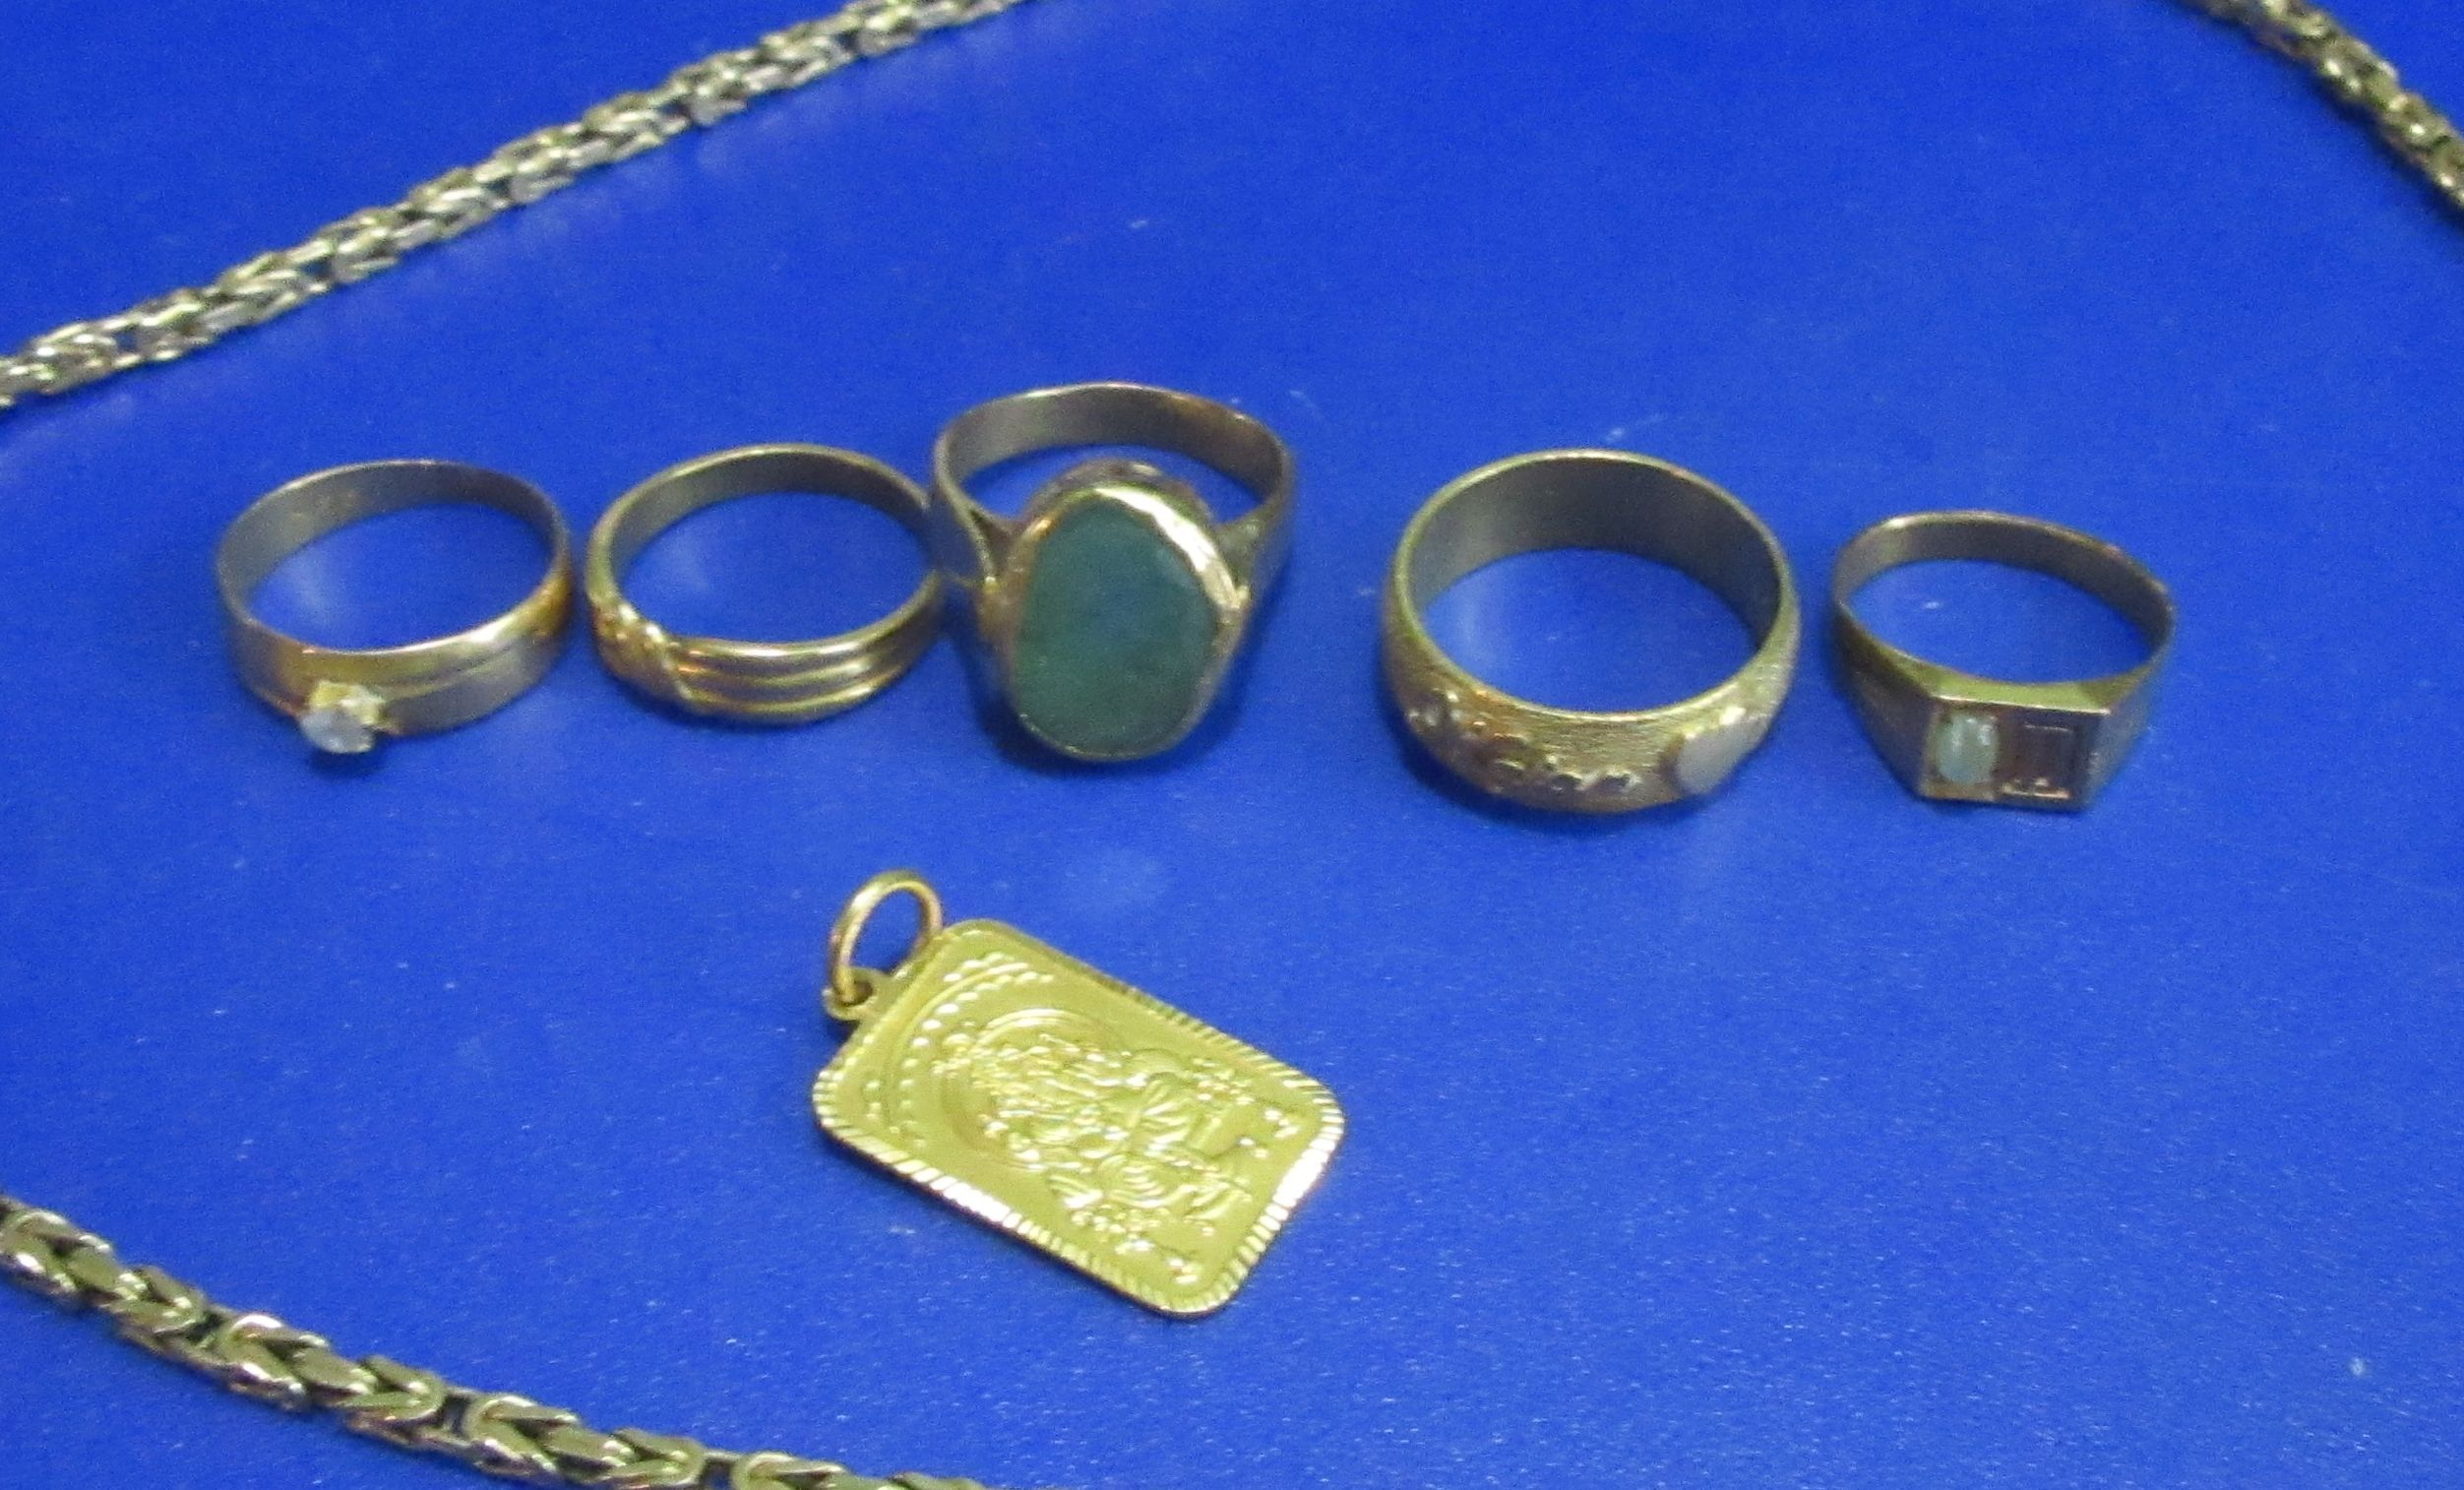


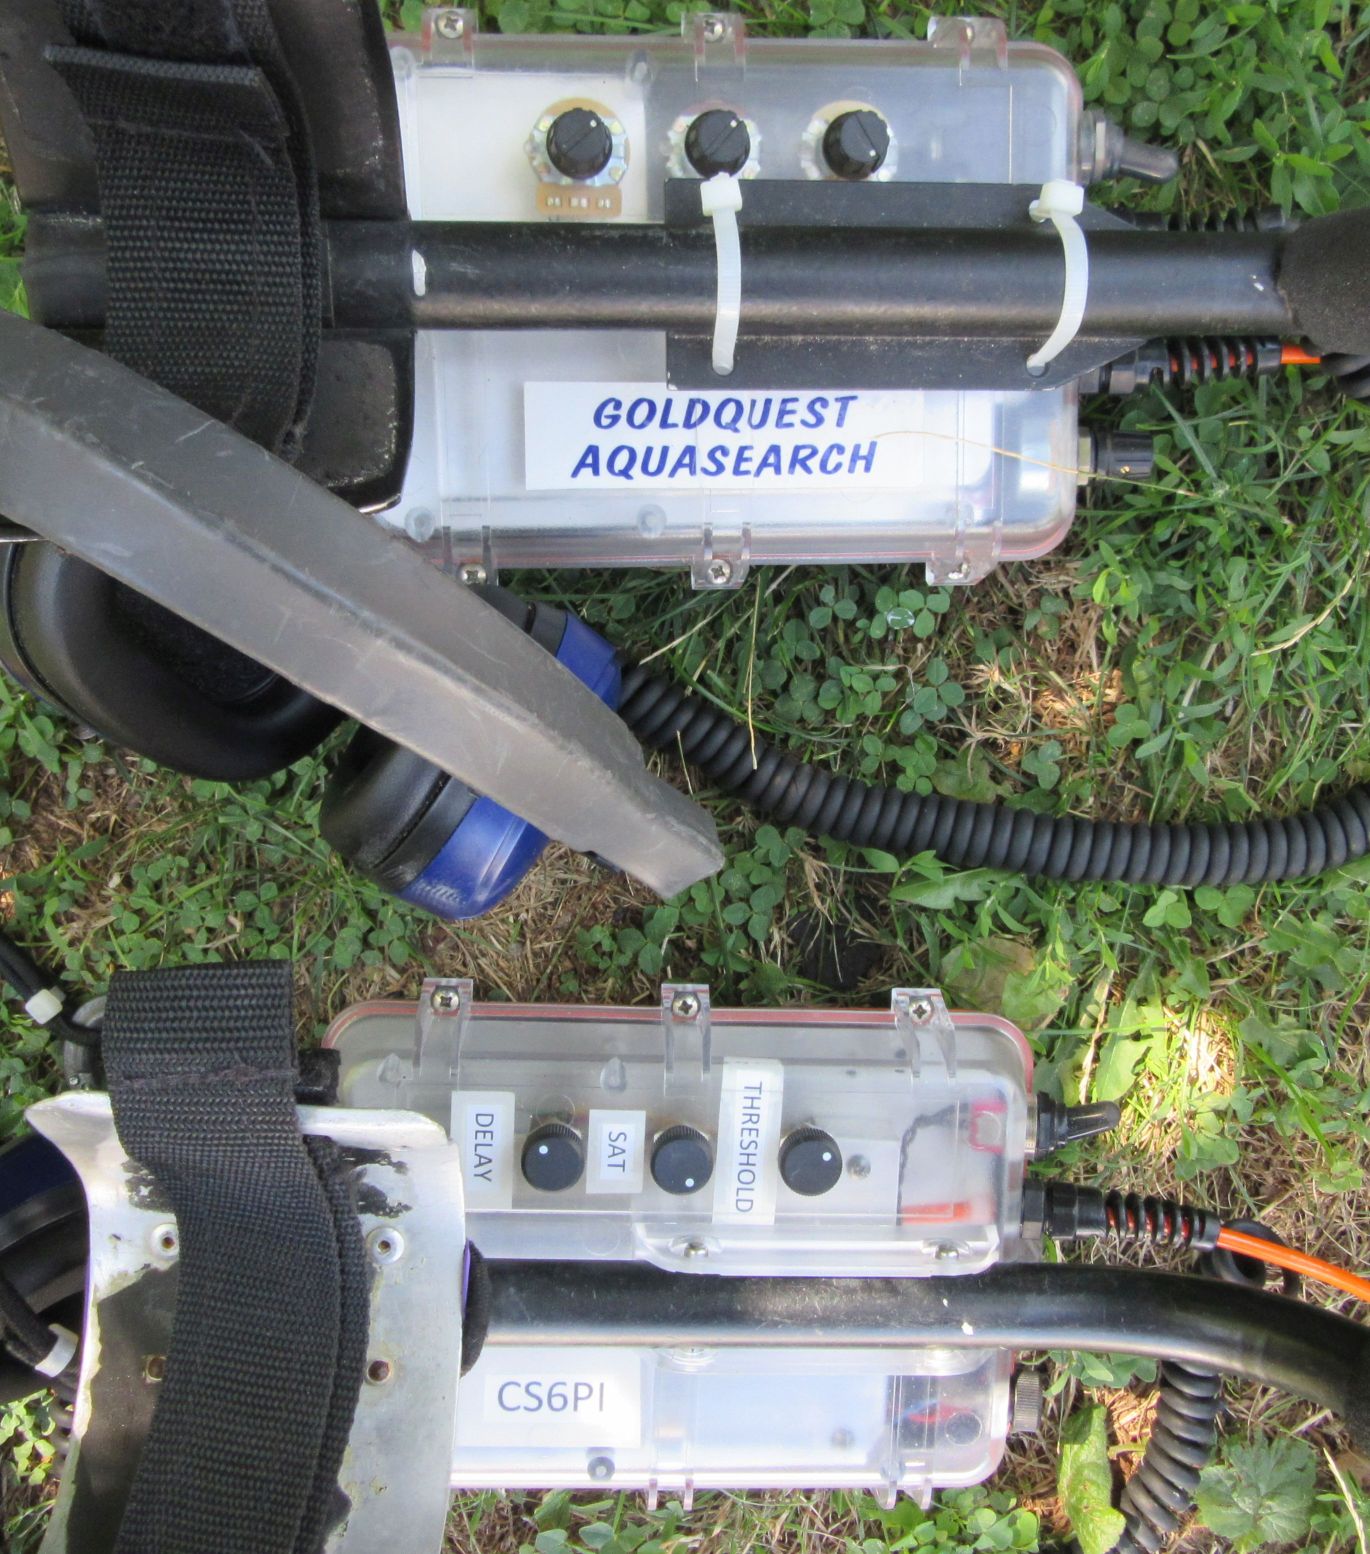


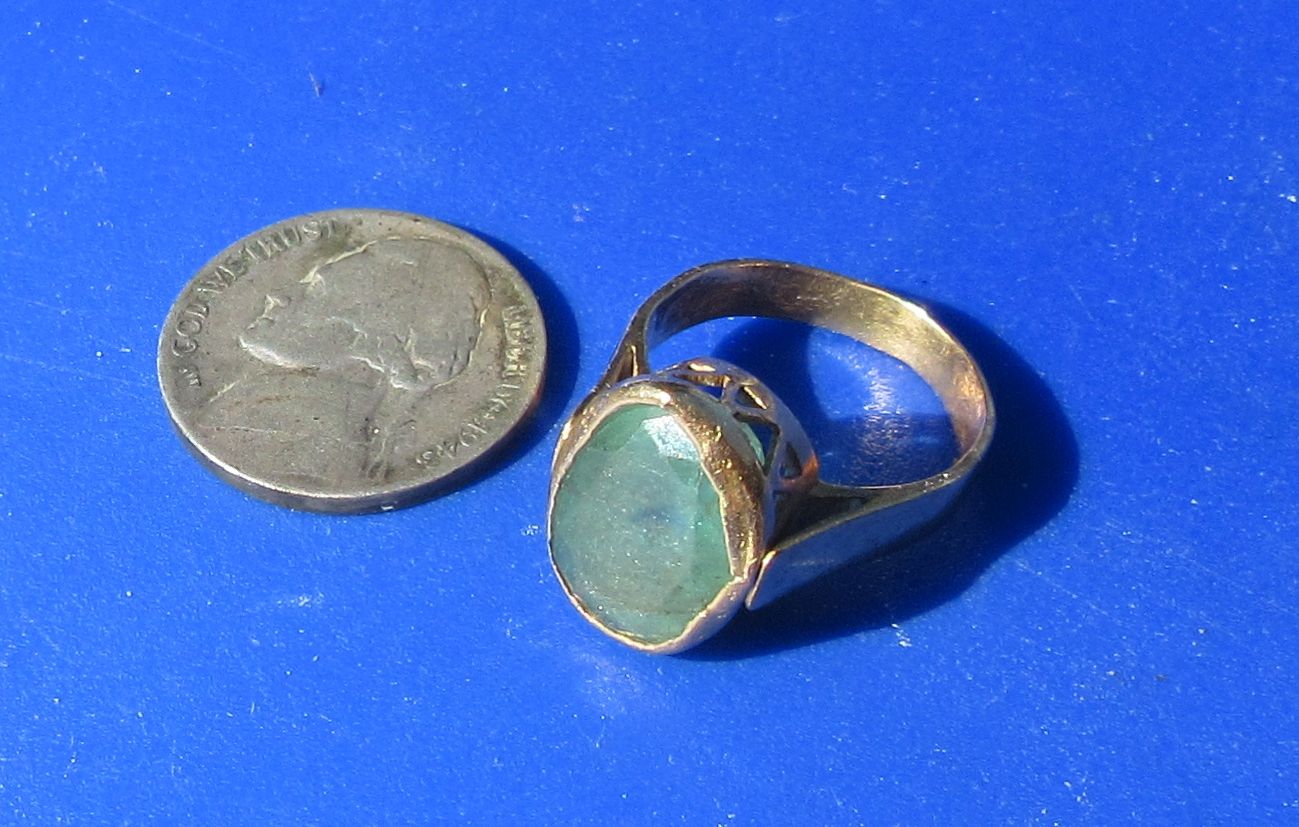


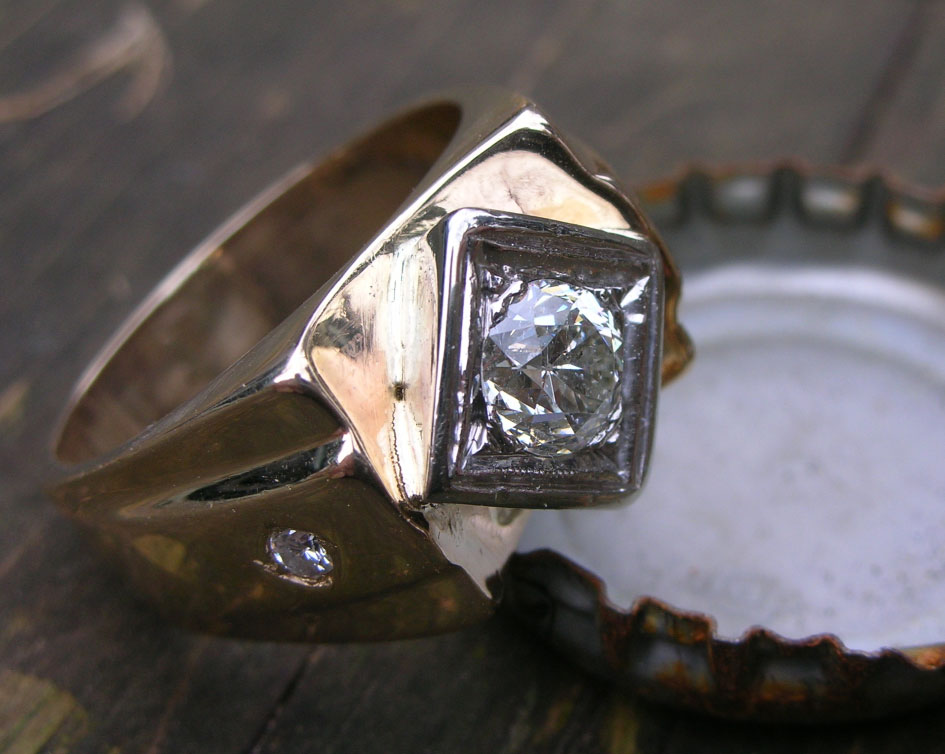


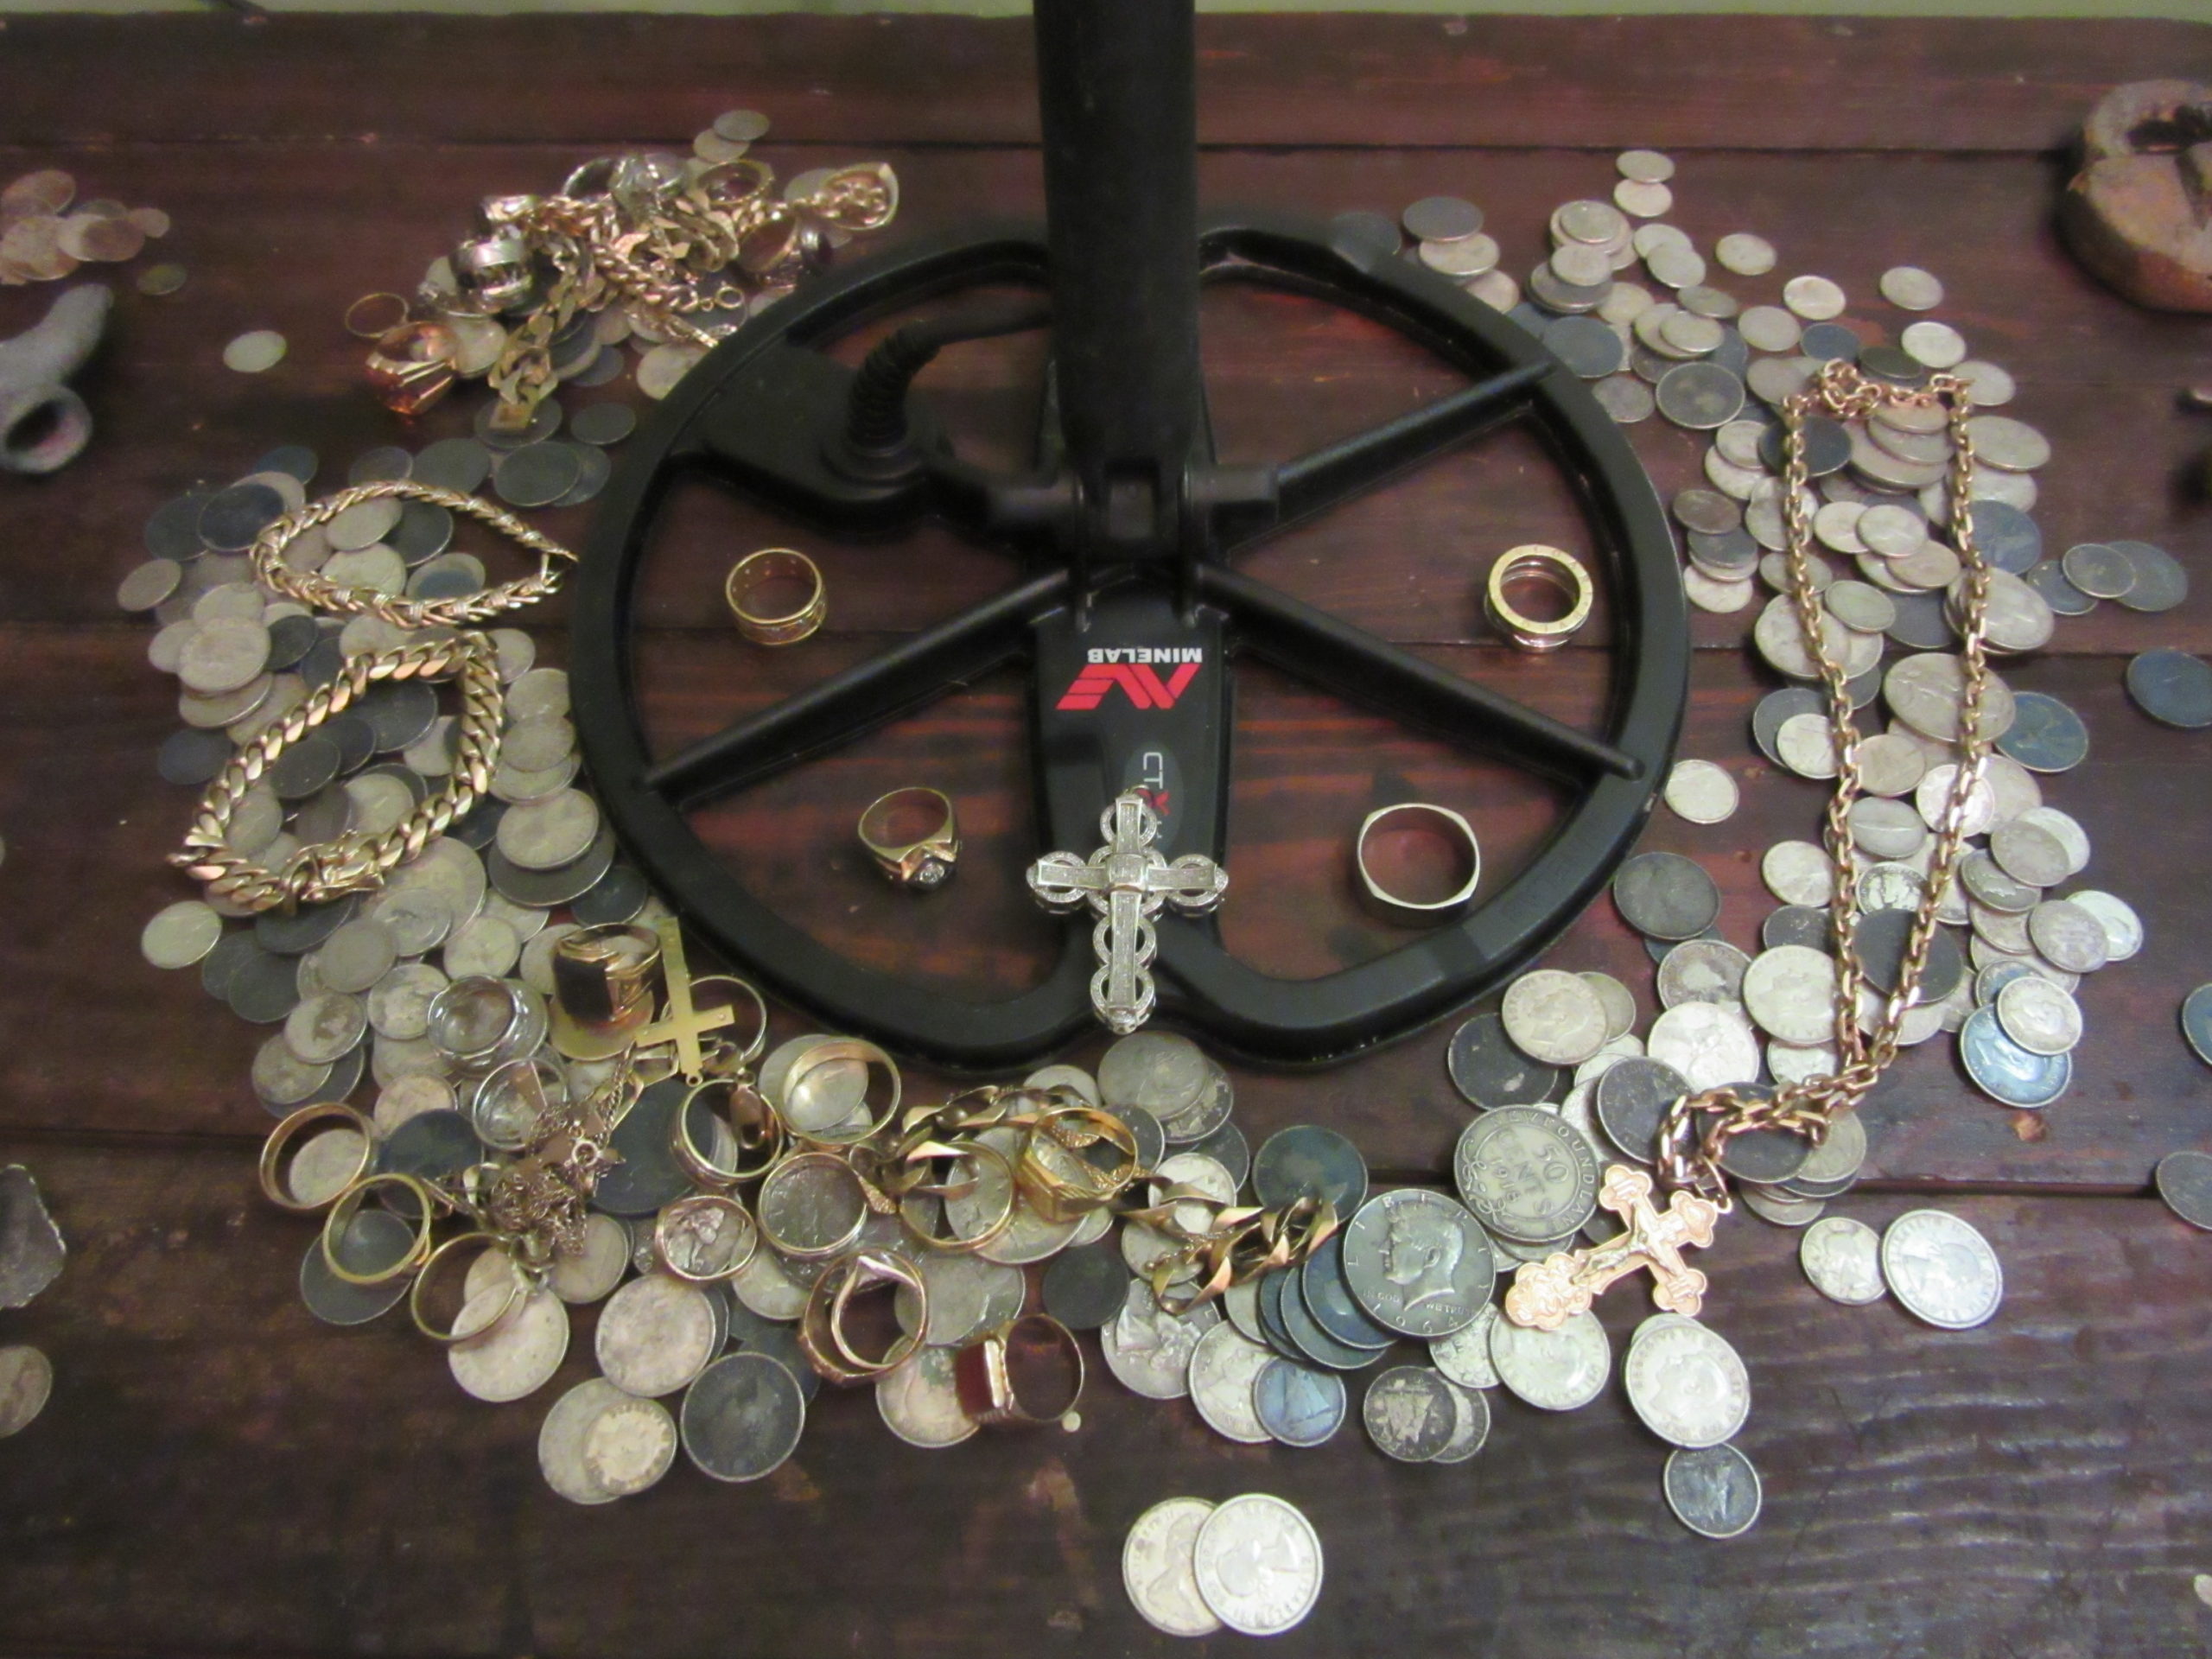


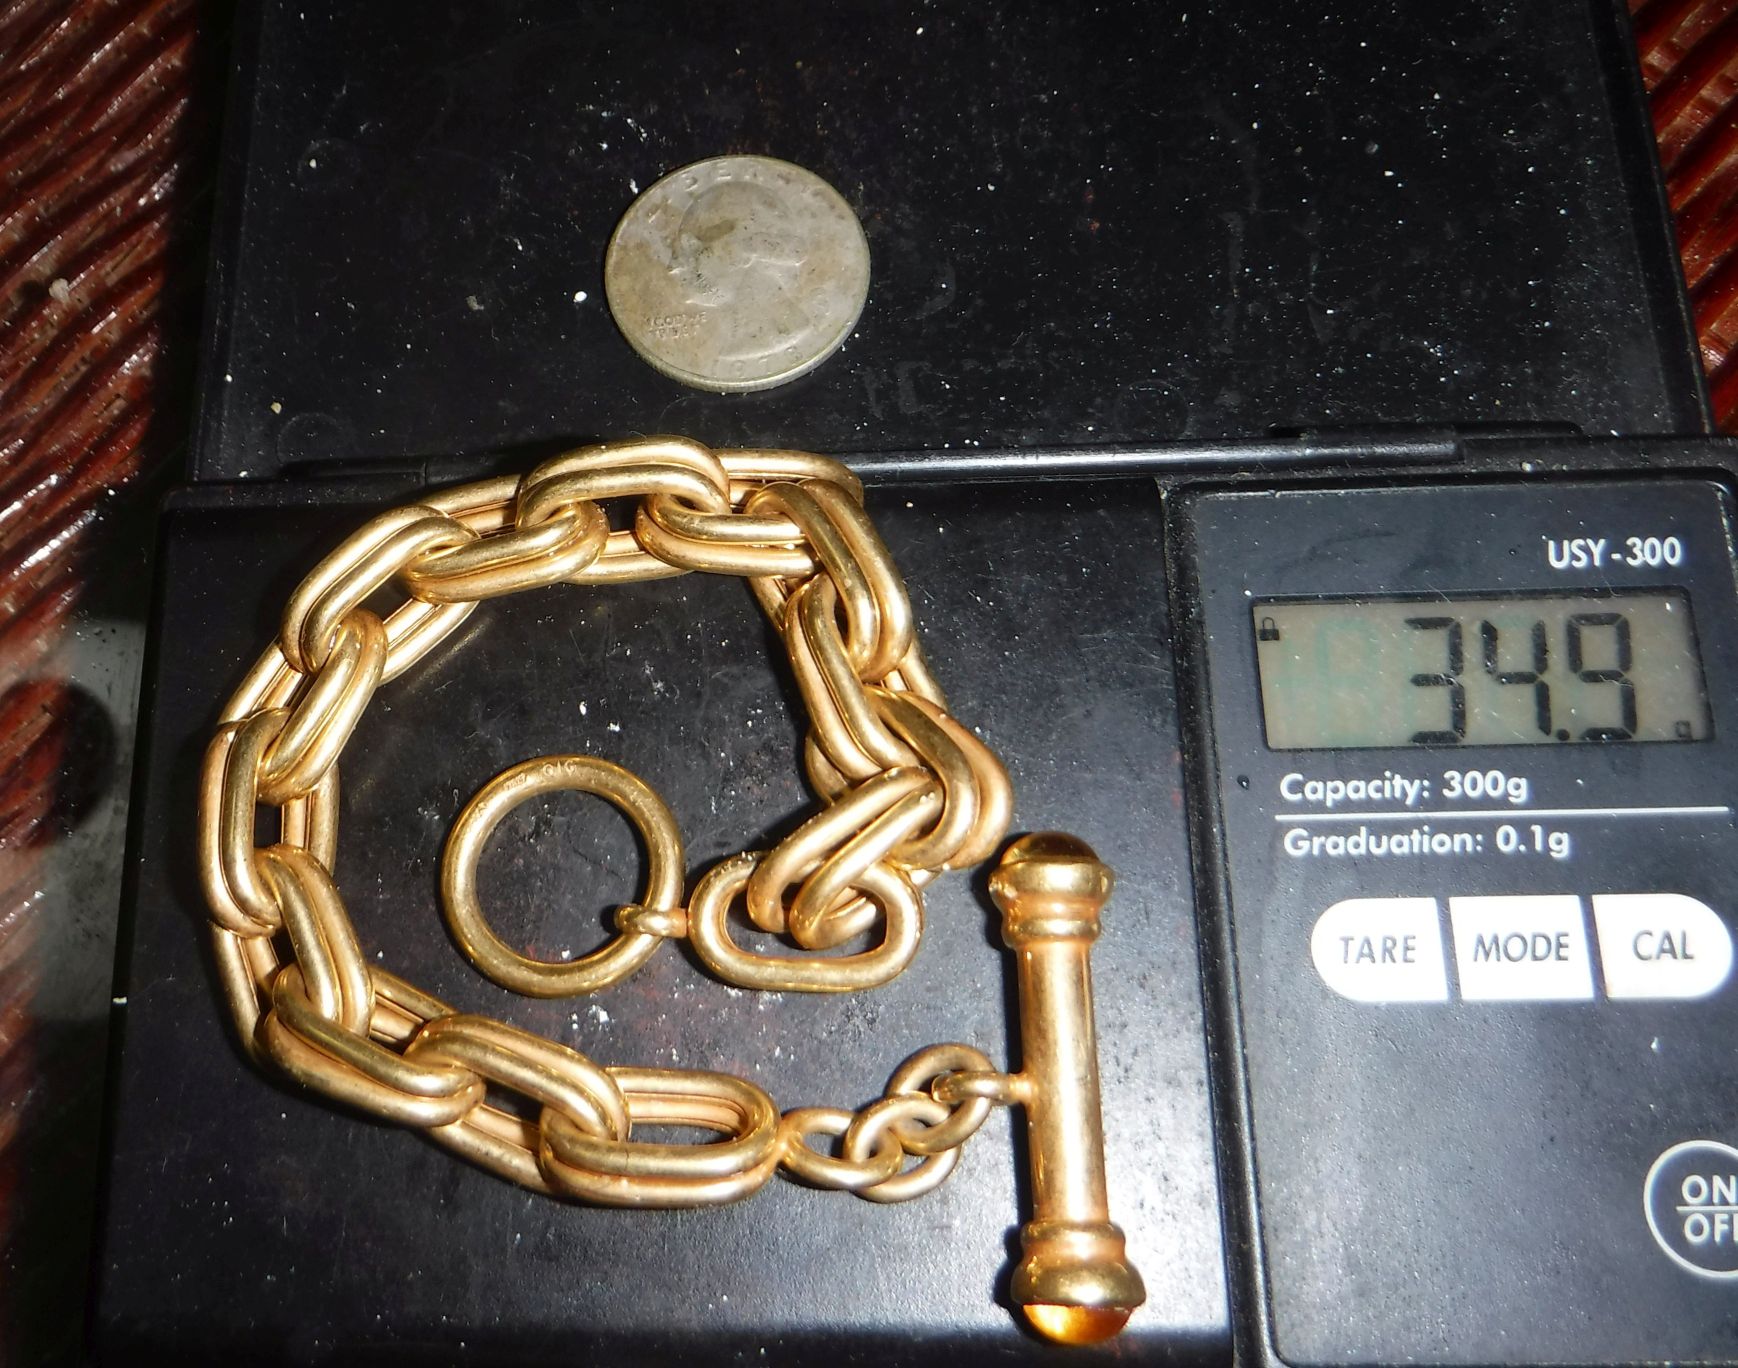

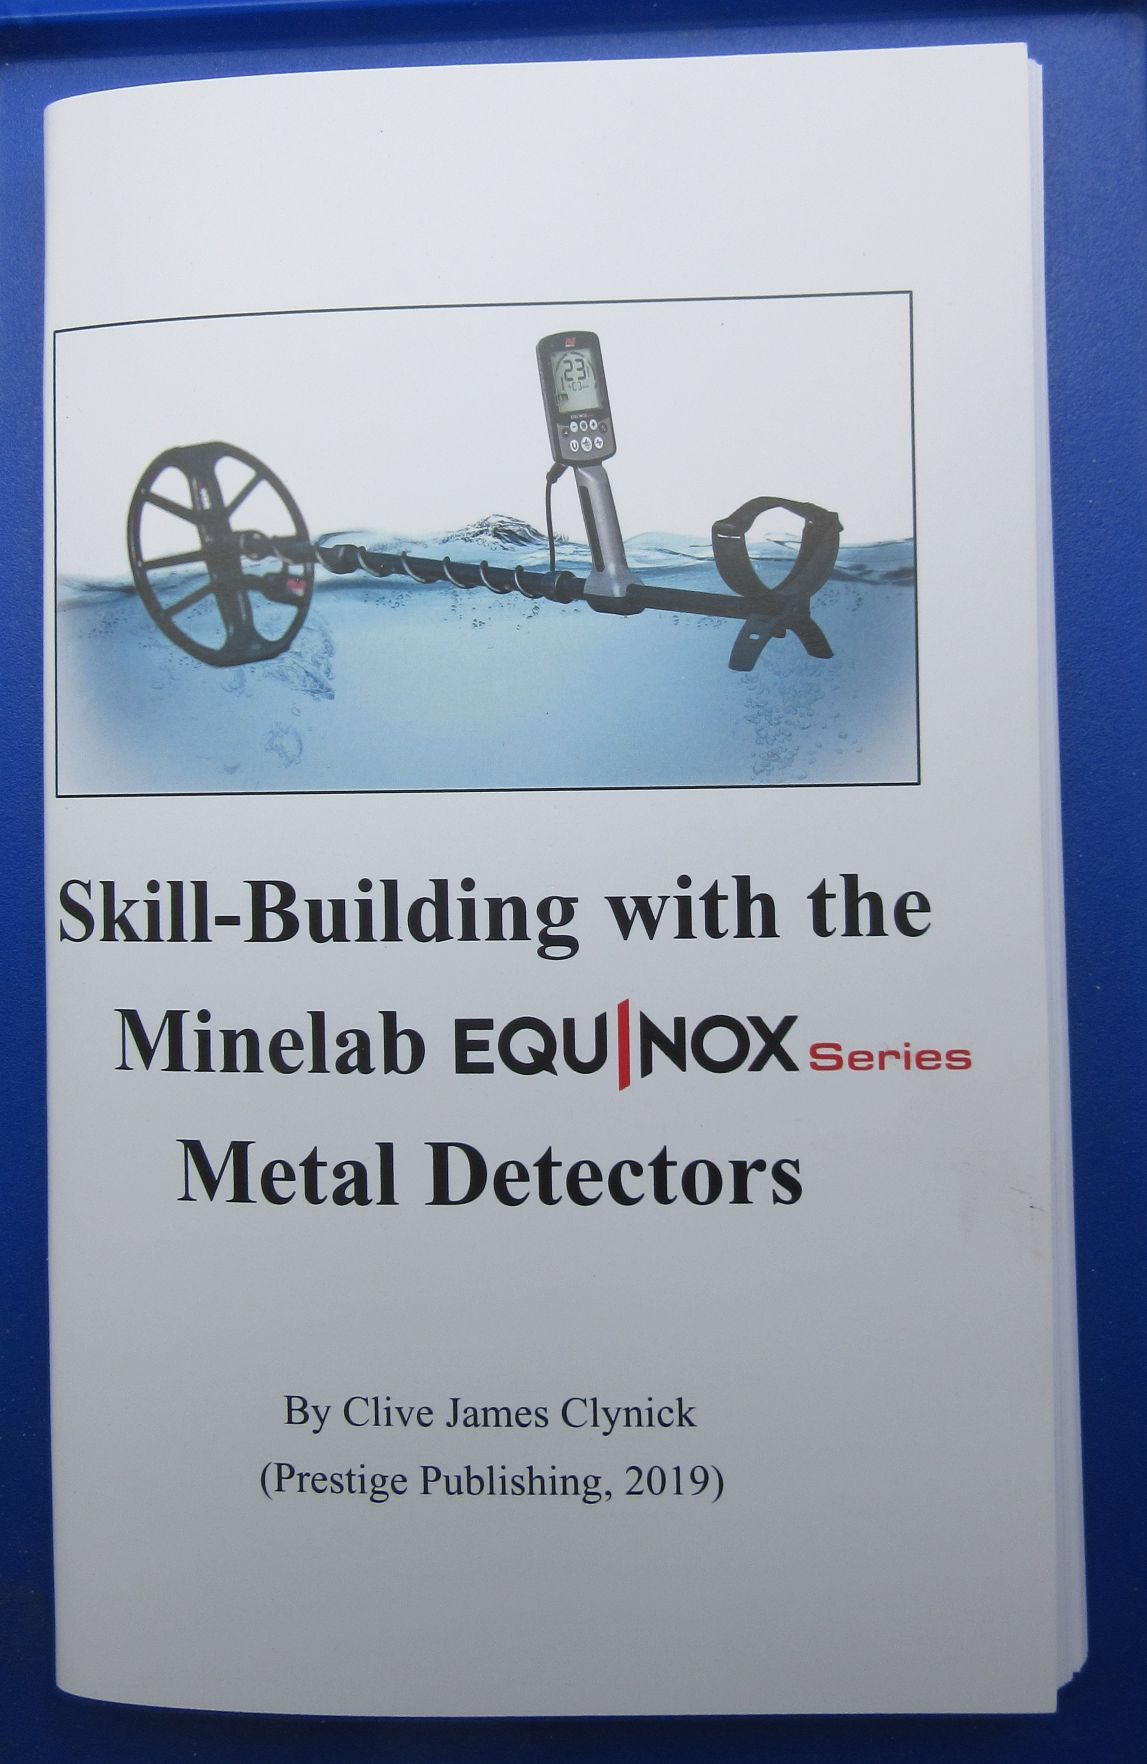


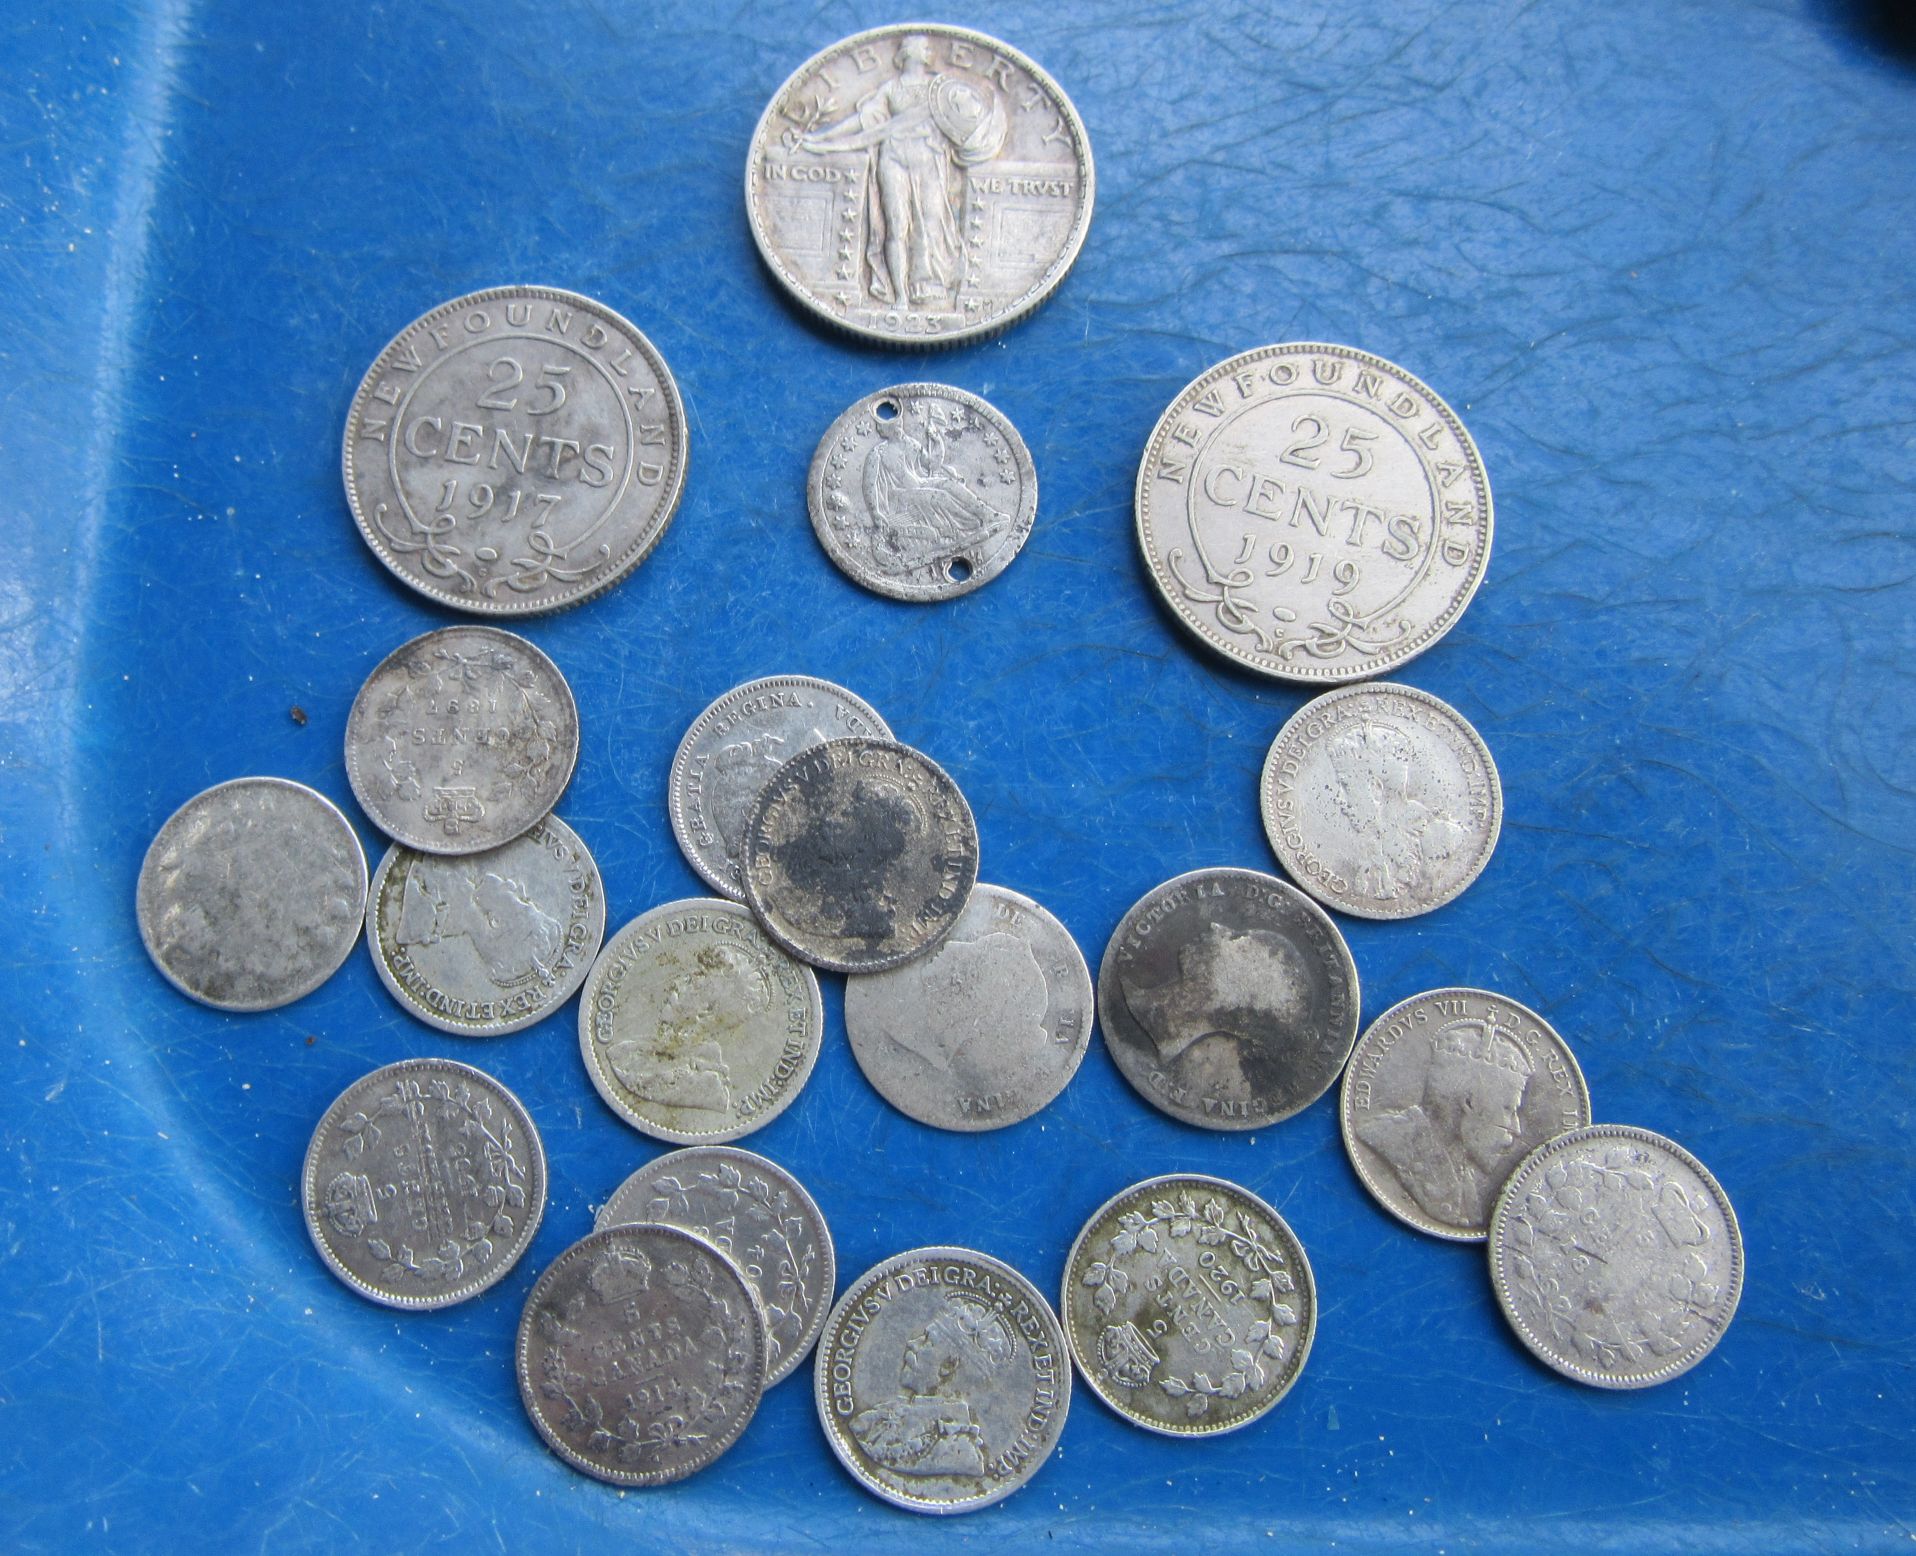
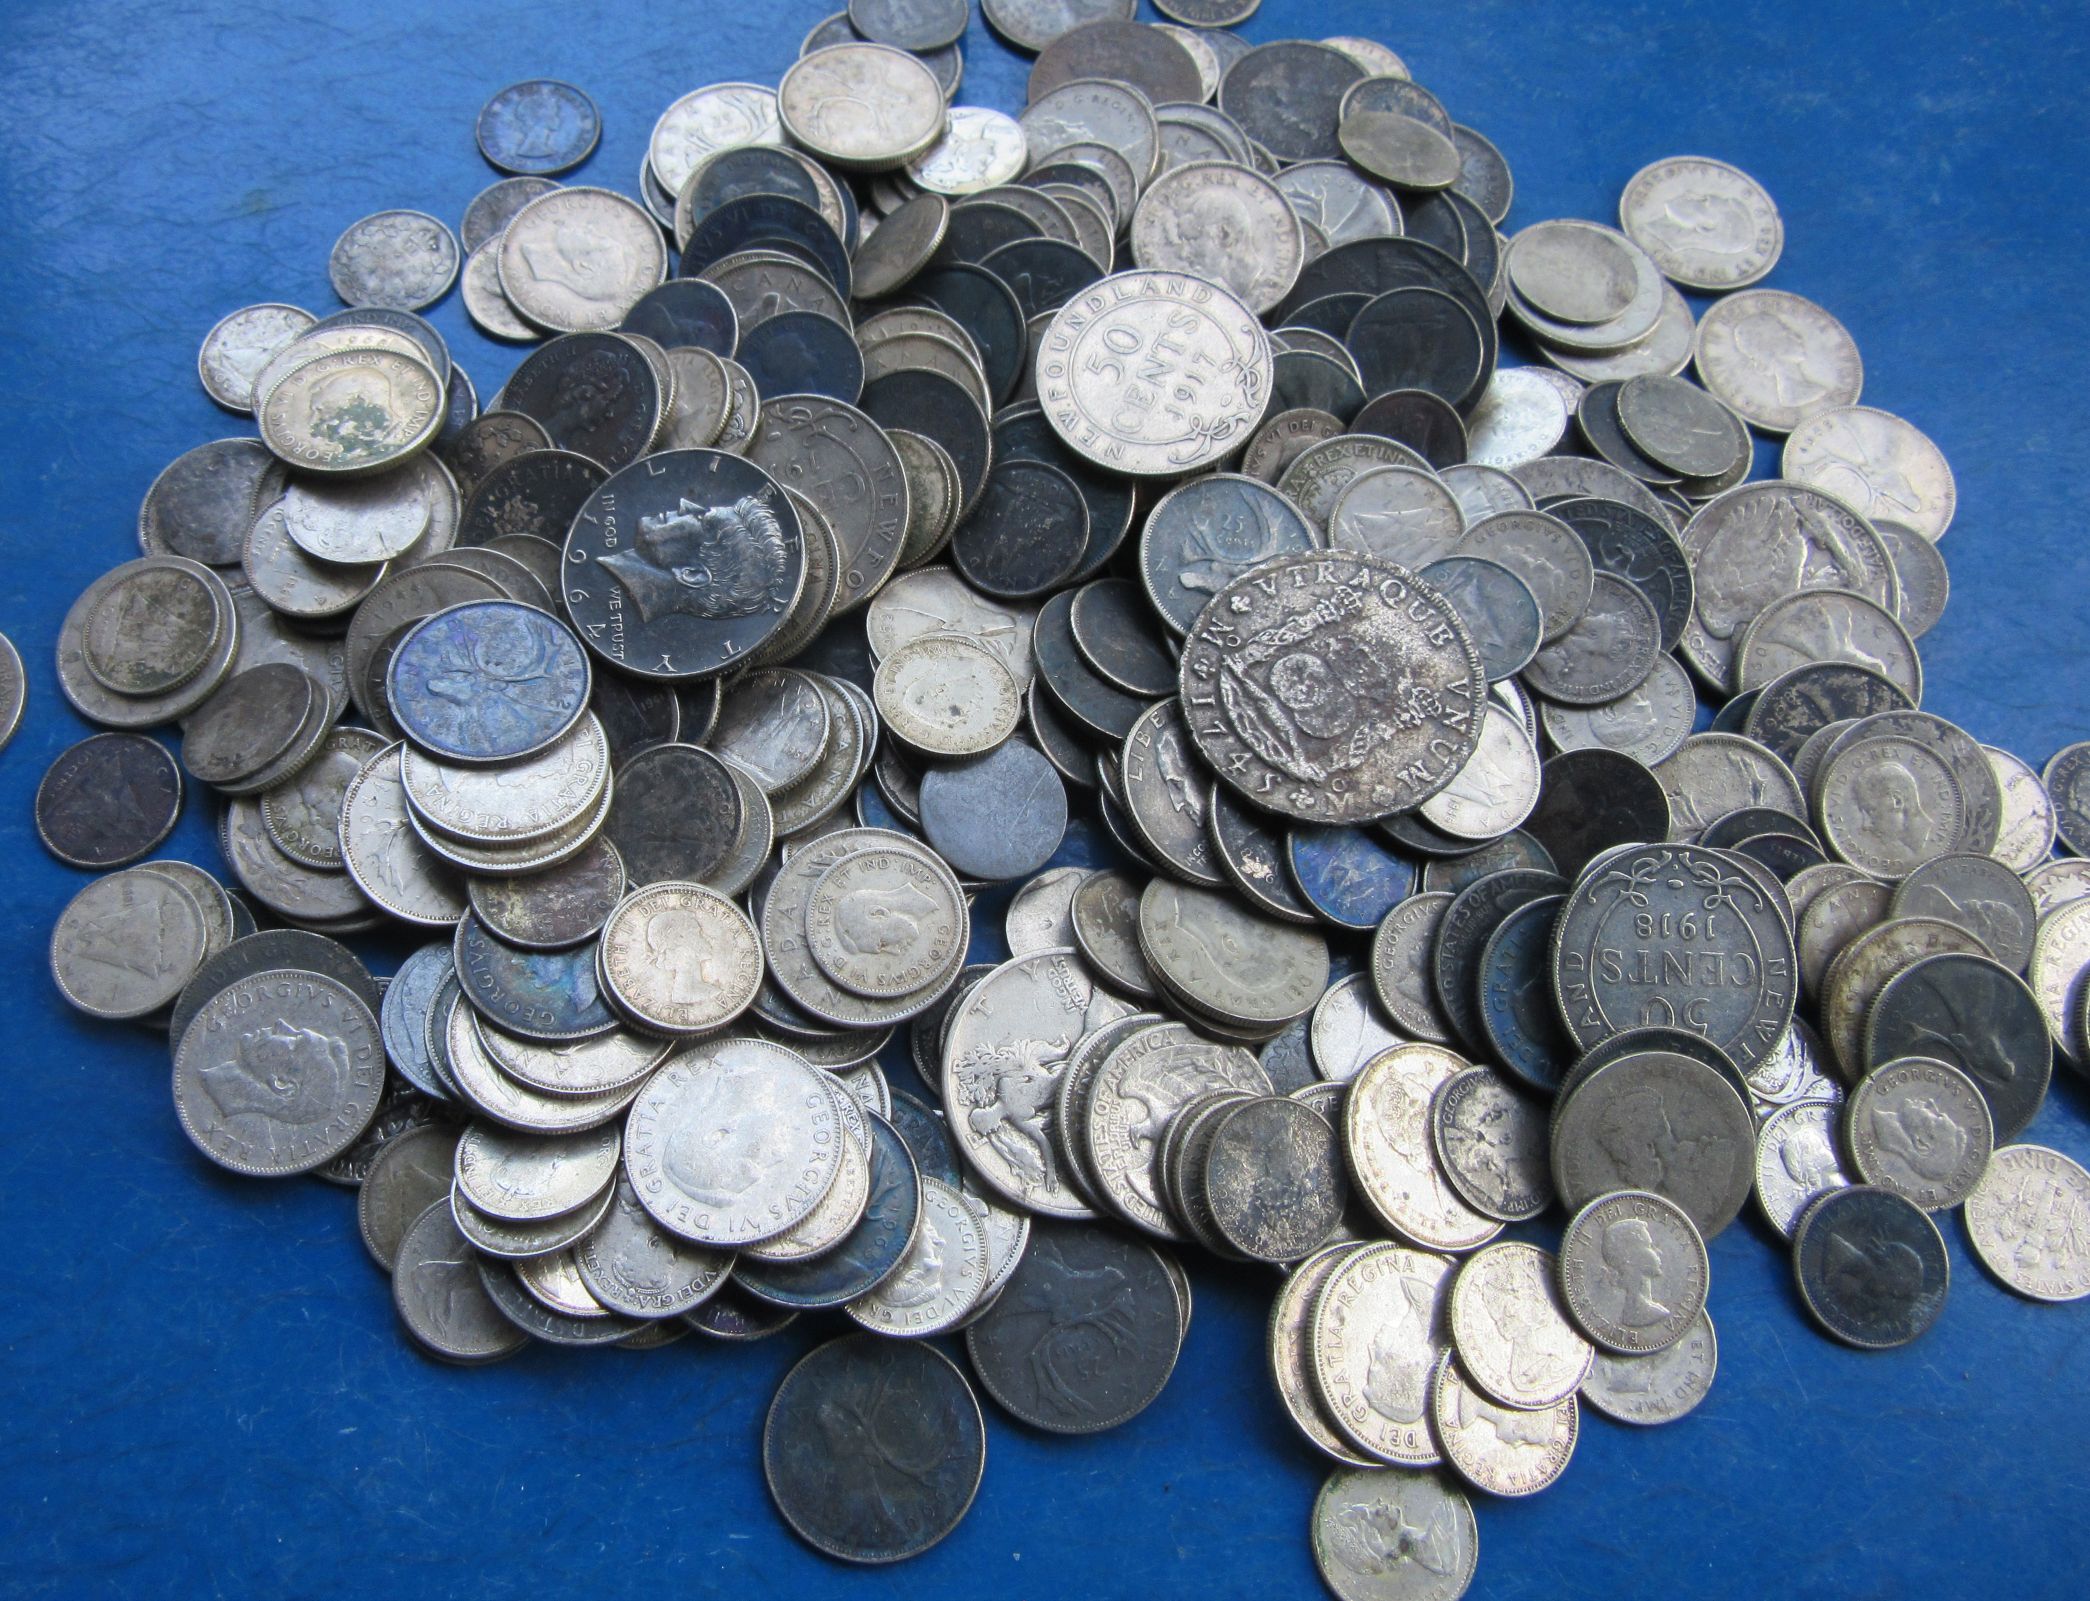

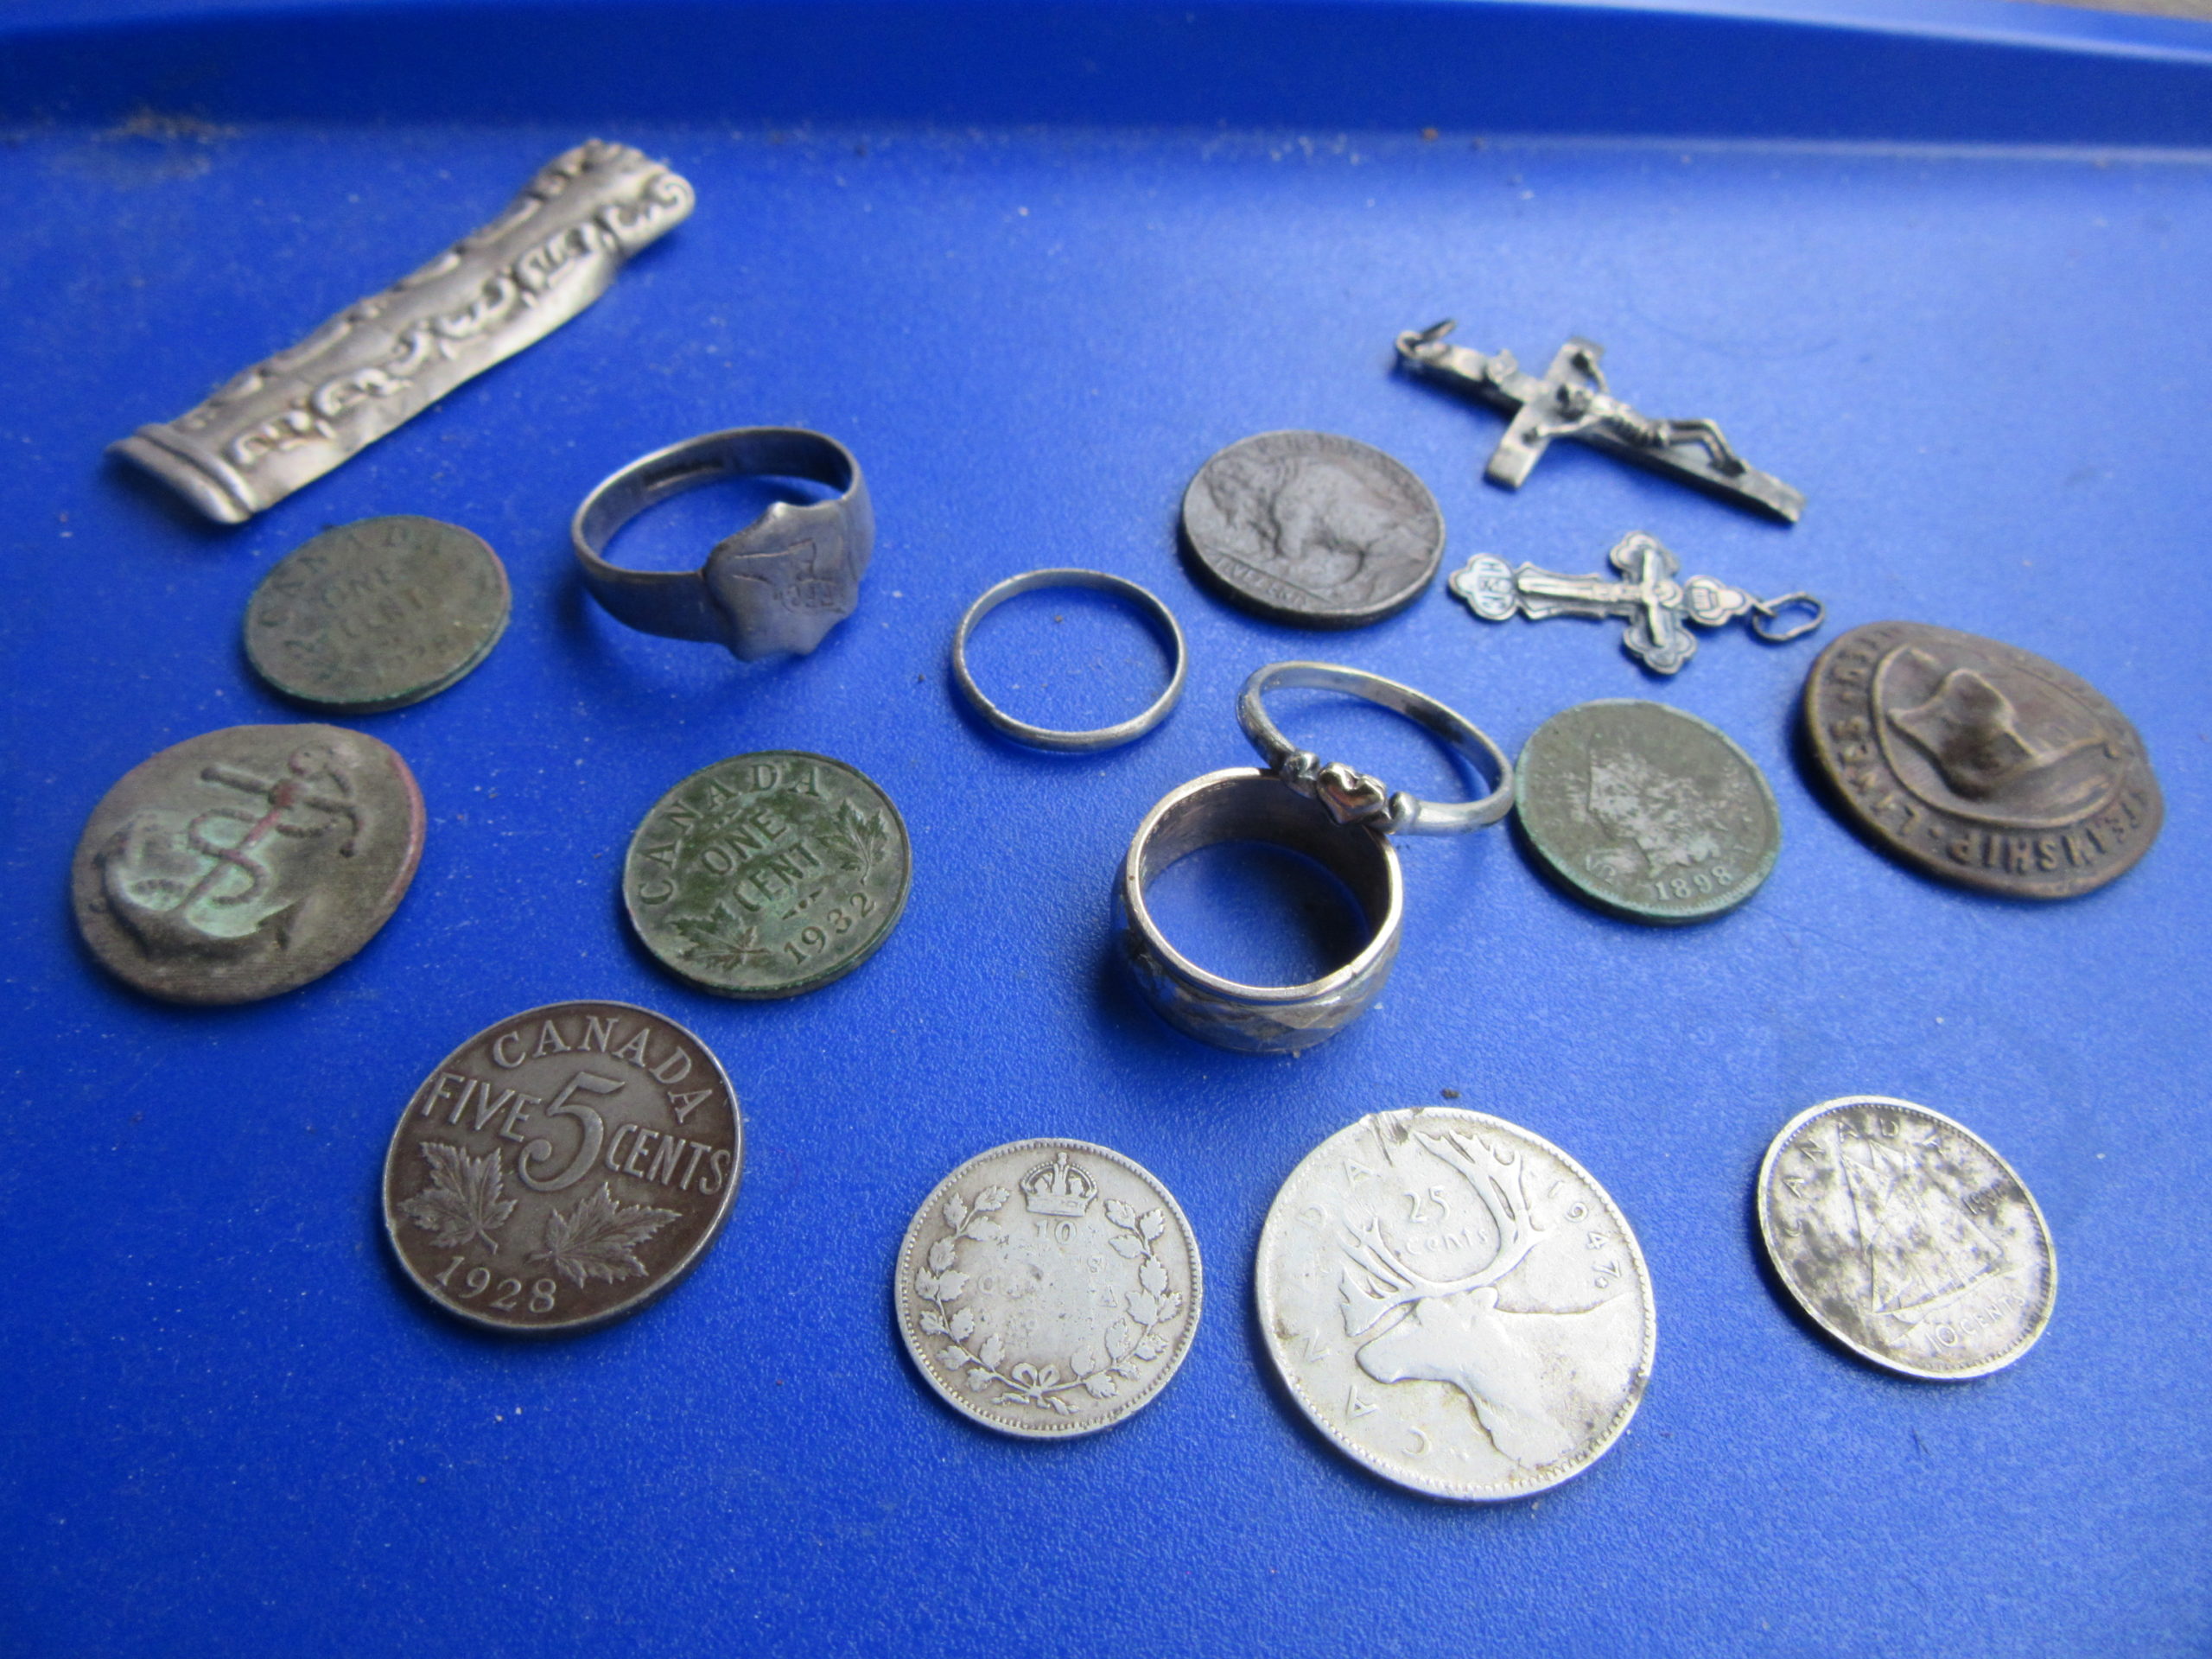


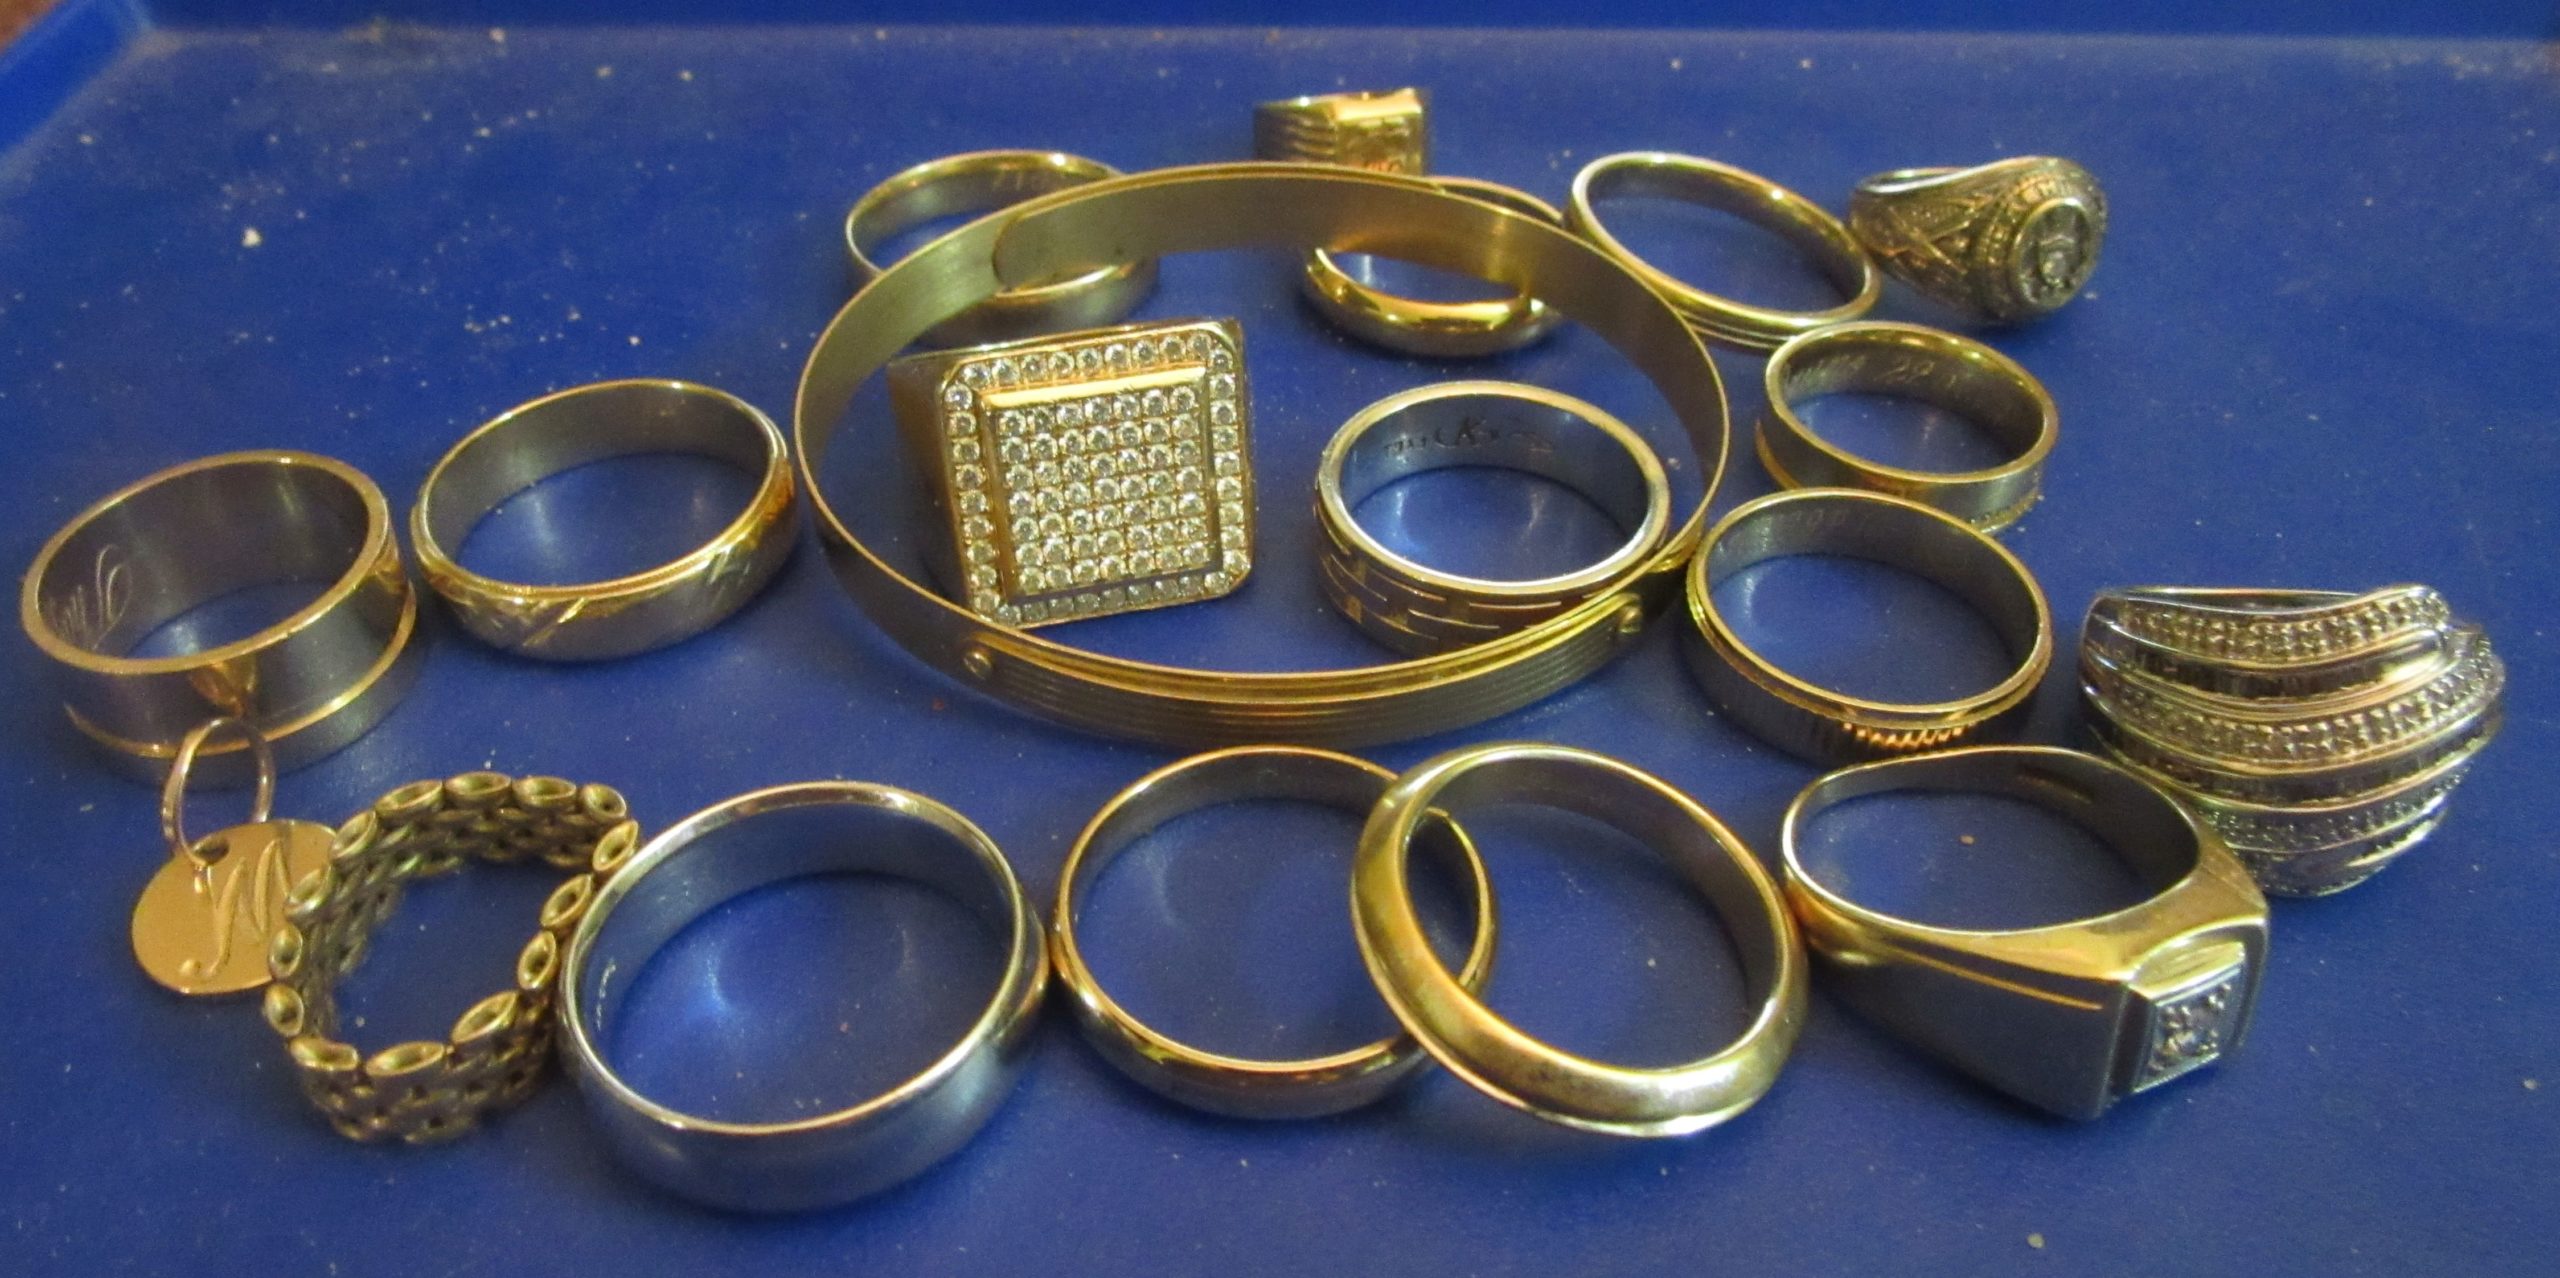

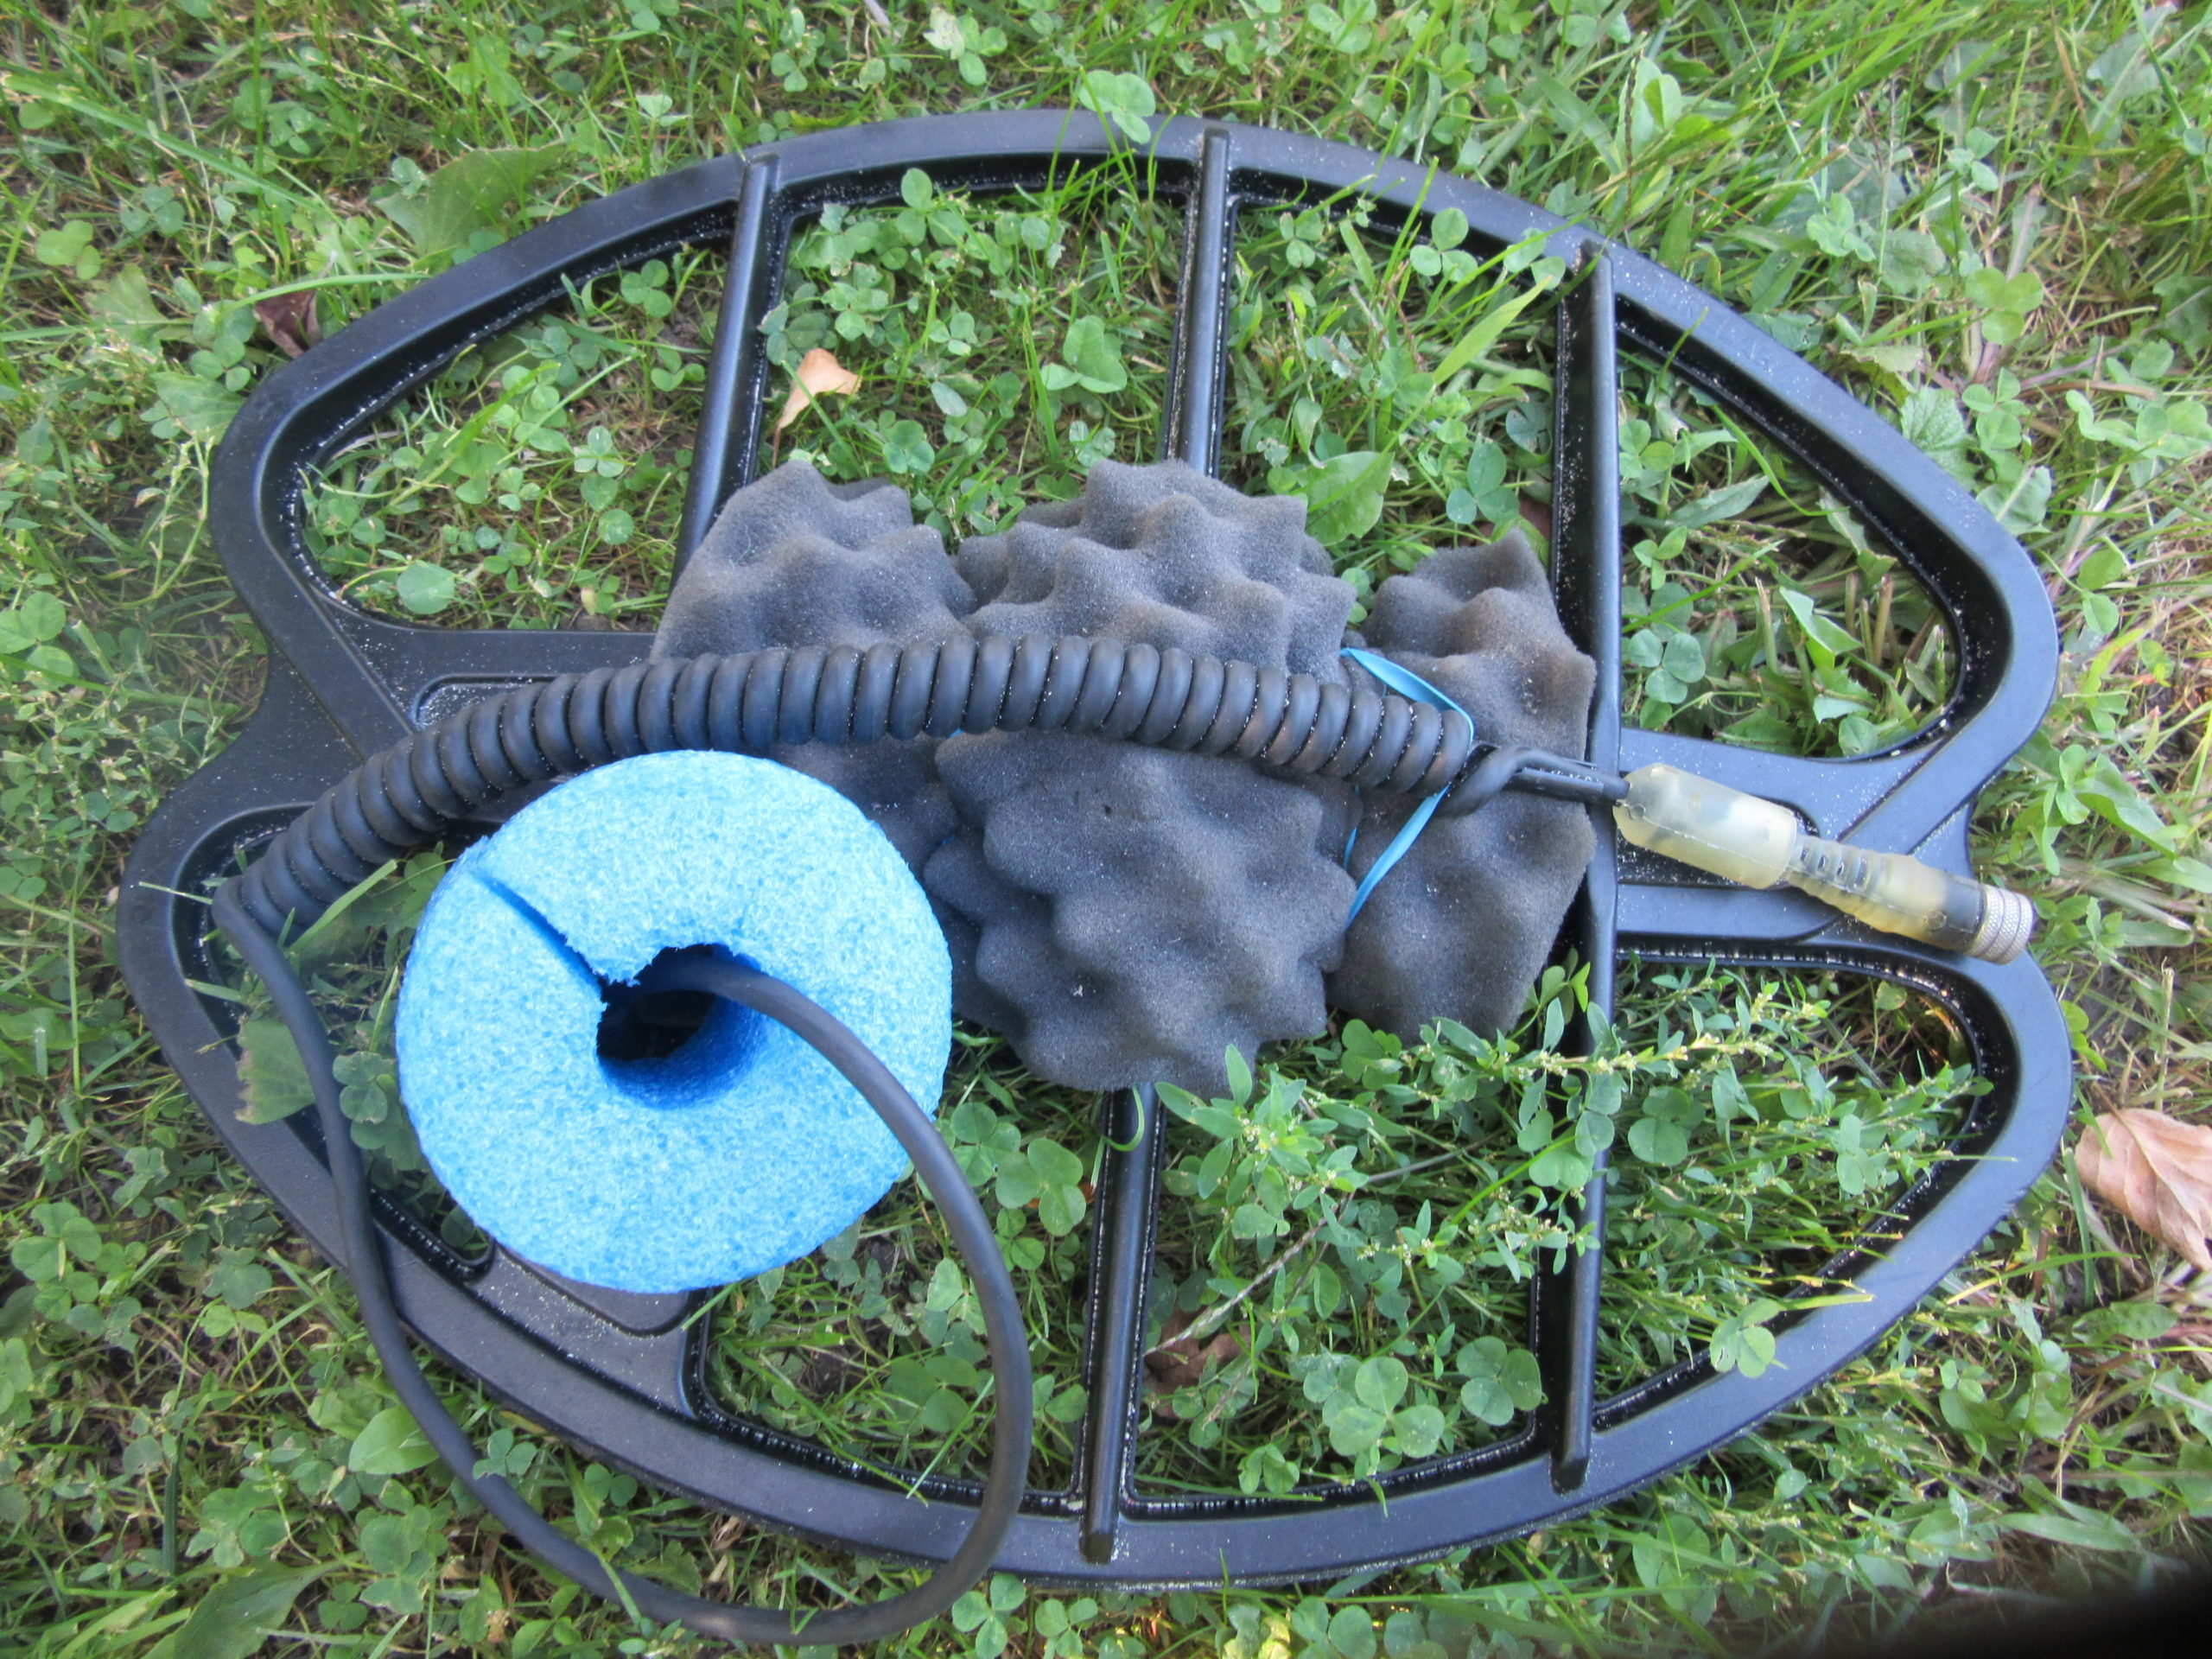


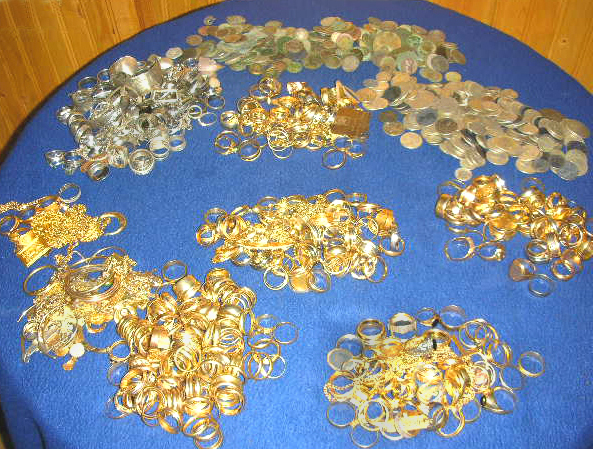


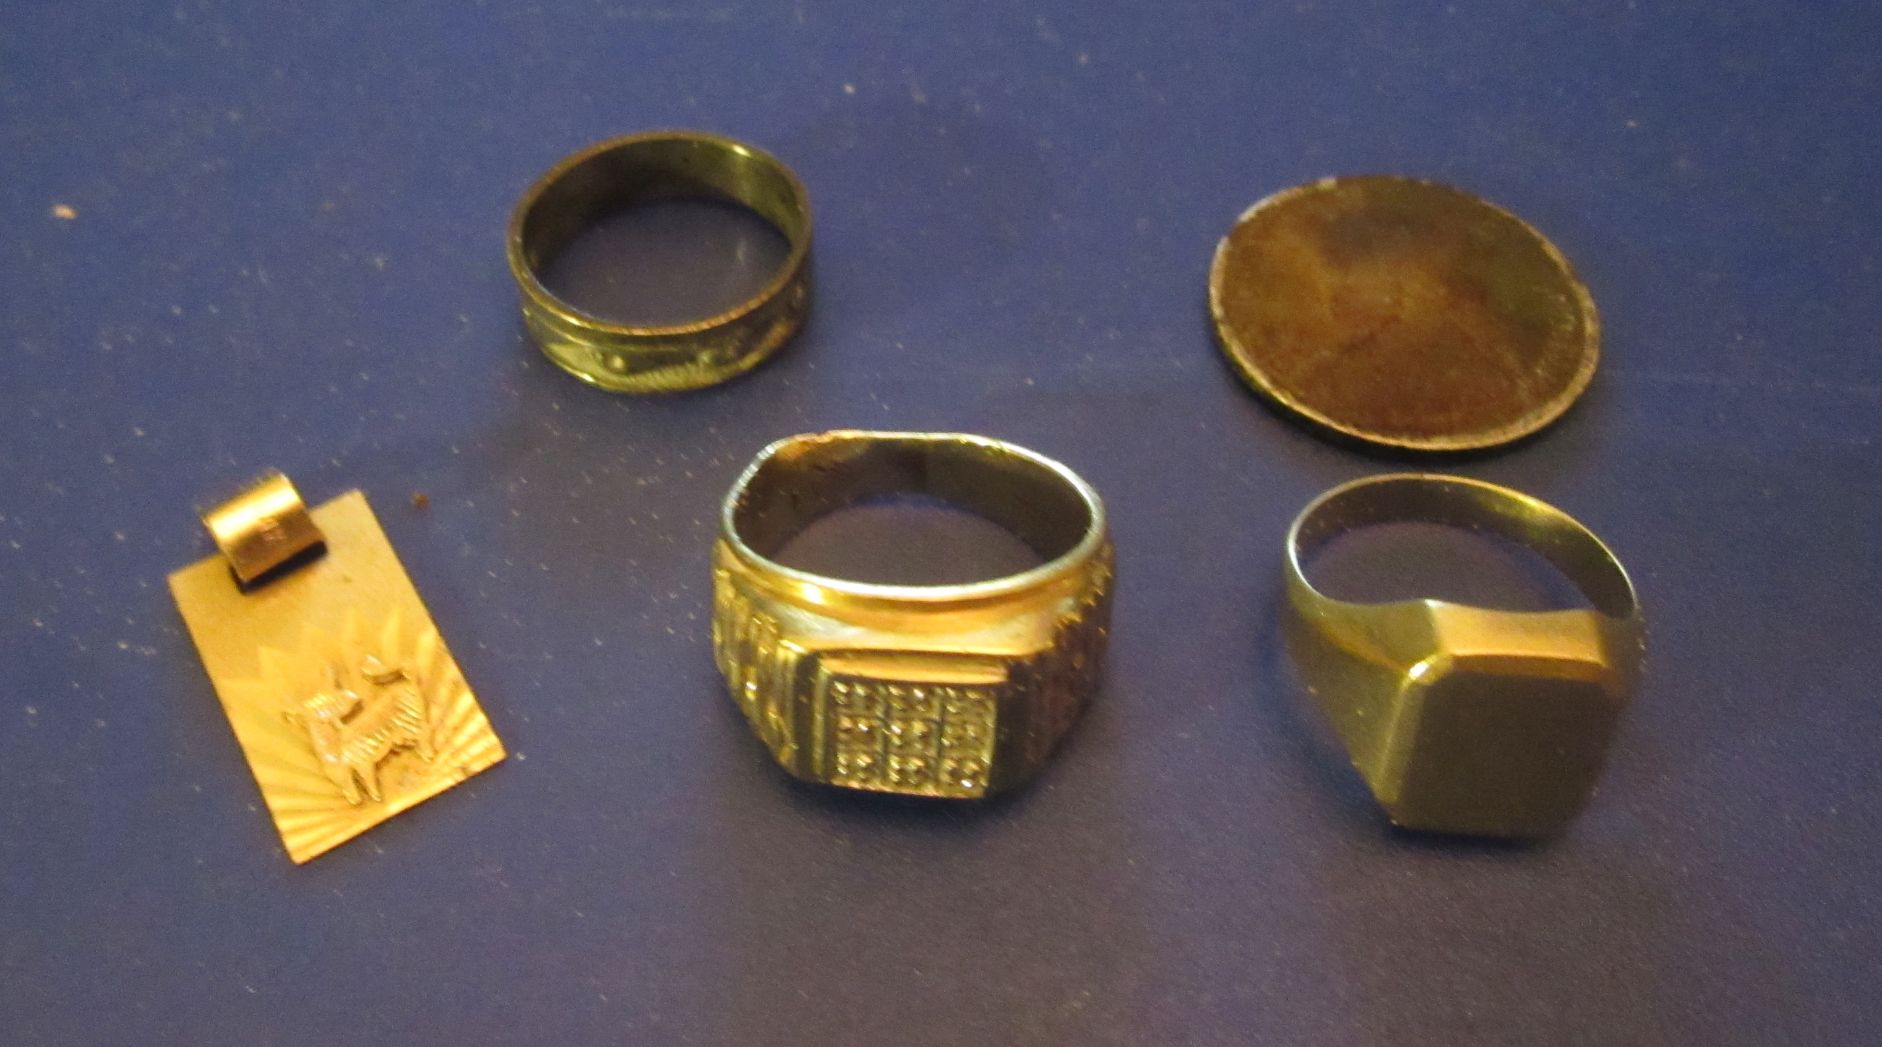

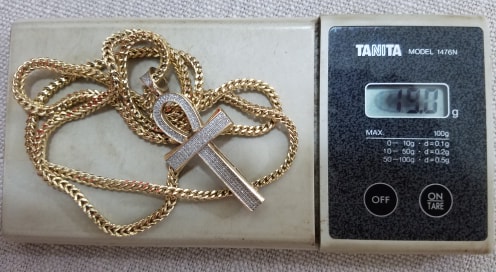

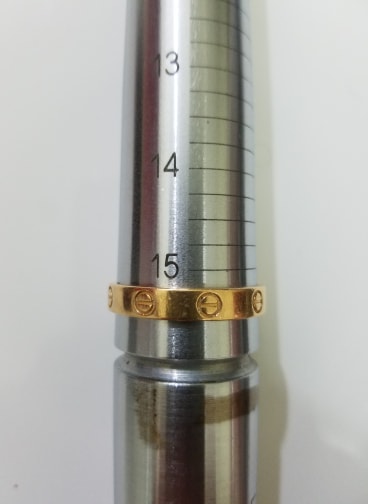


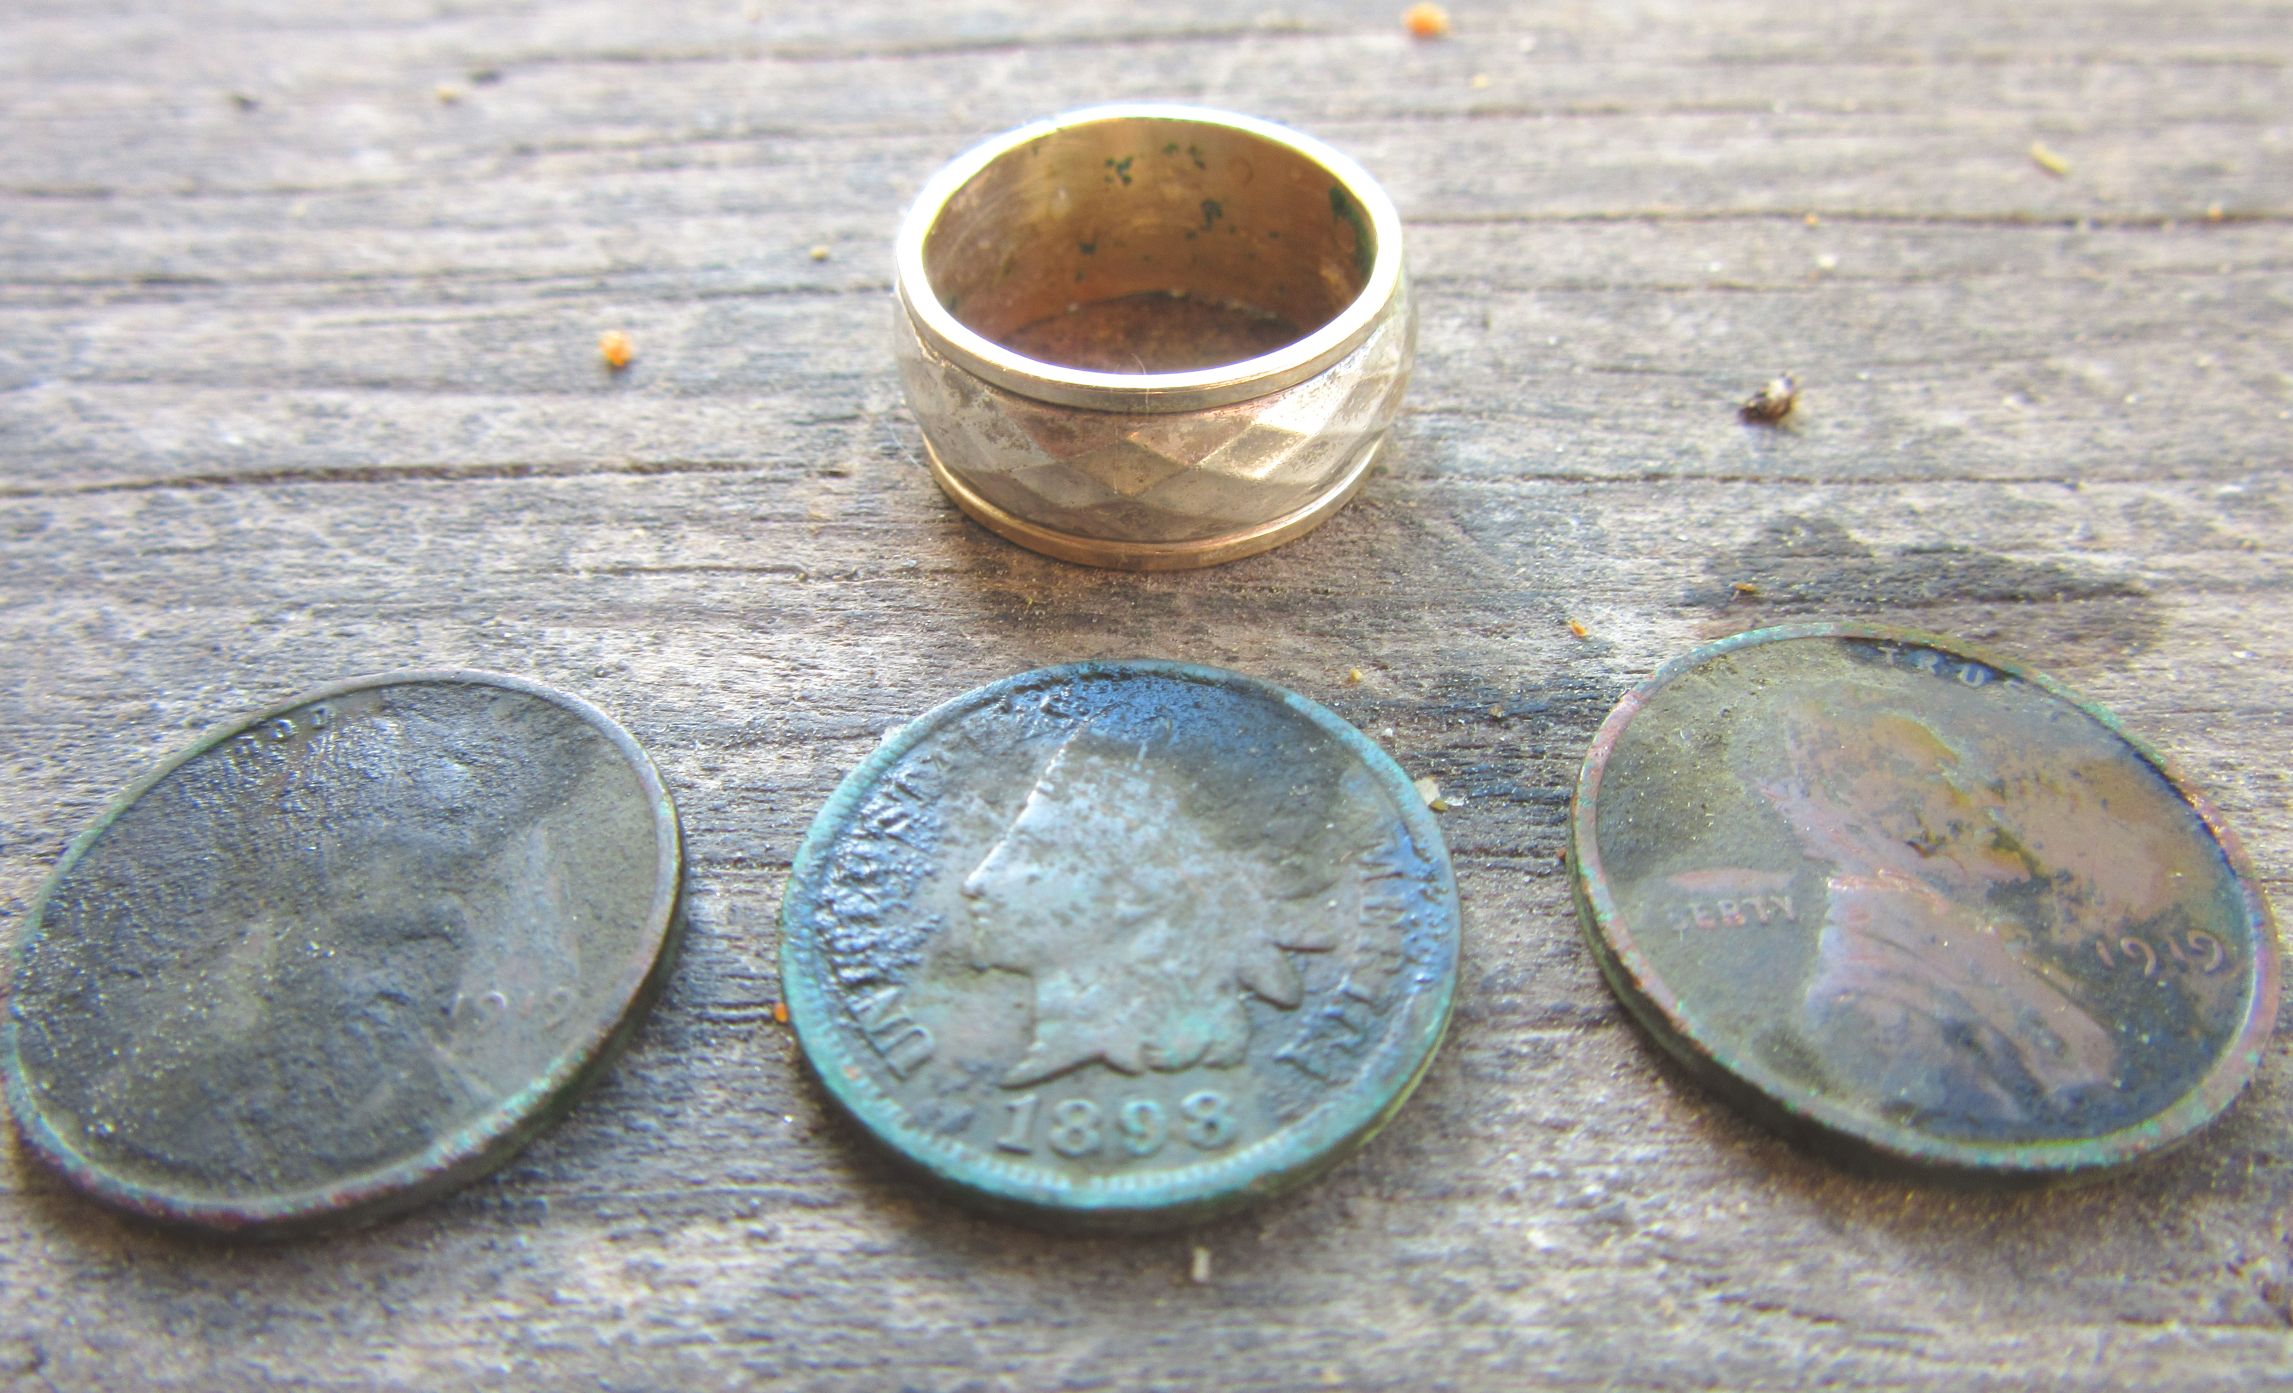

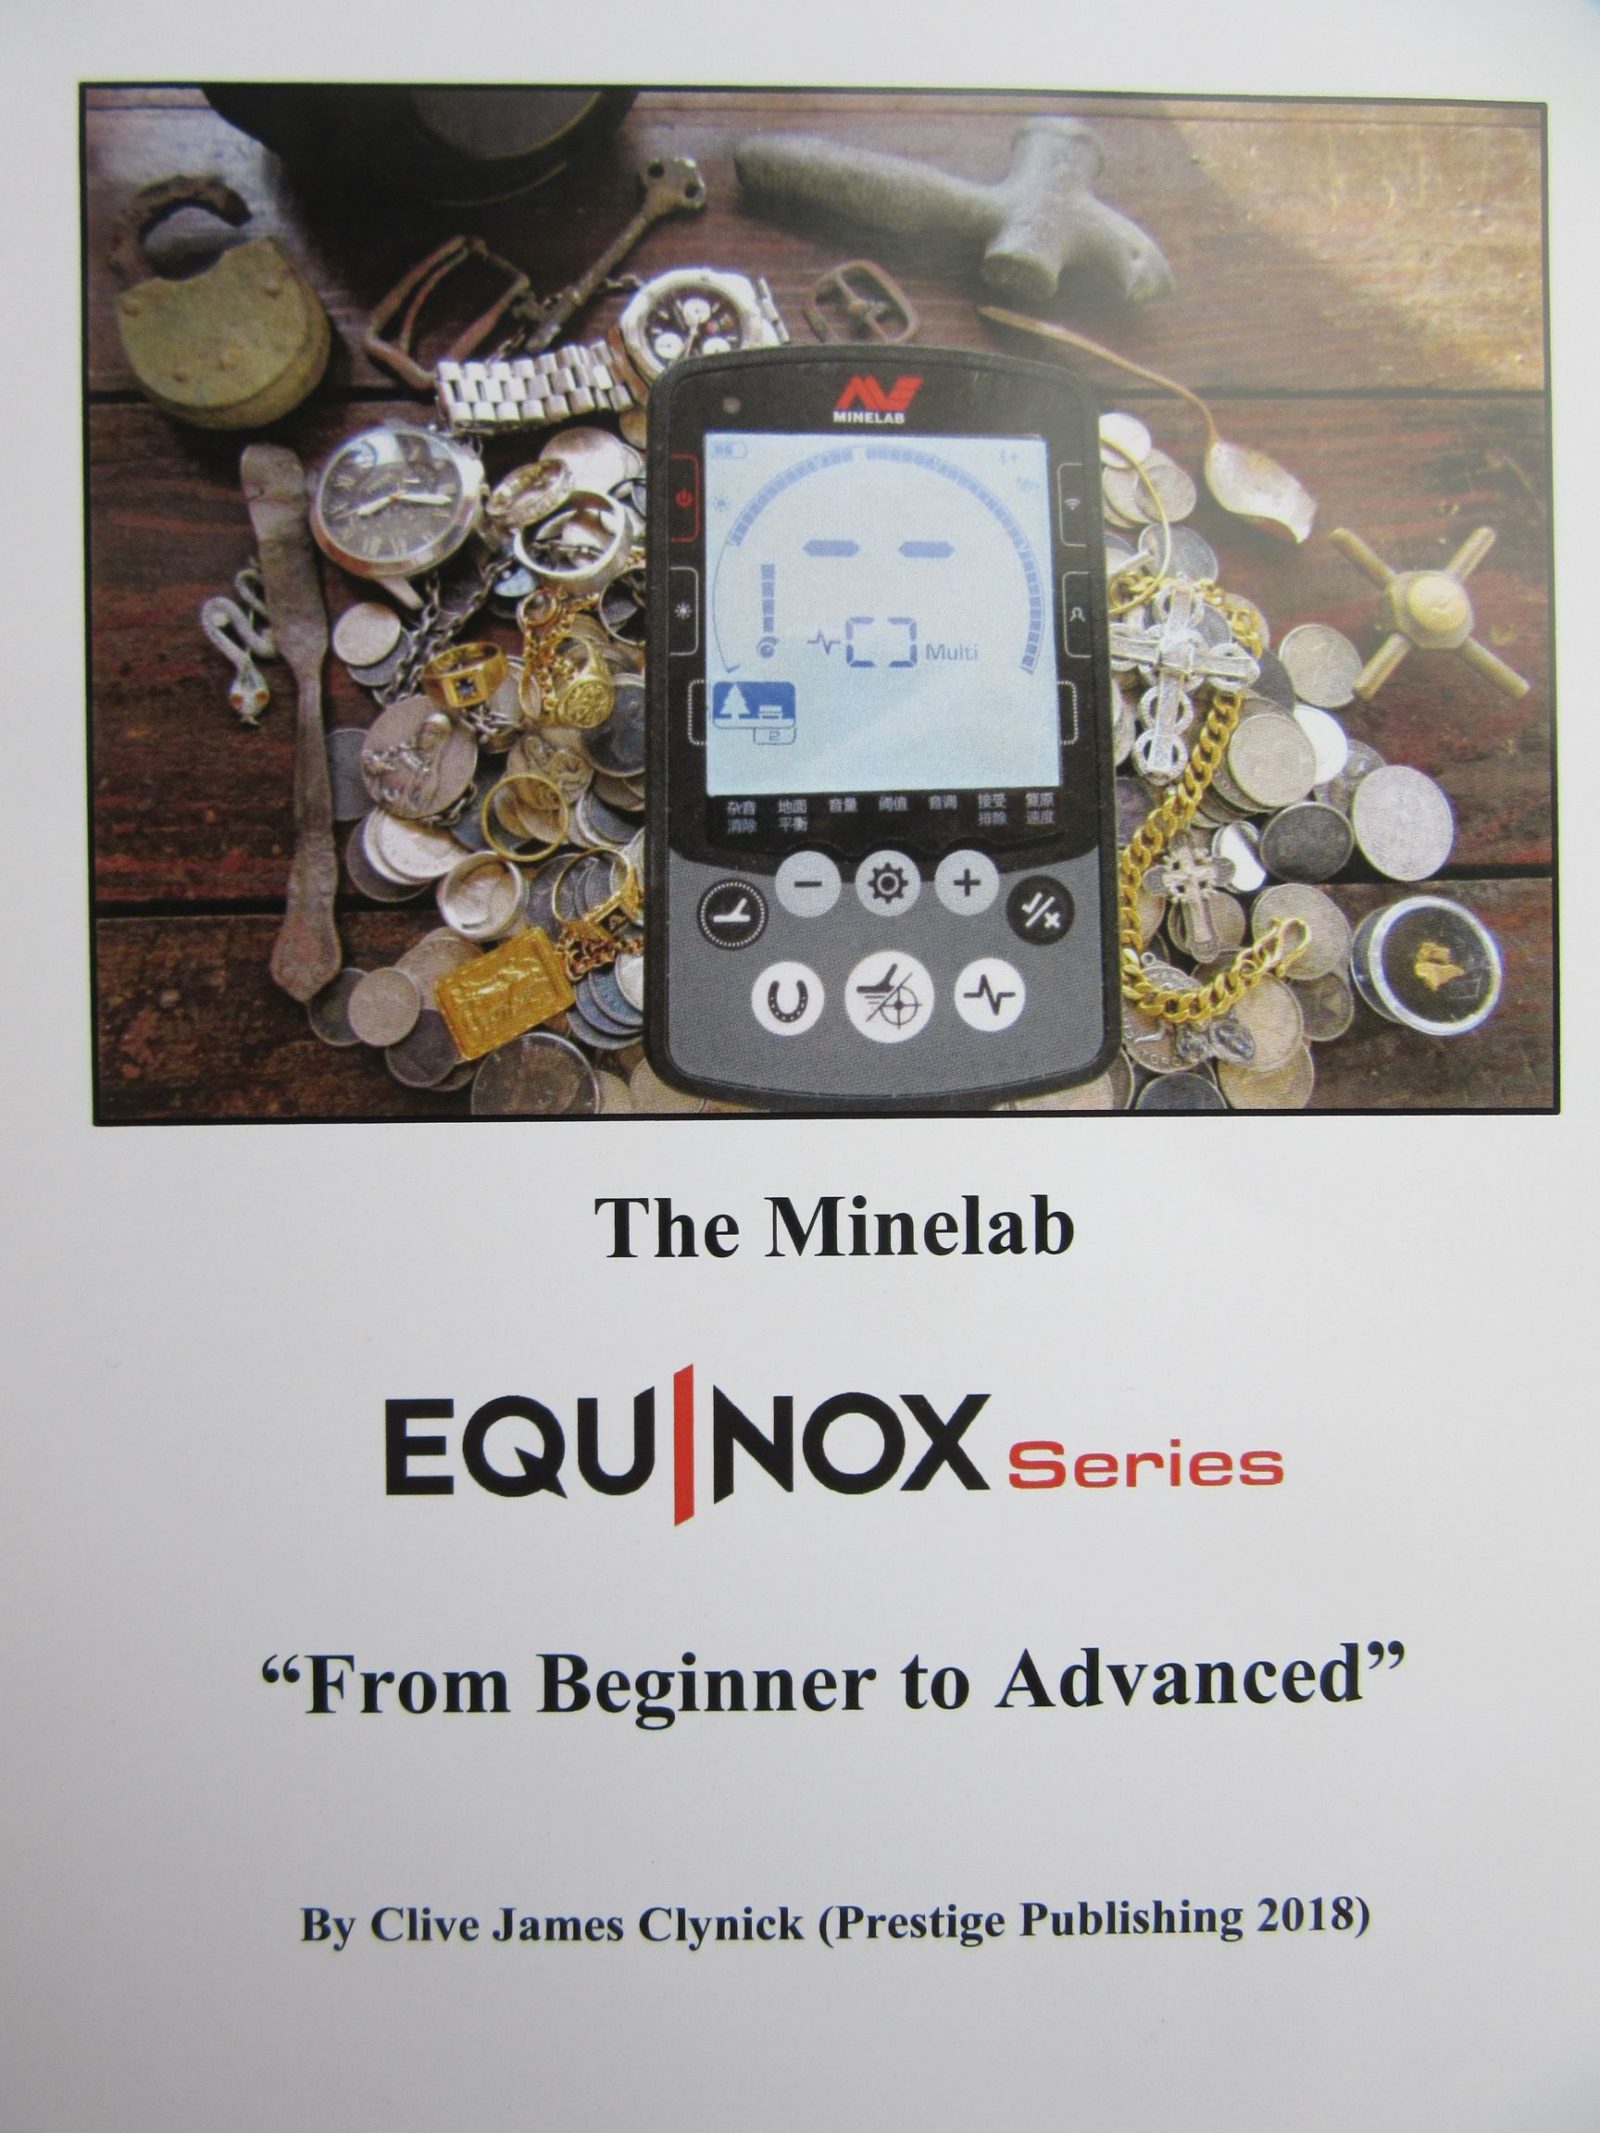

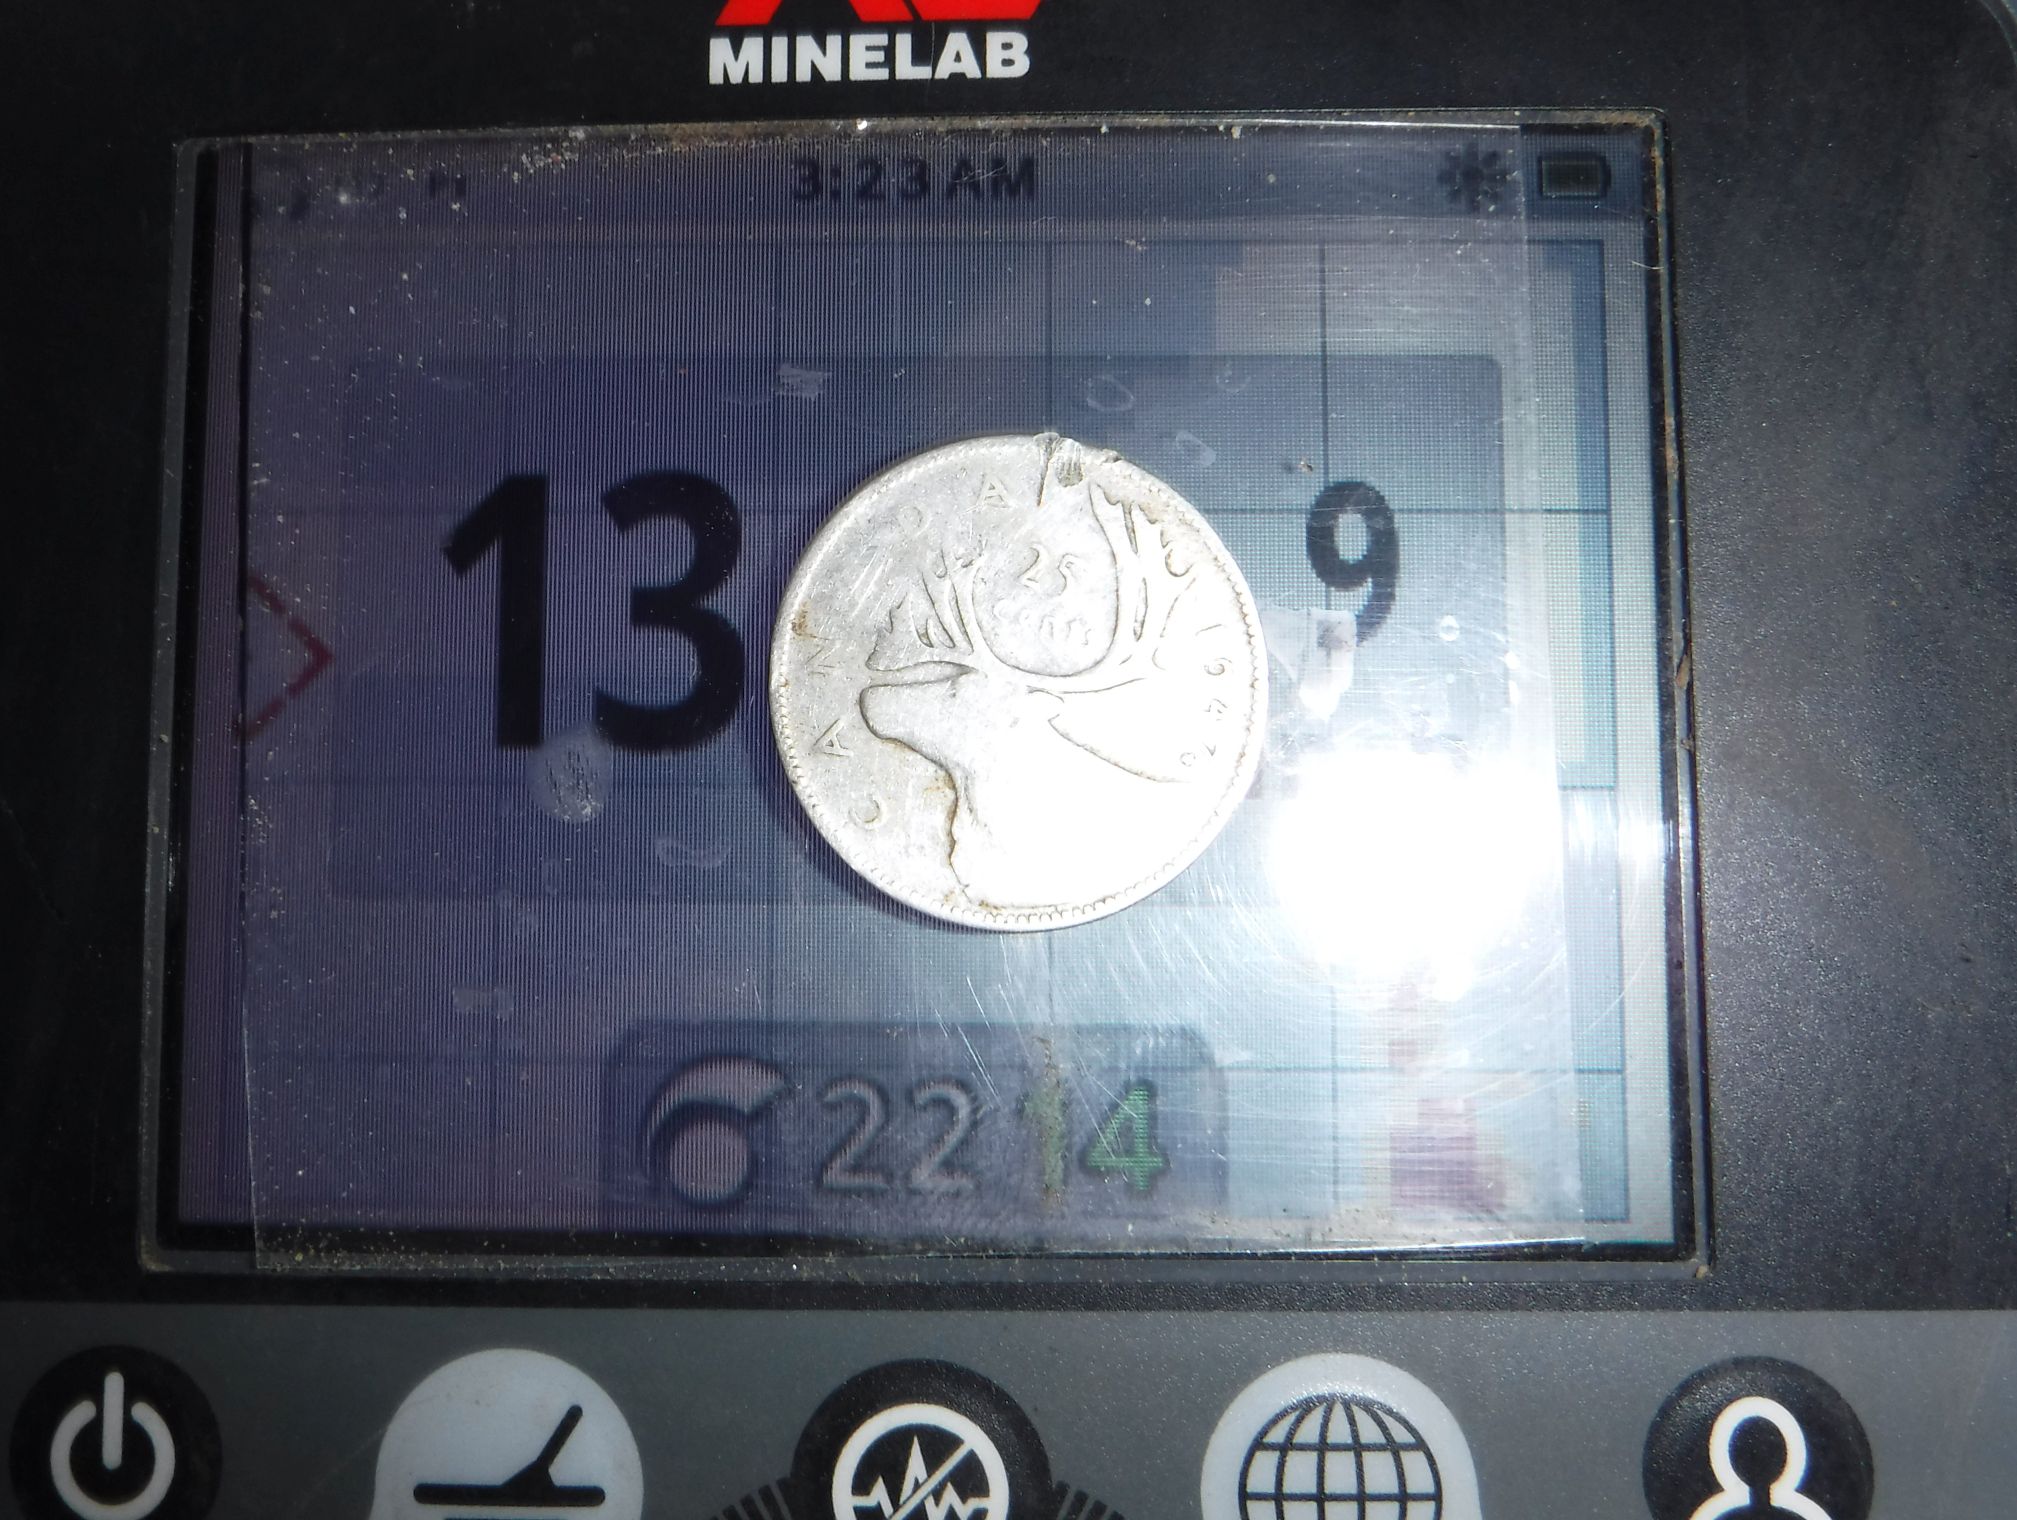

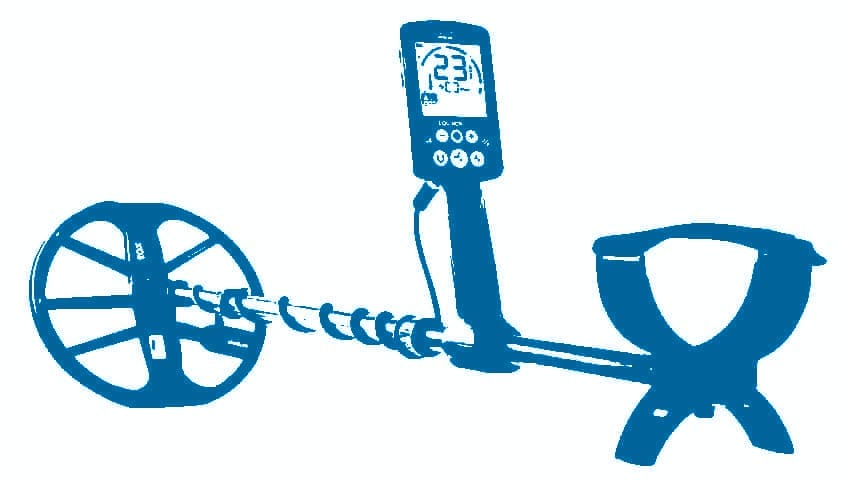
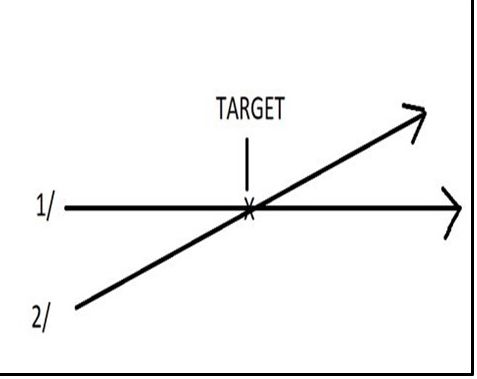
 EQ.
EQ.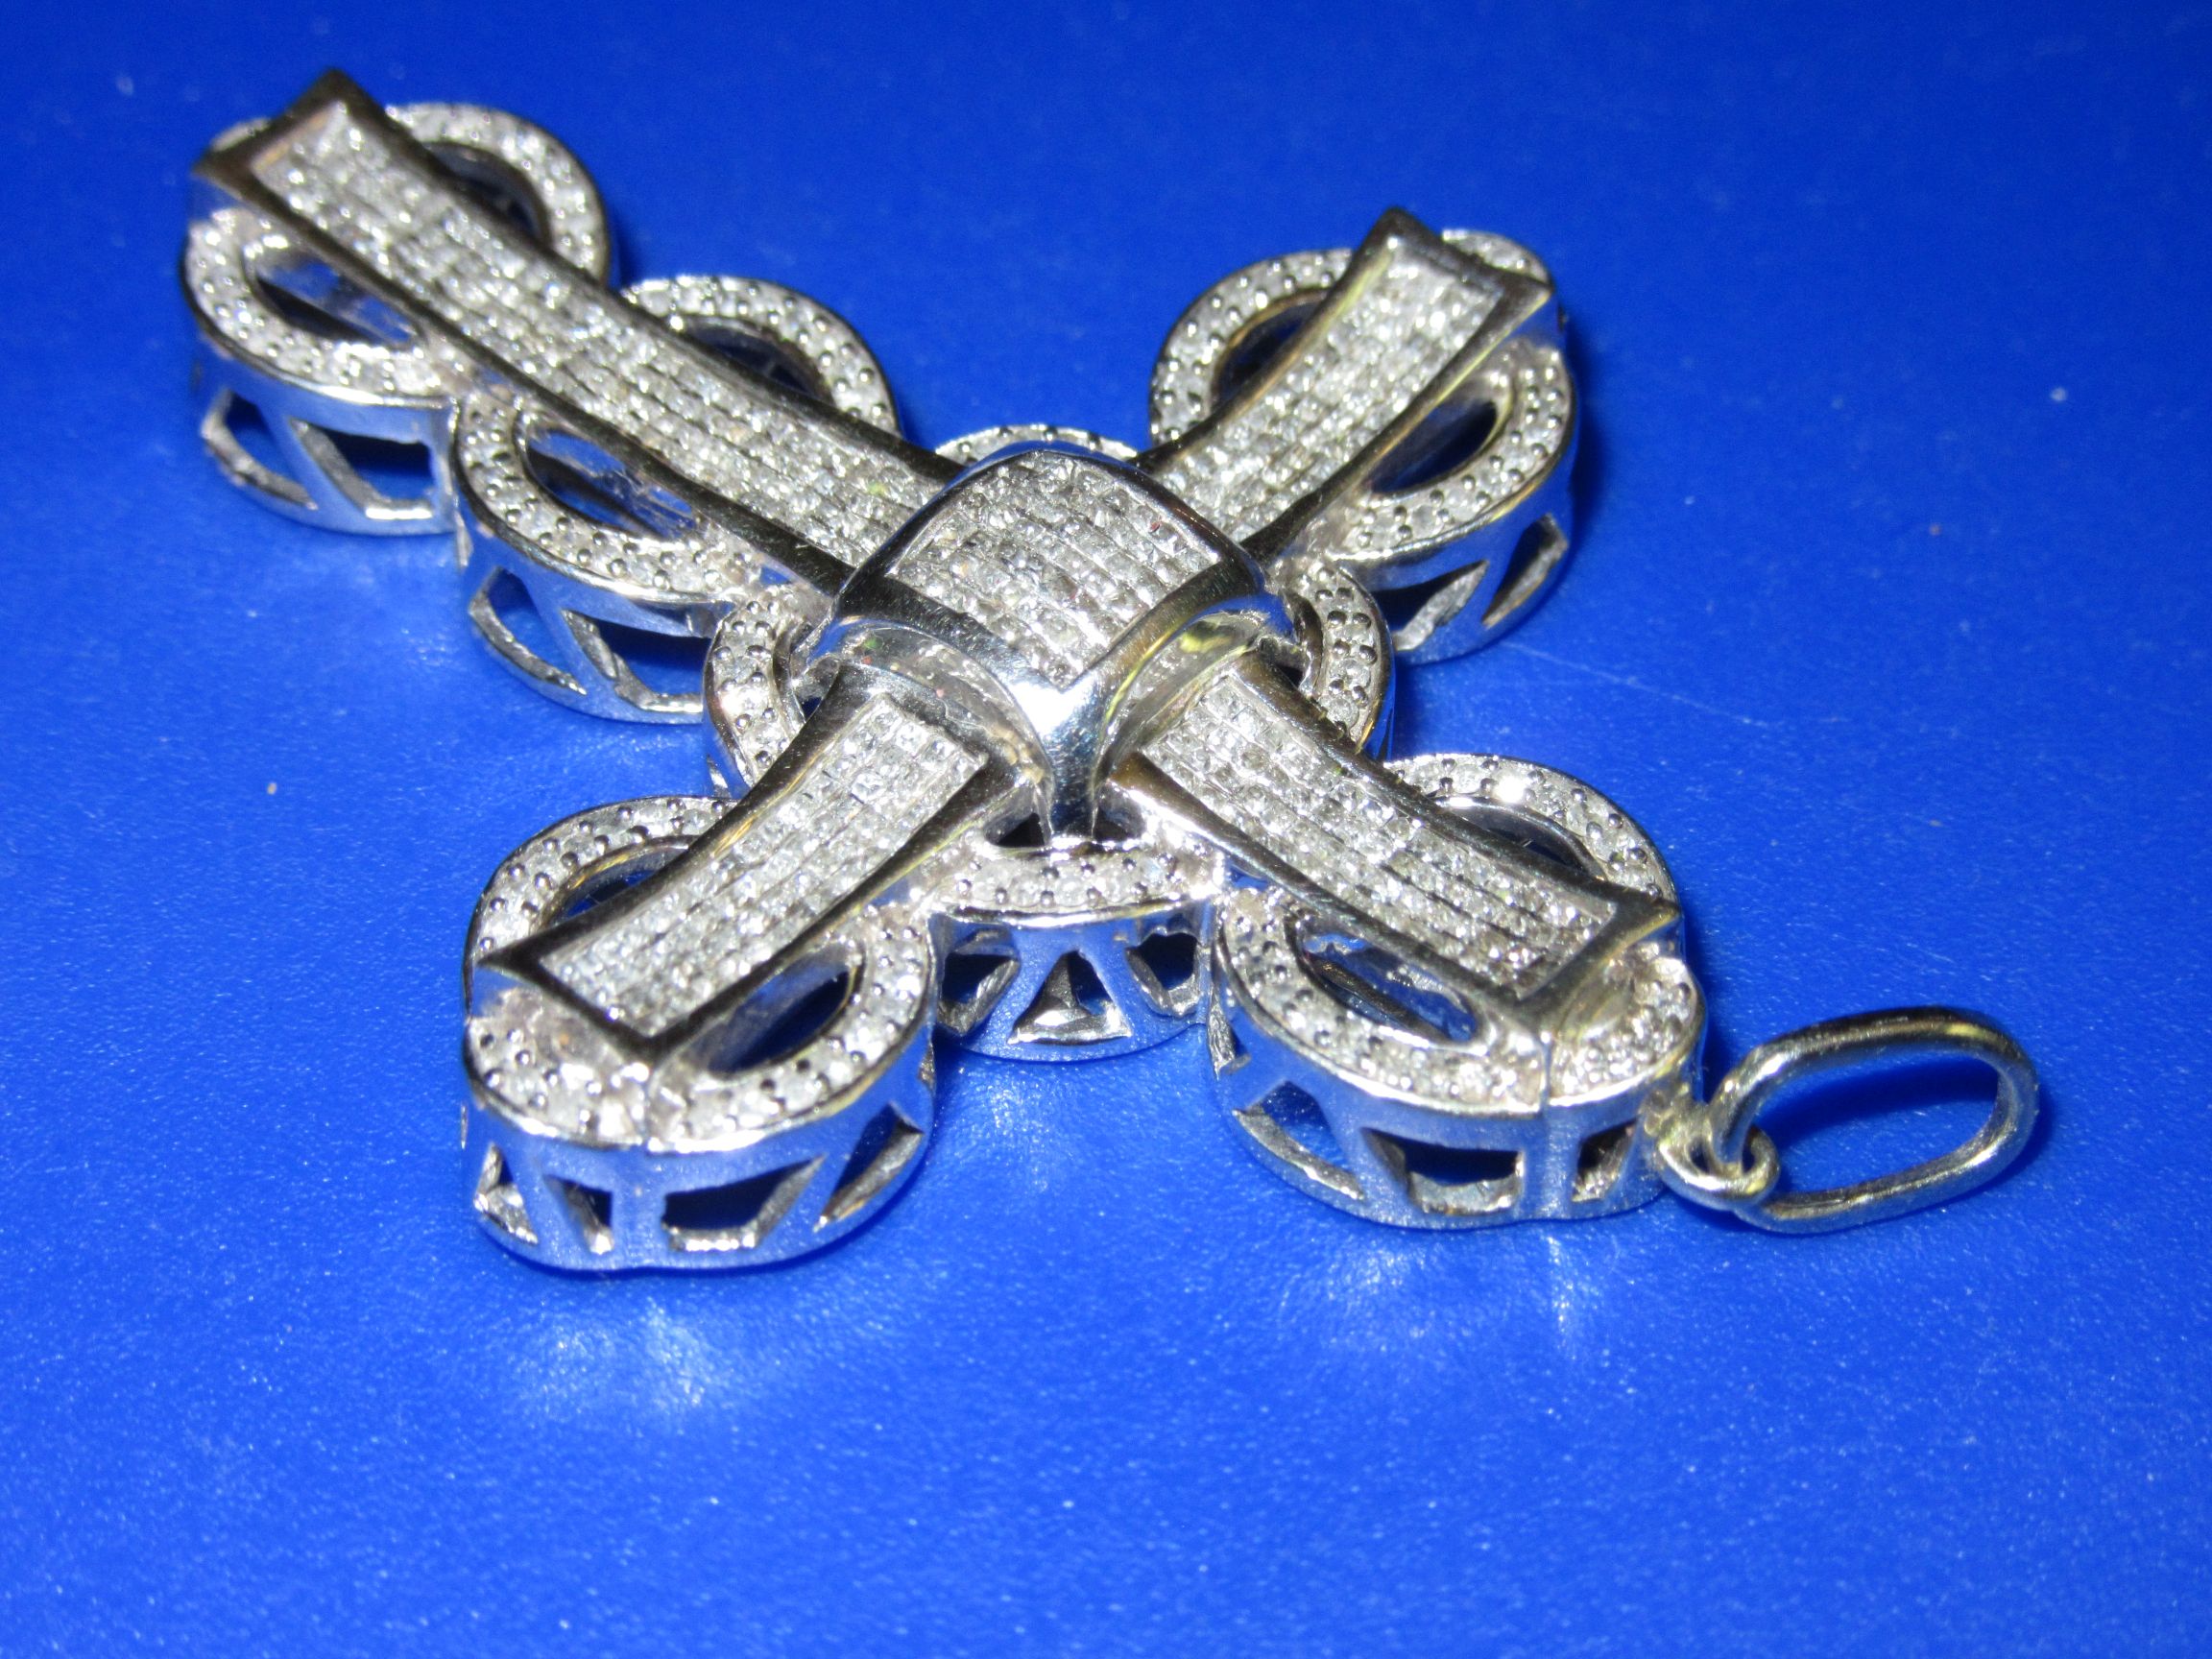

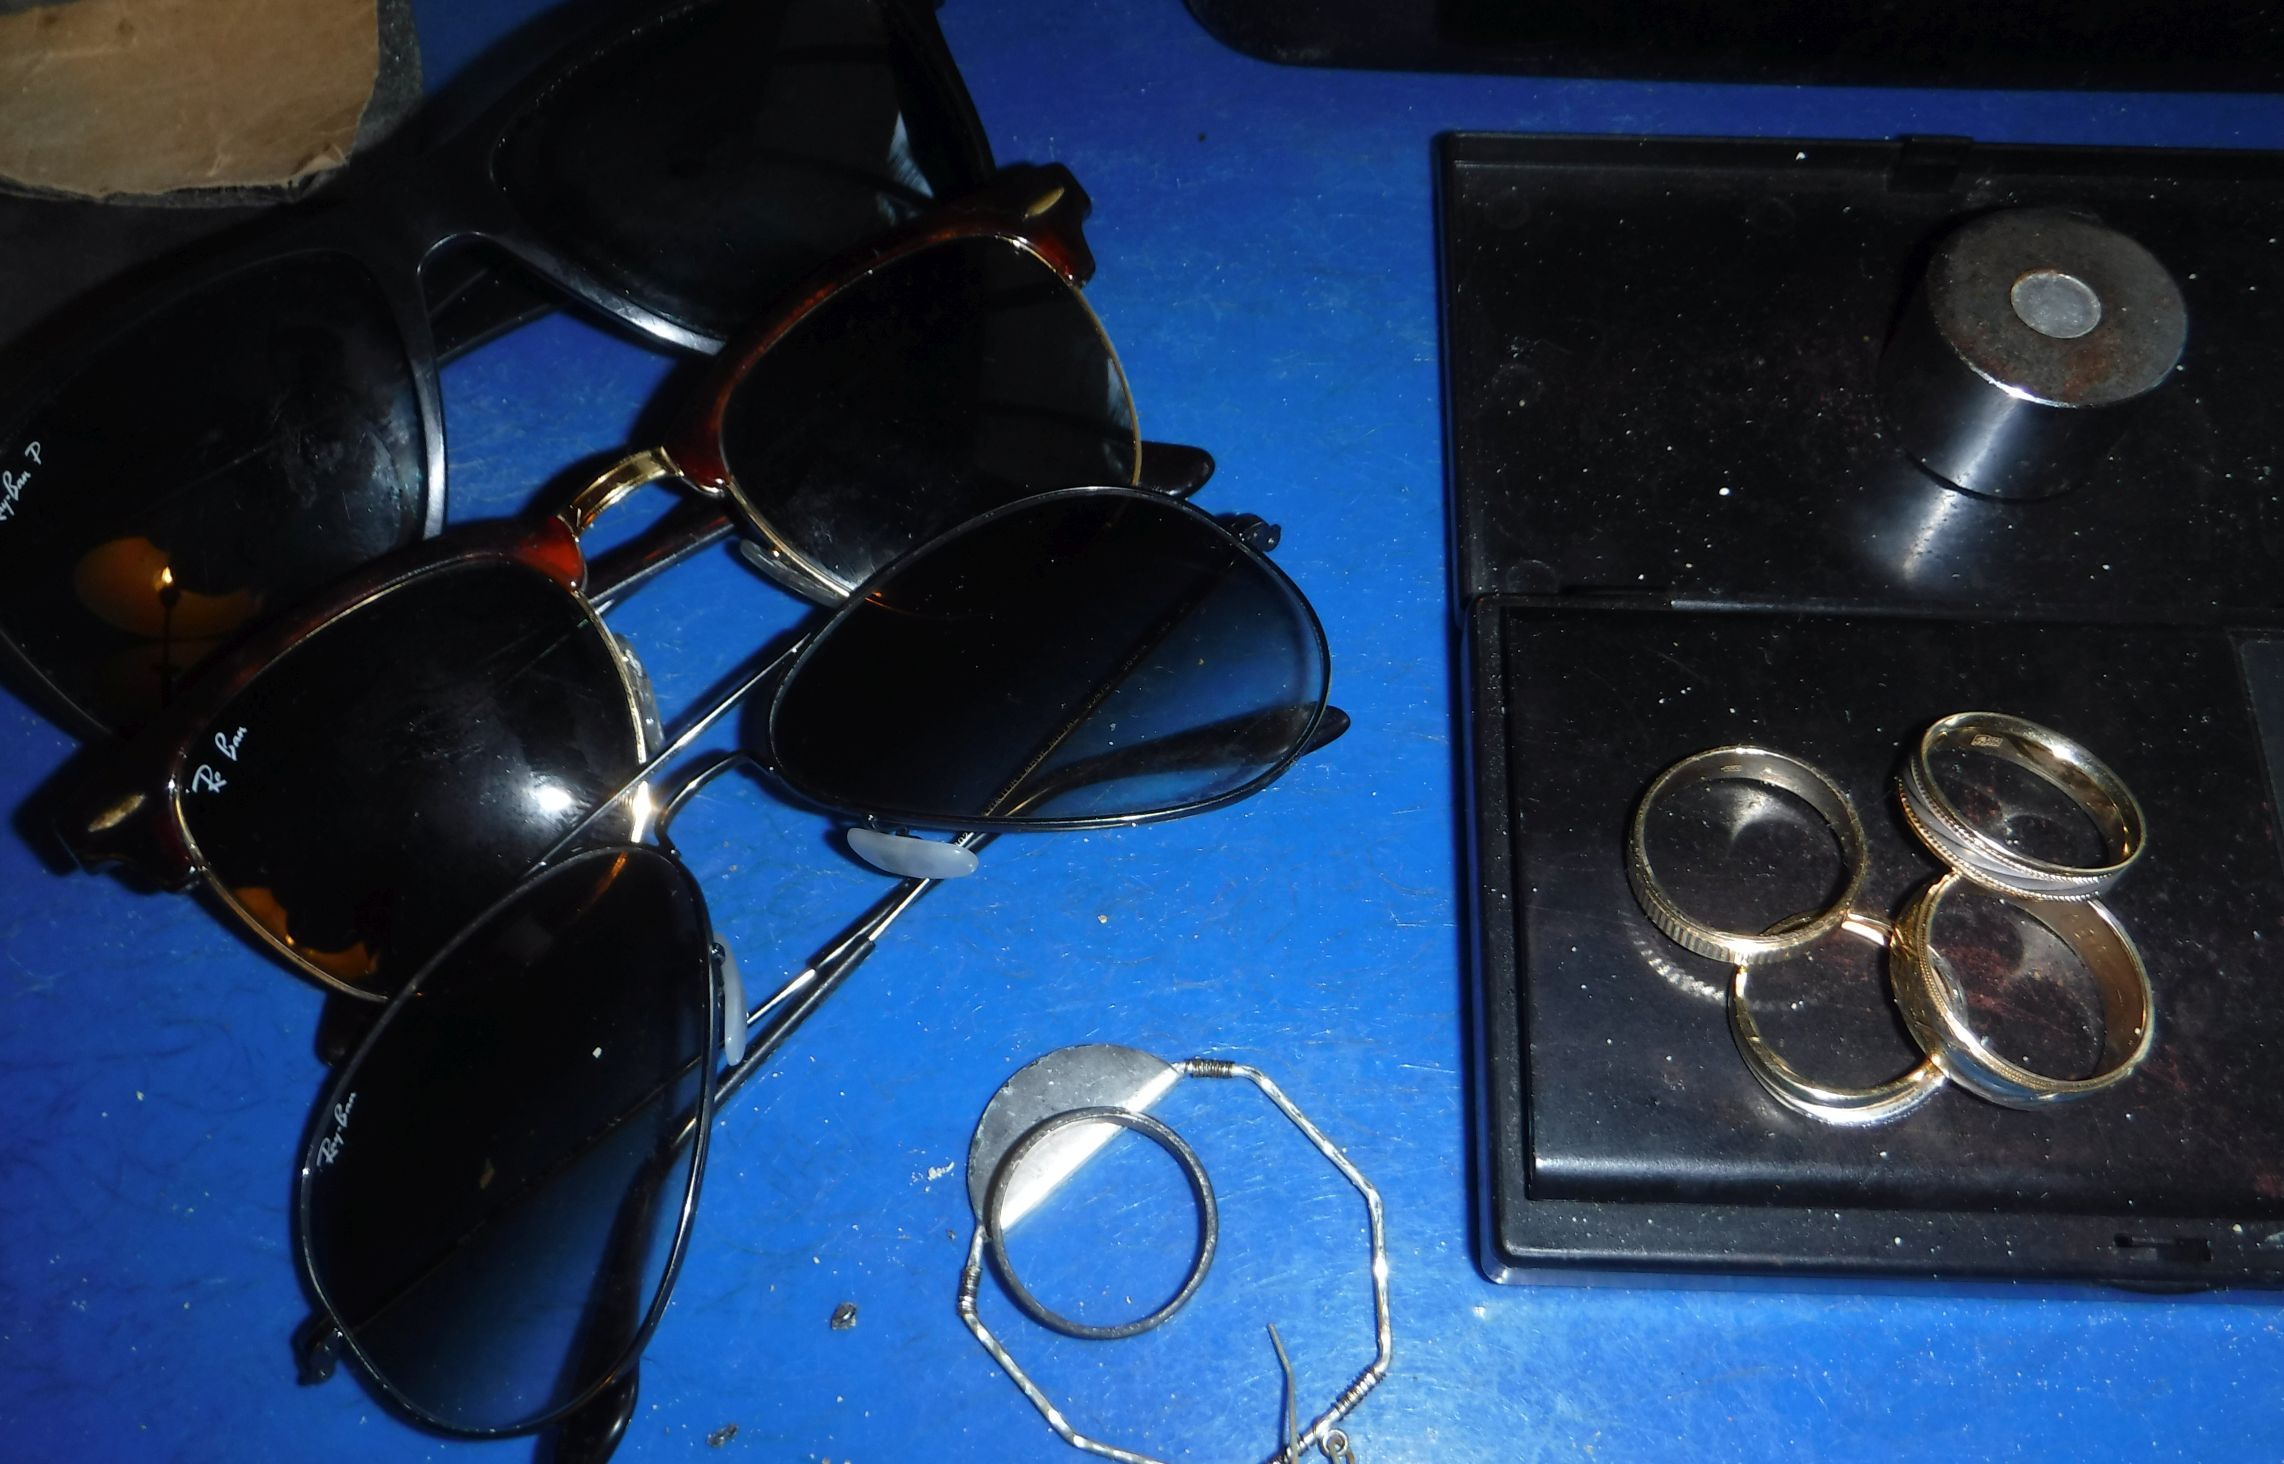


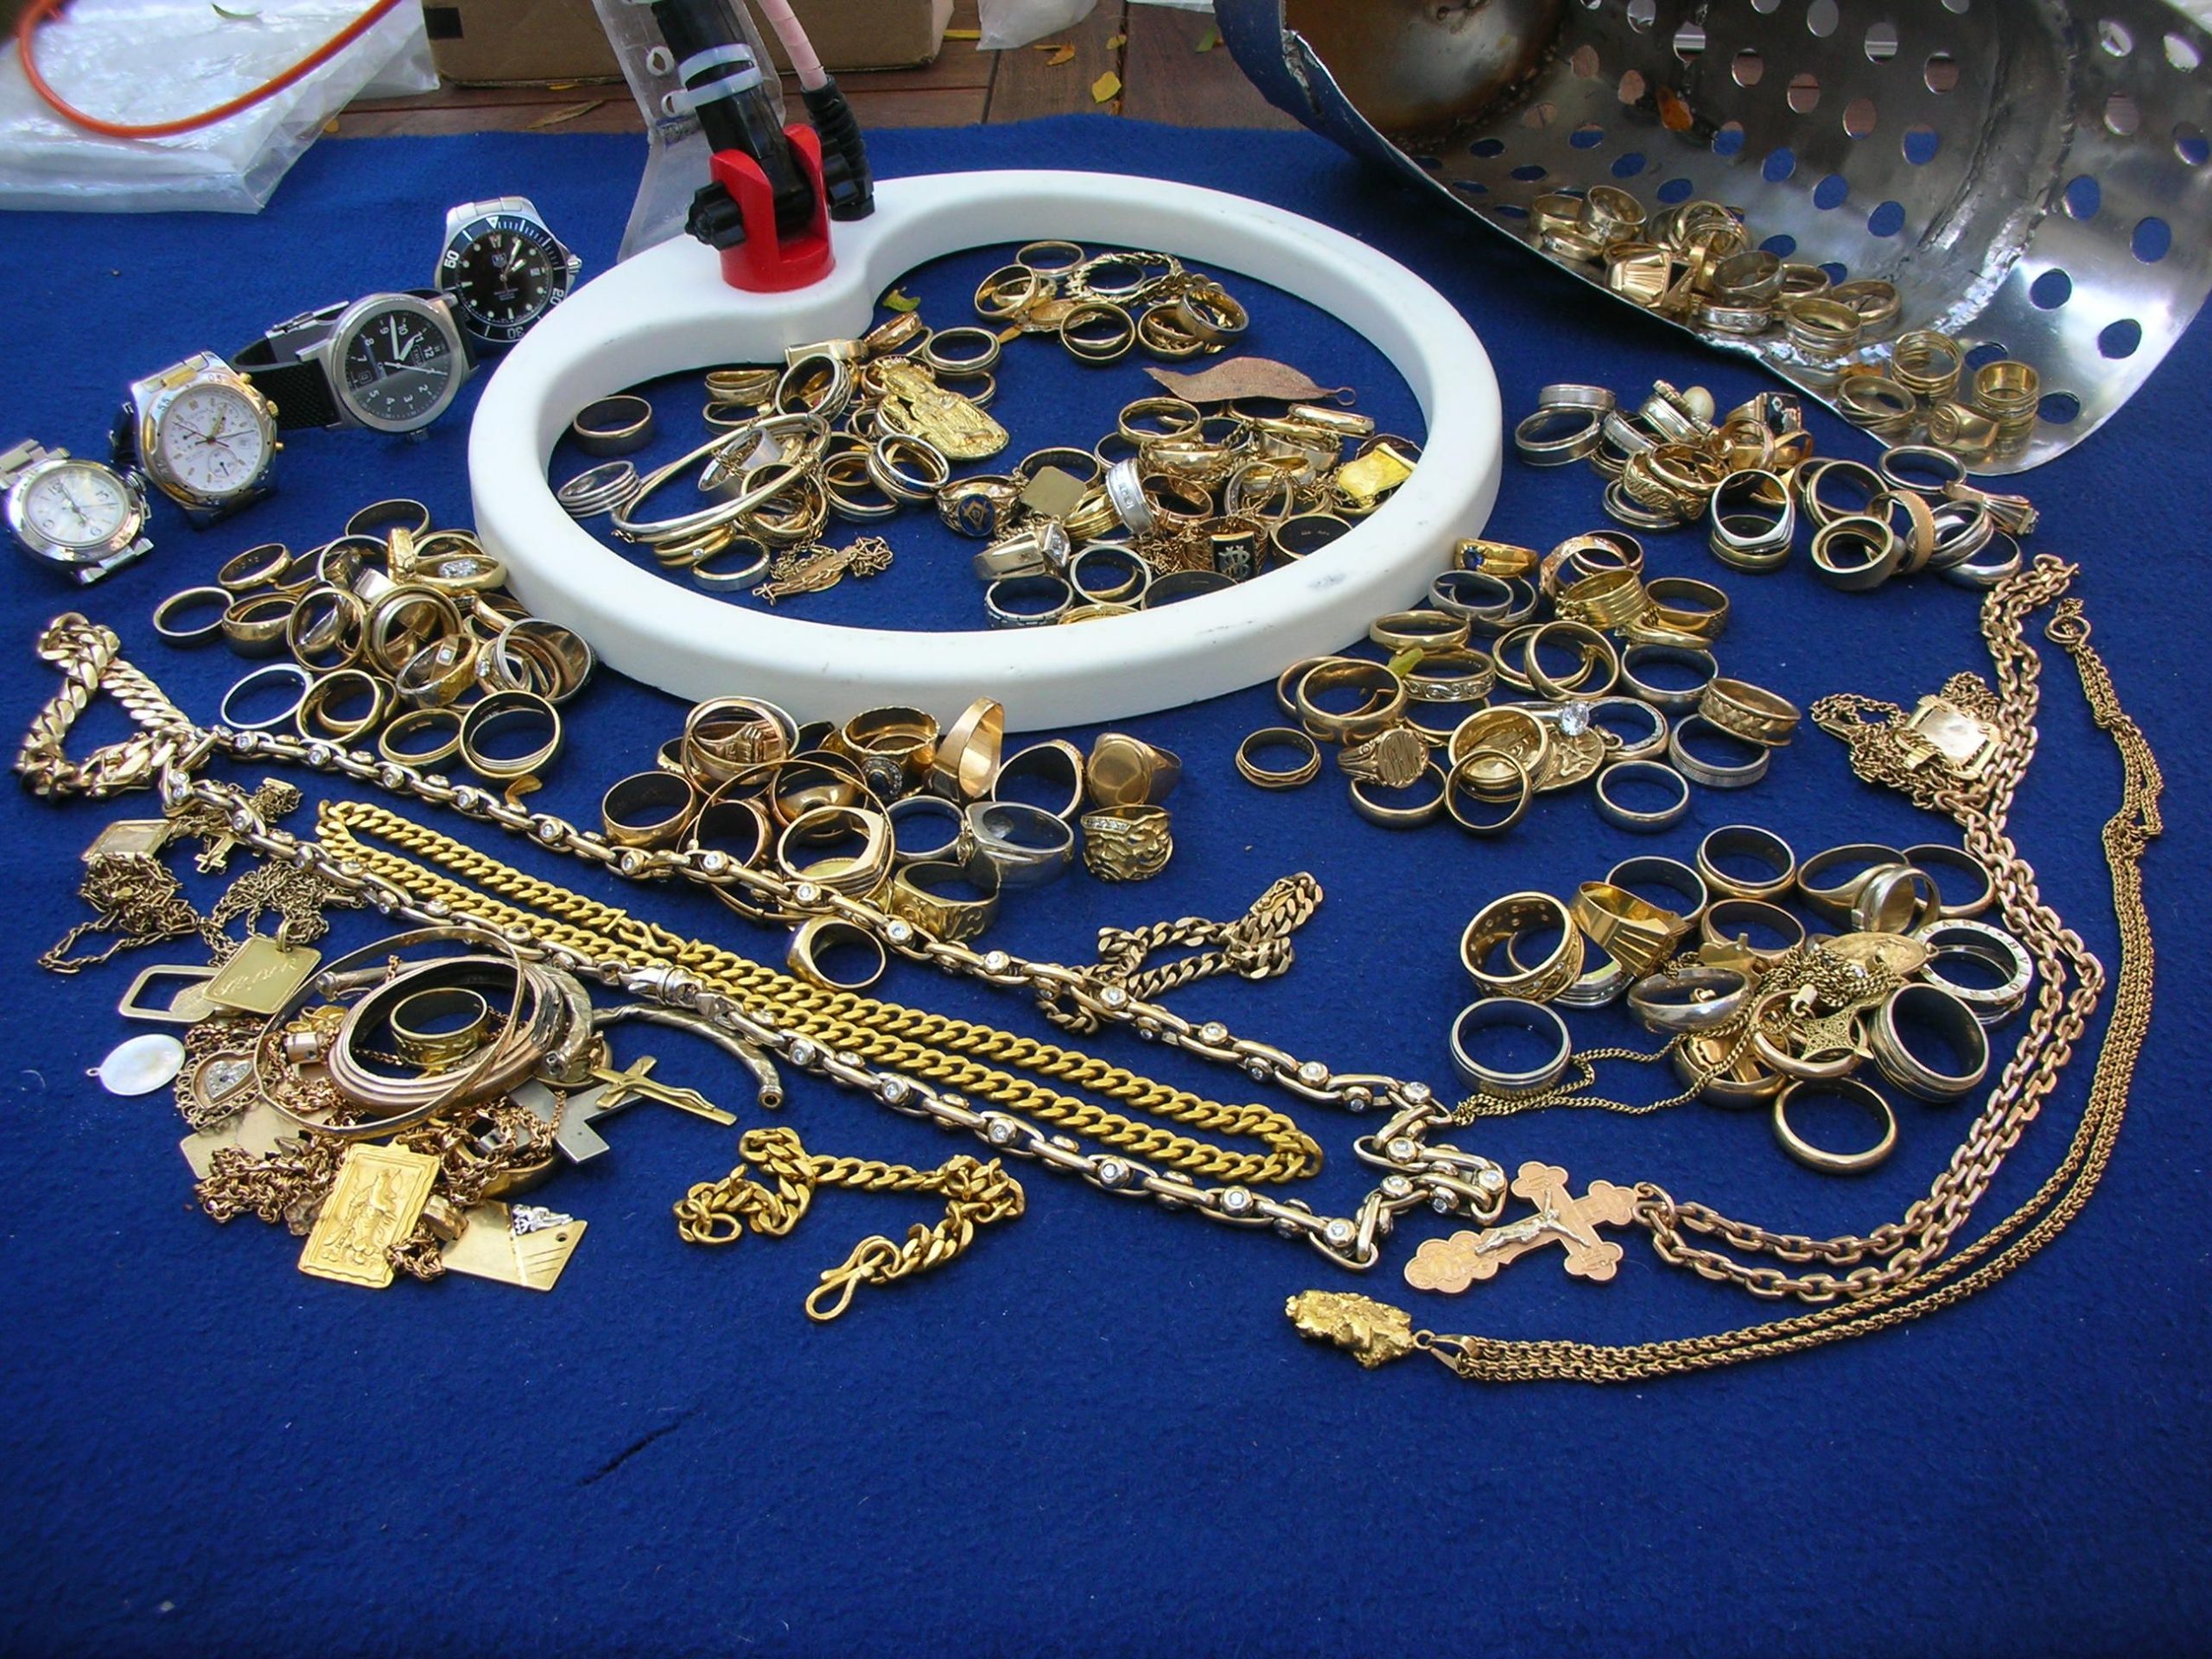

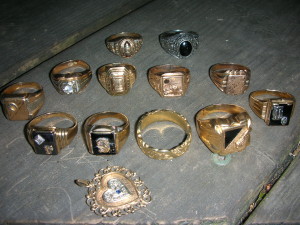


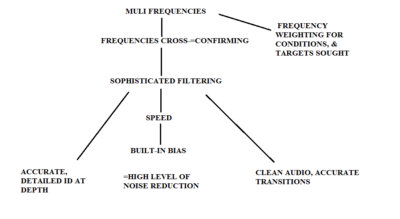

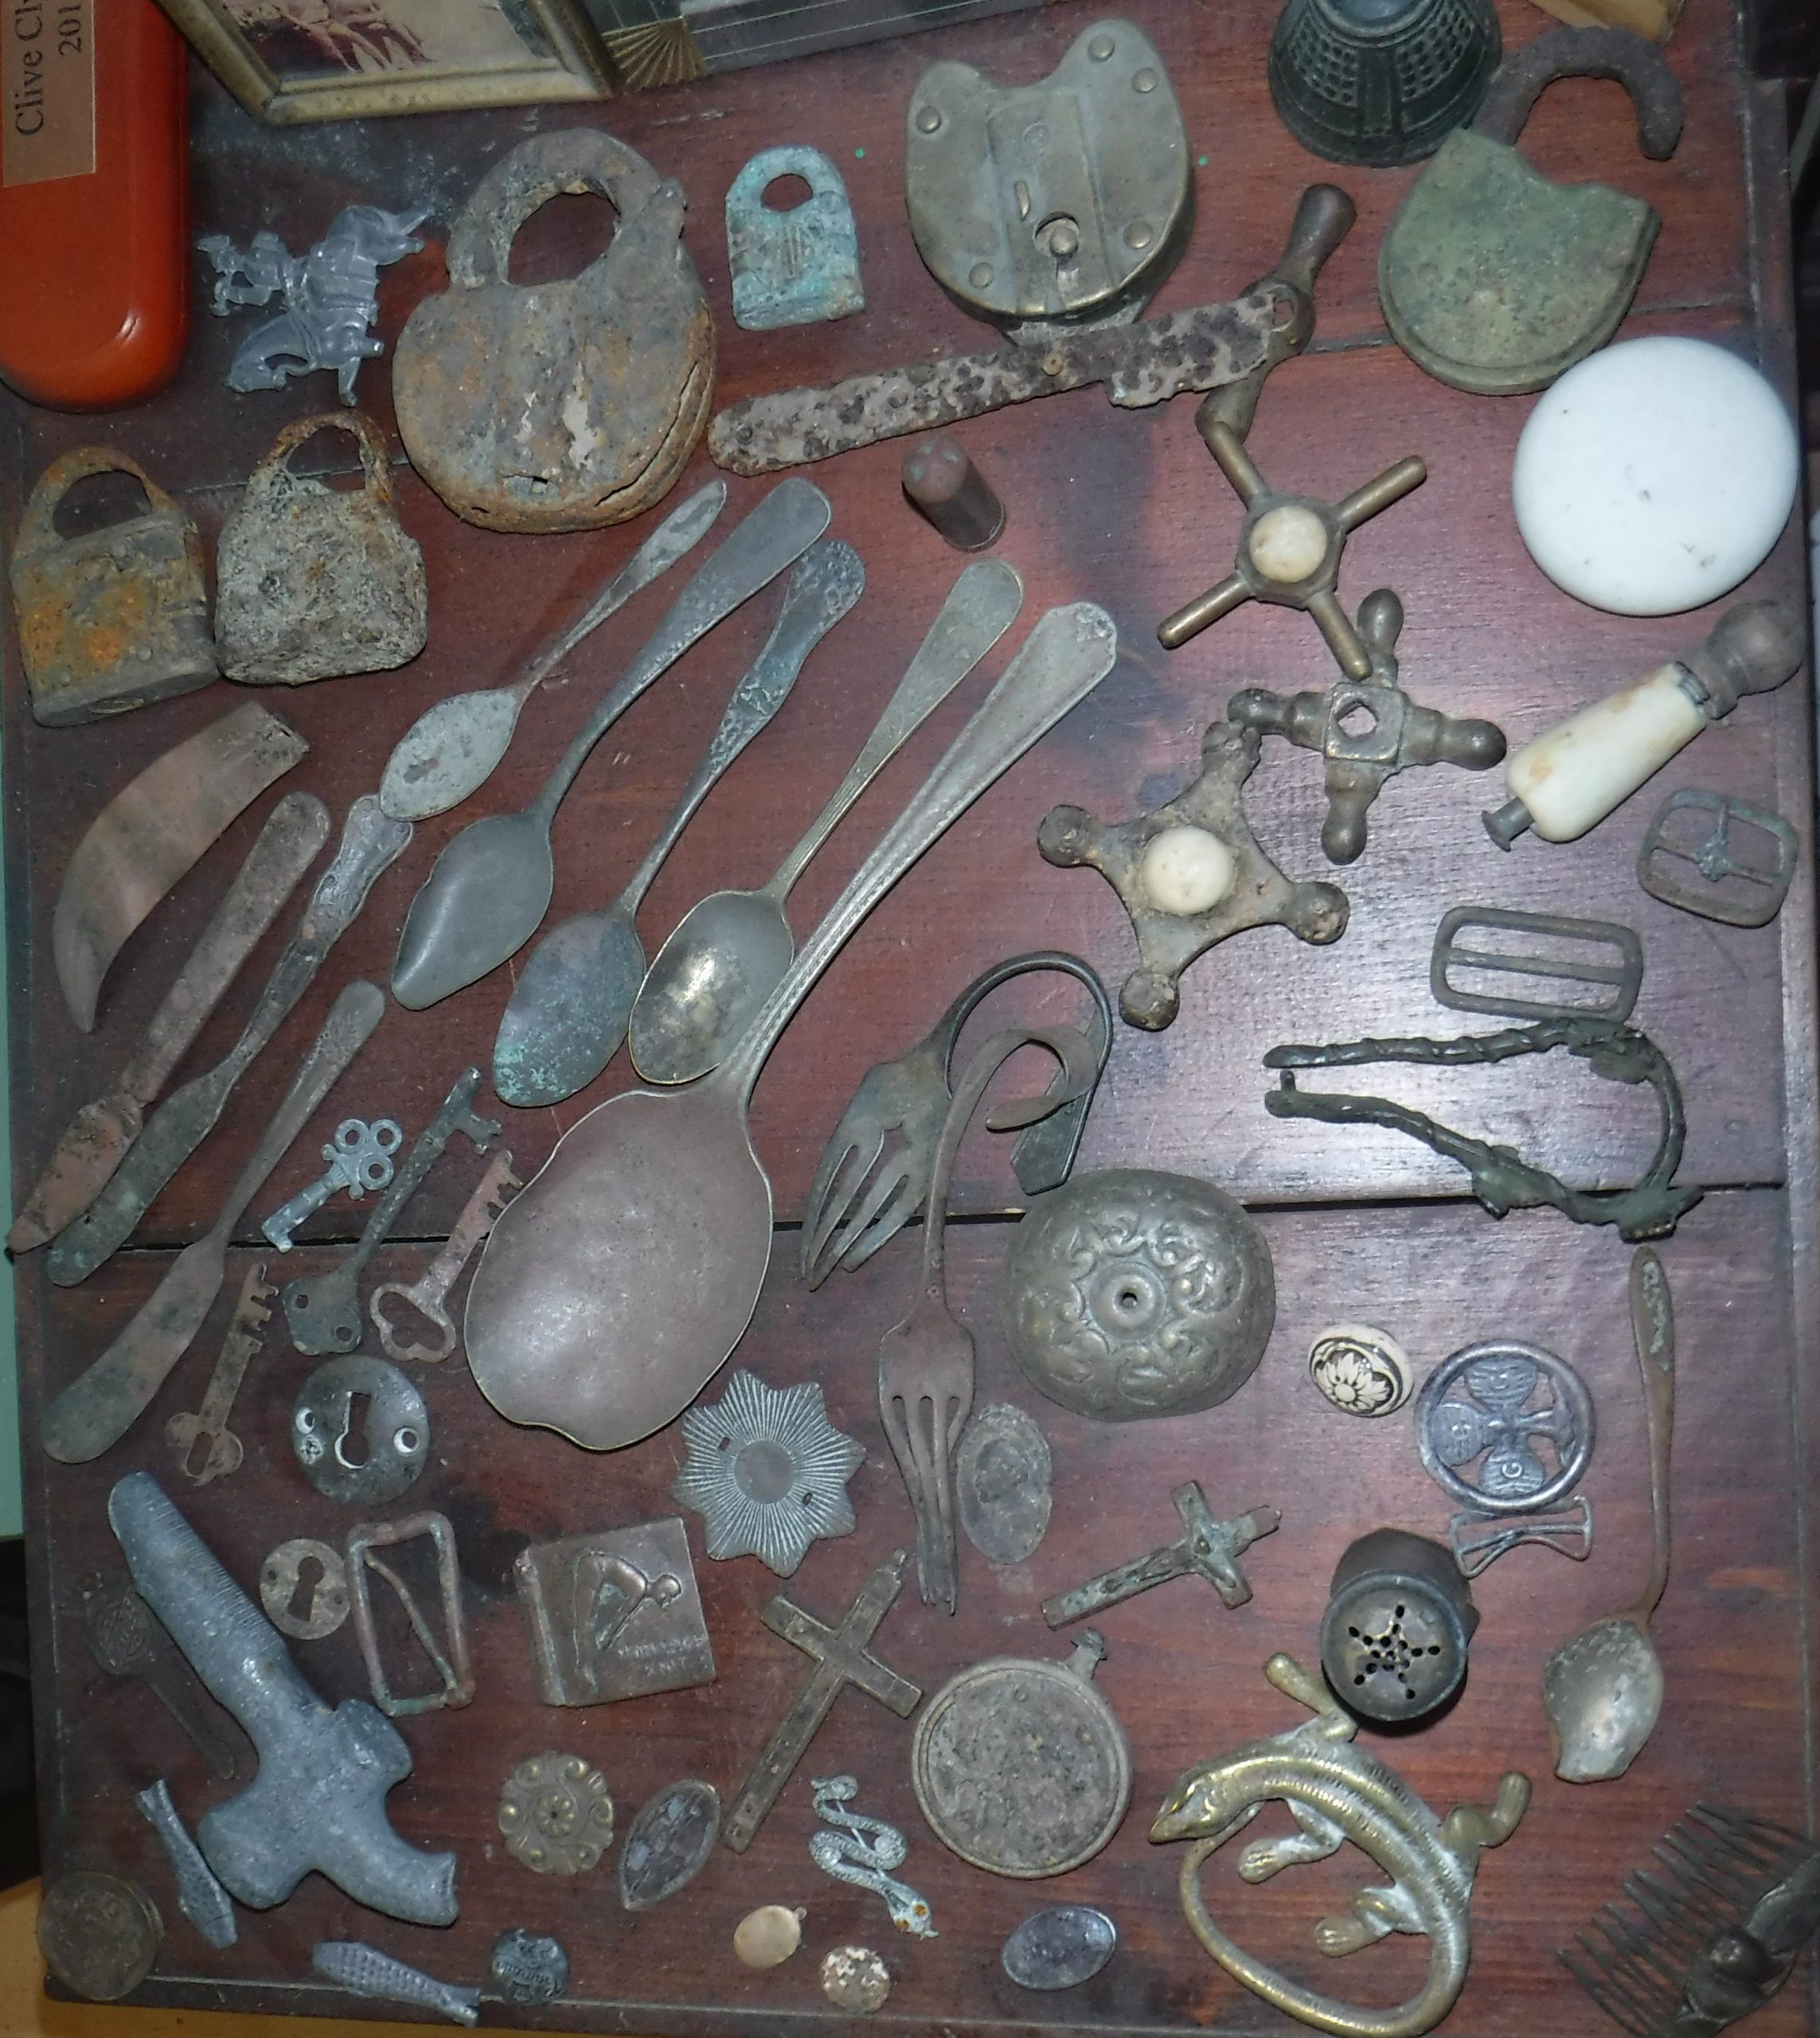


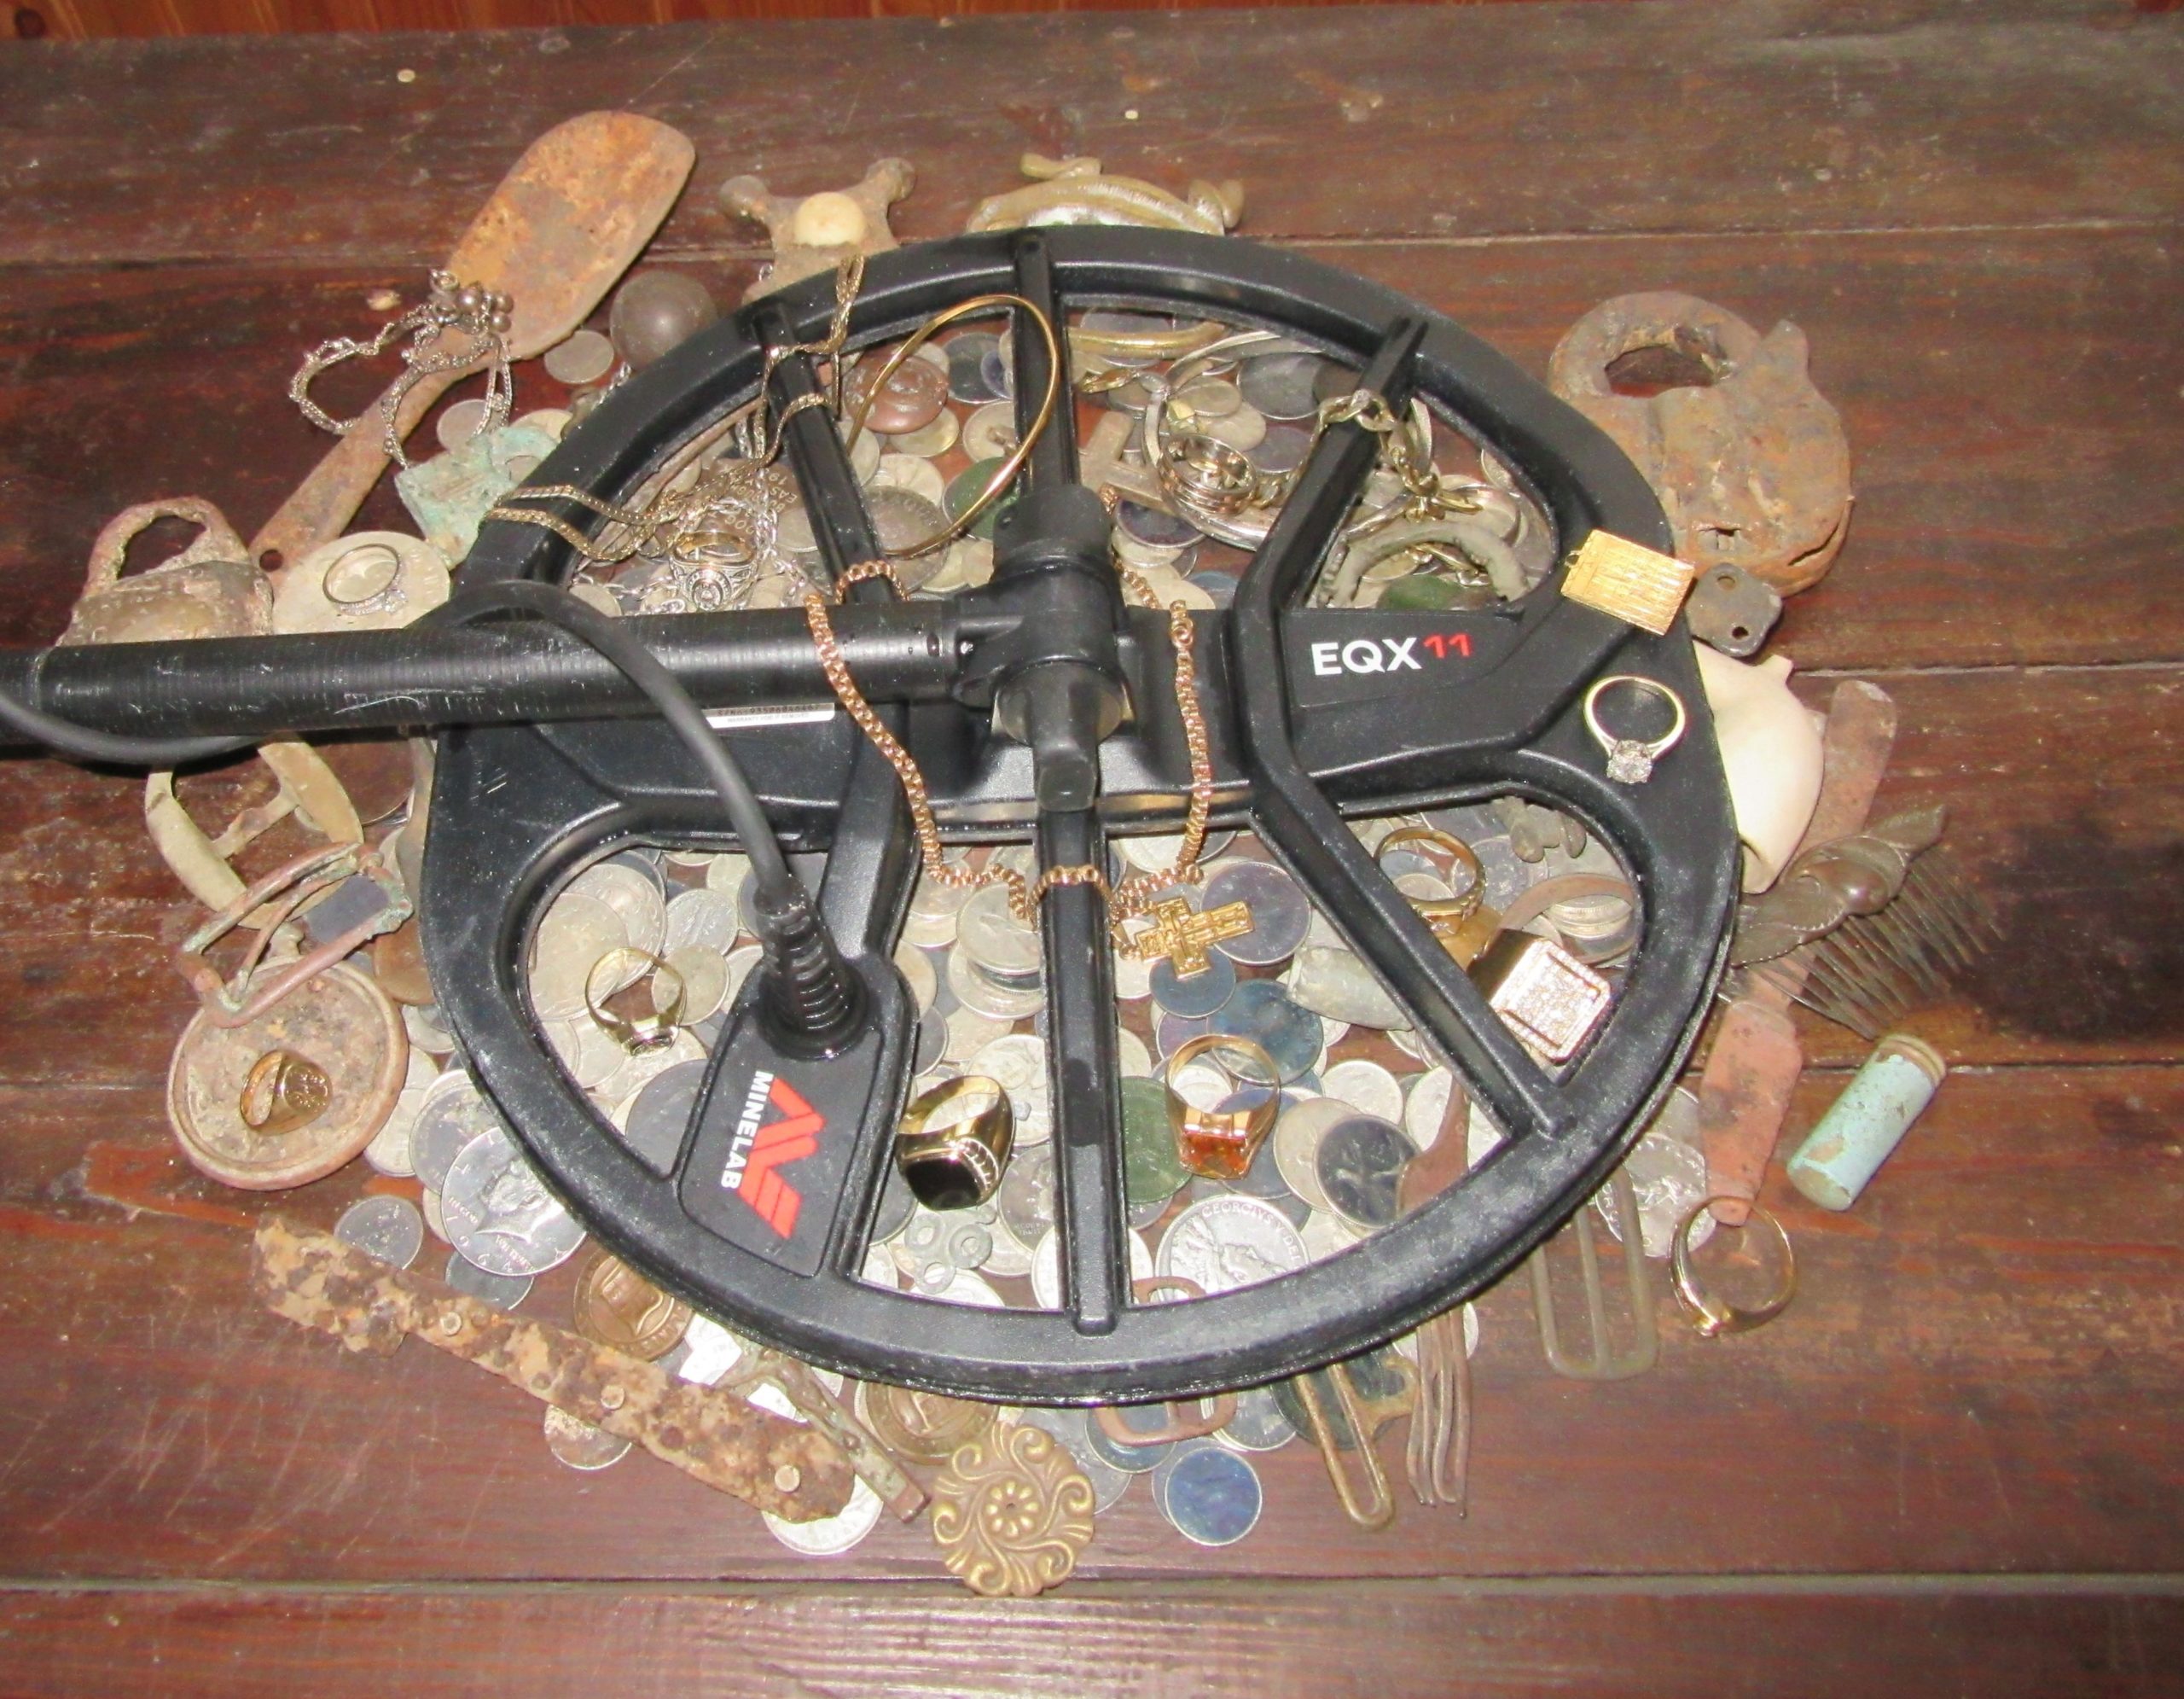


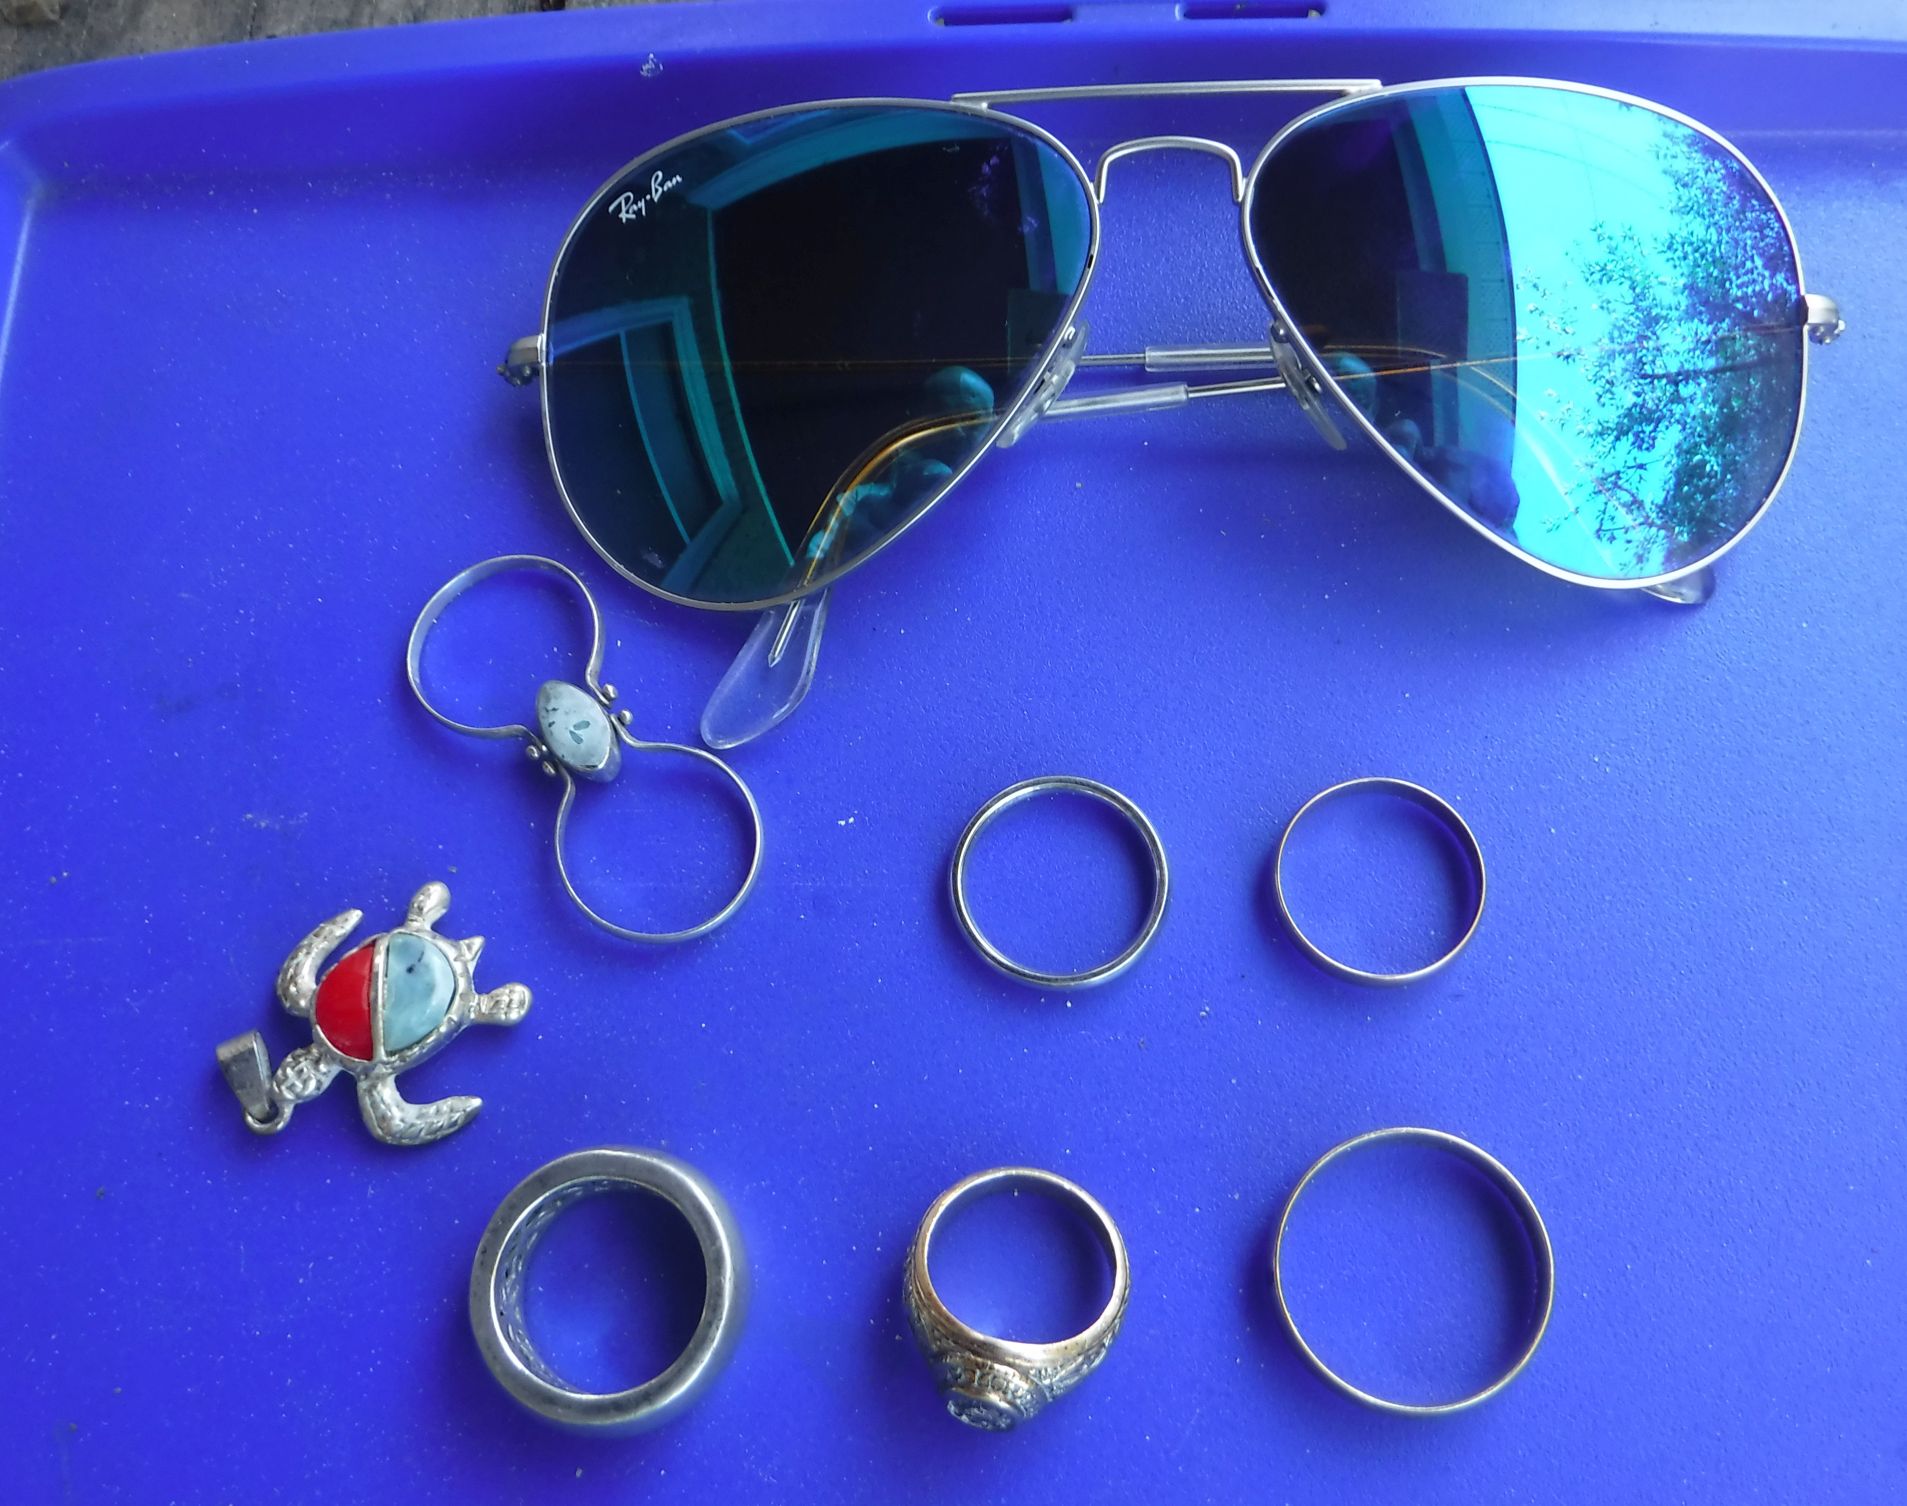
 –and found that “20” is a nice tone selection for gold–try it!
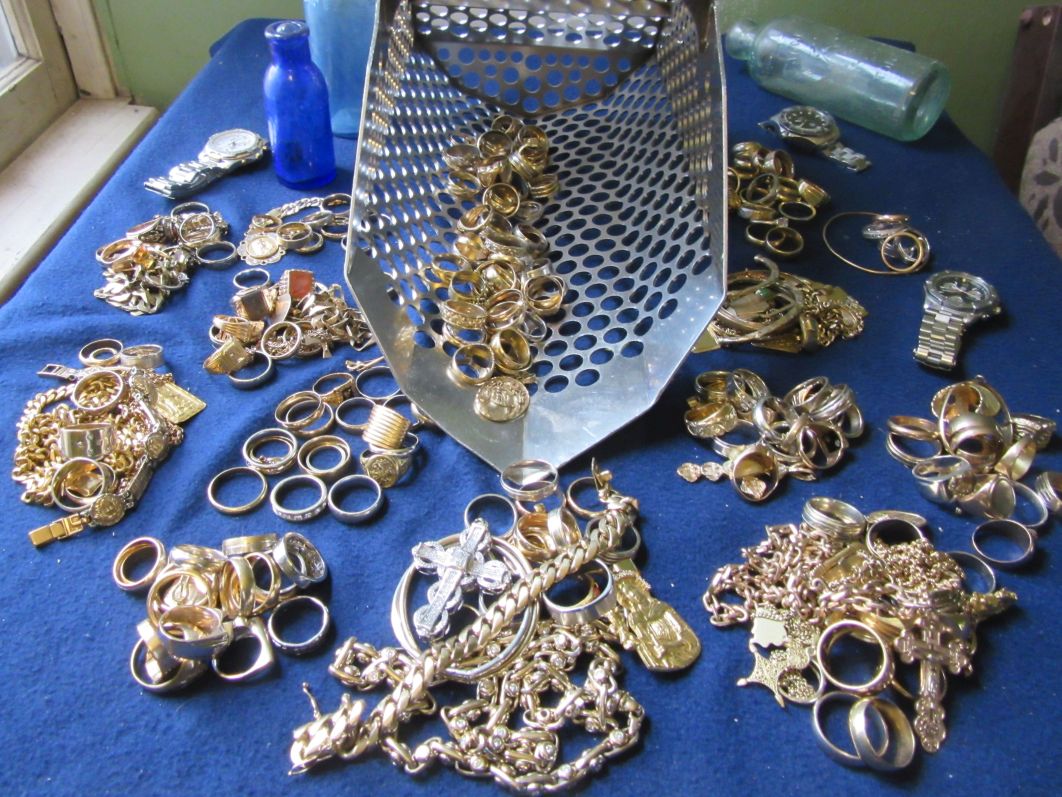
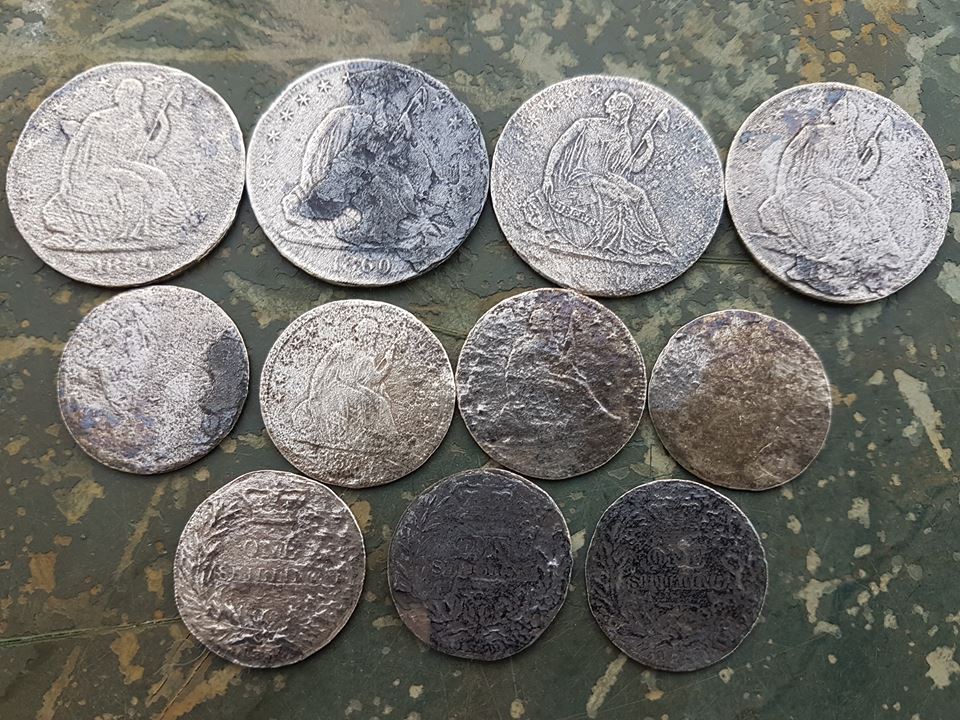


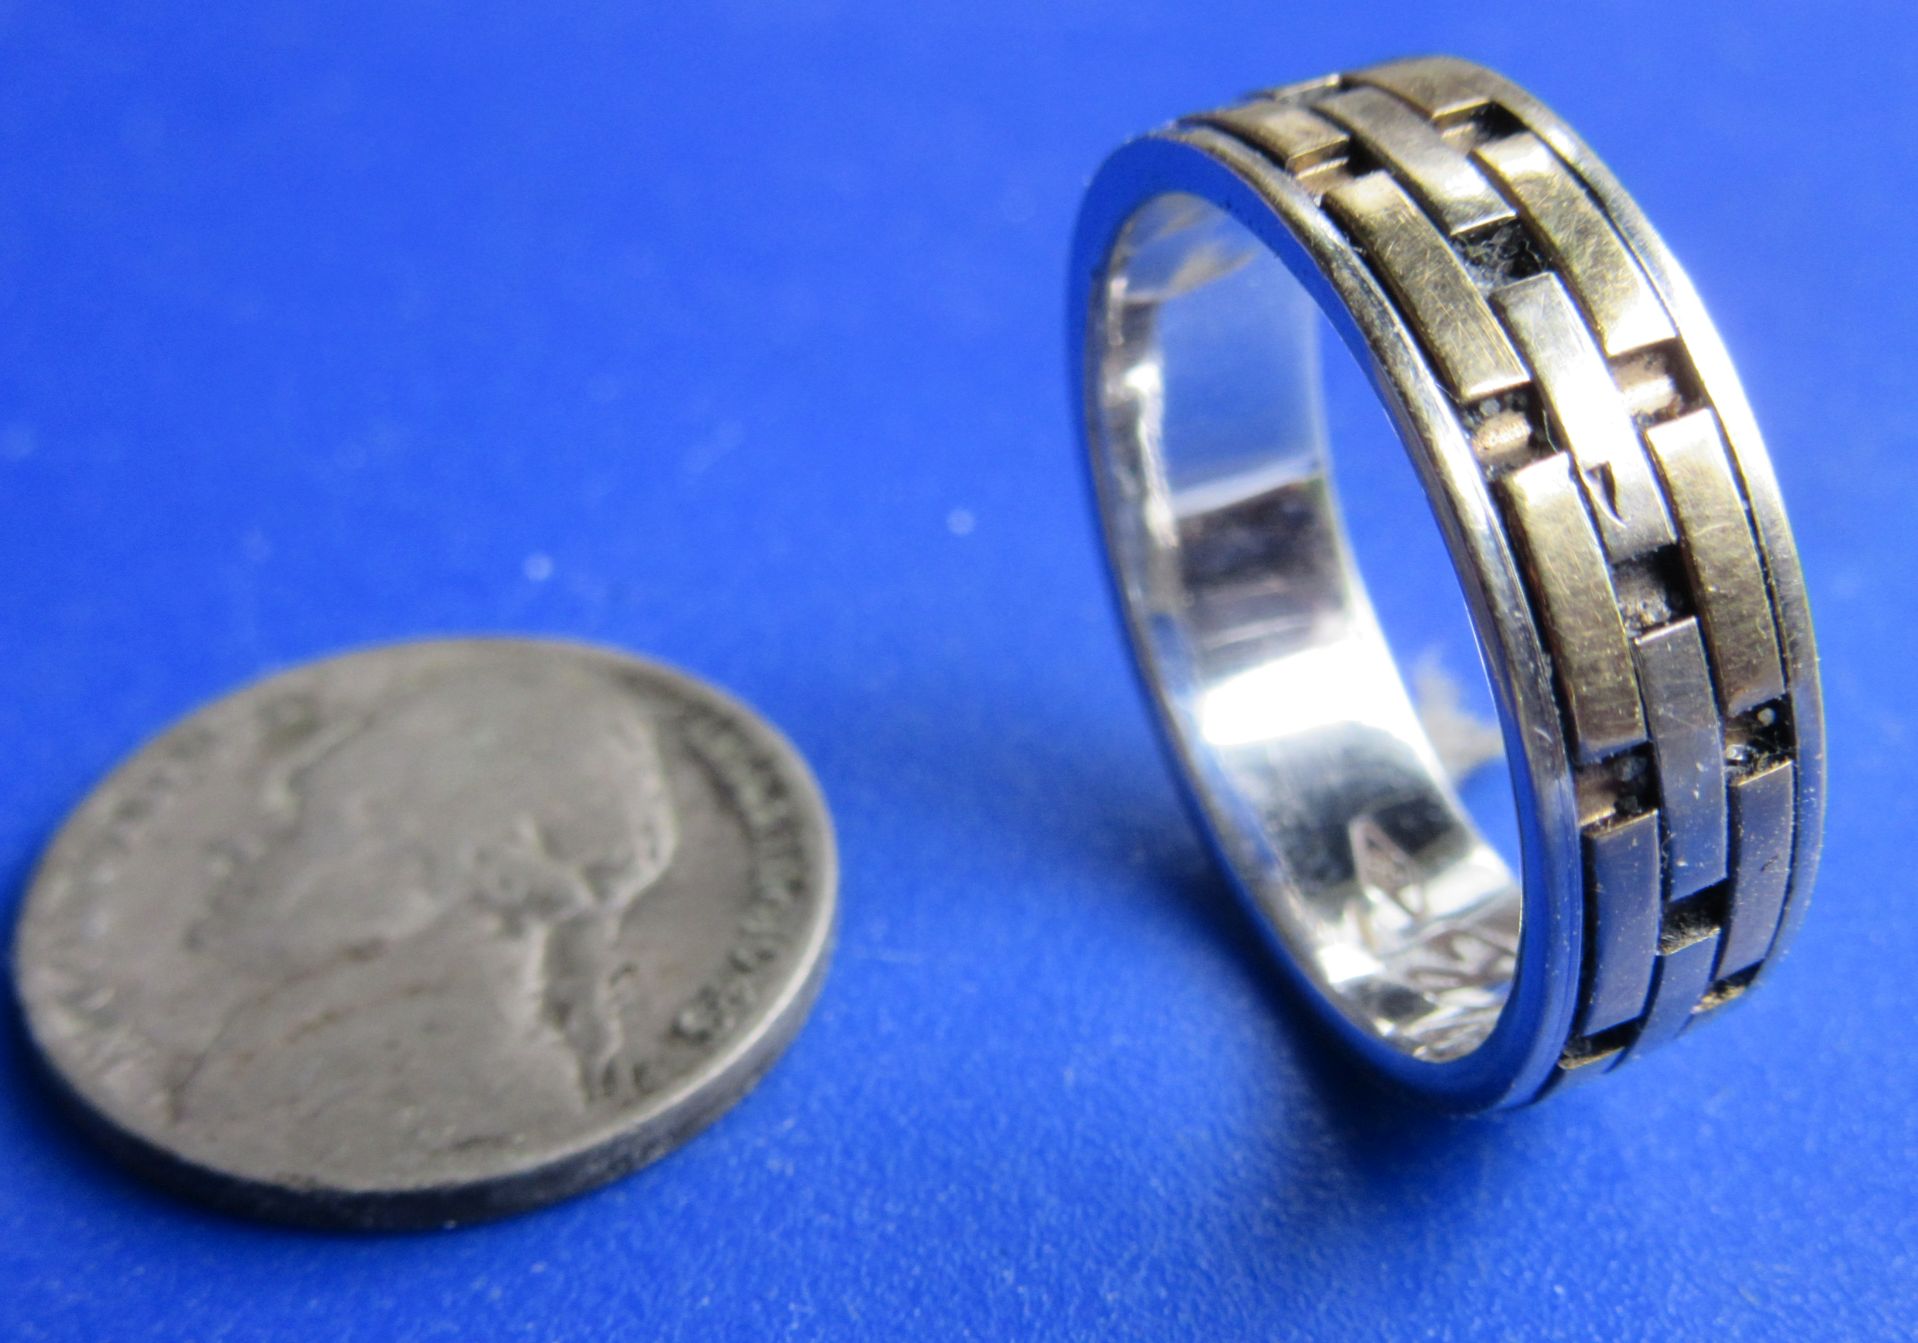

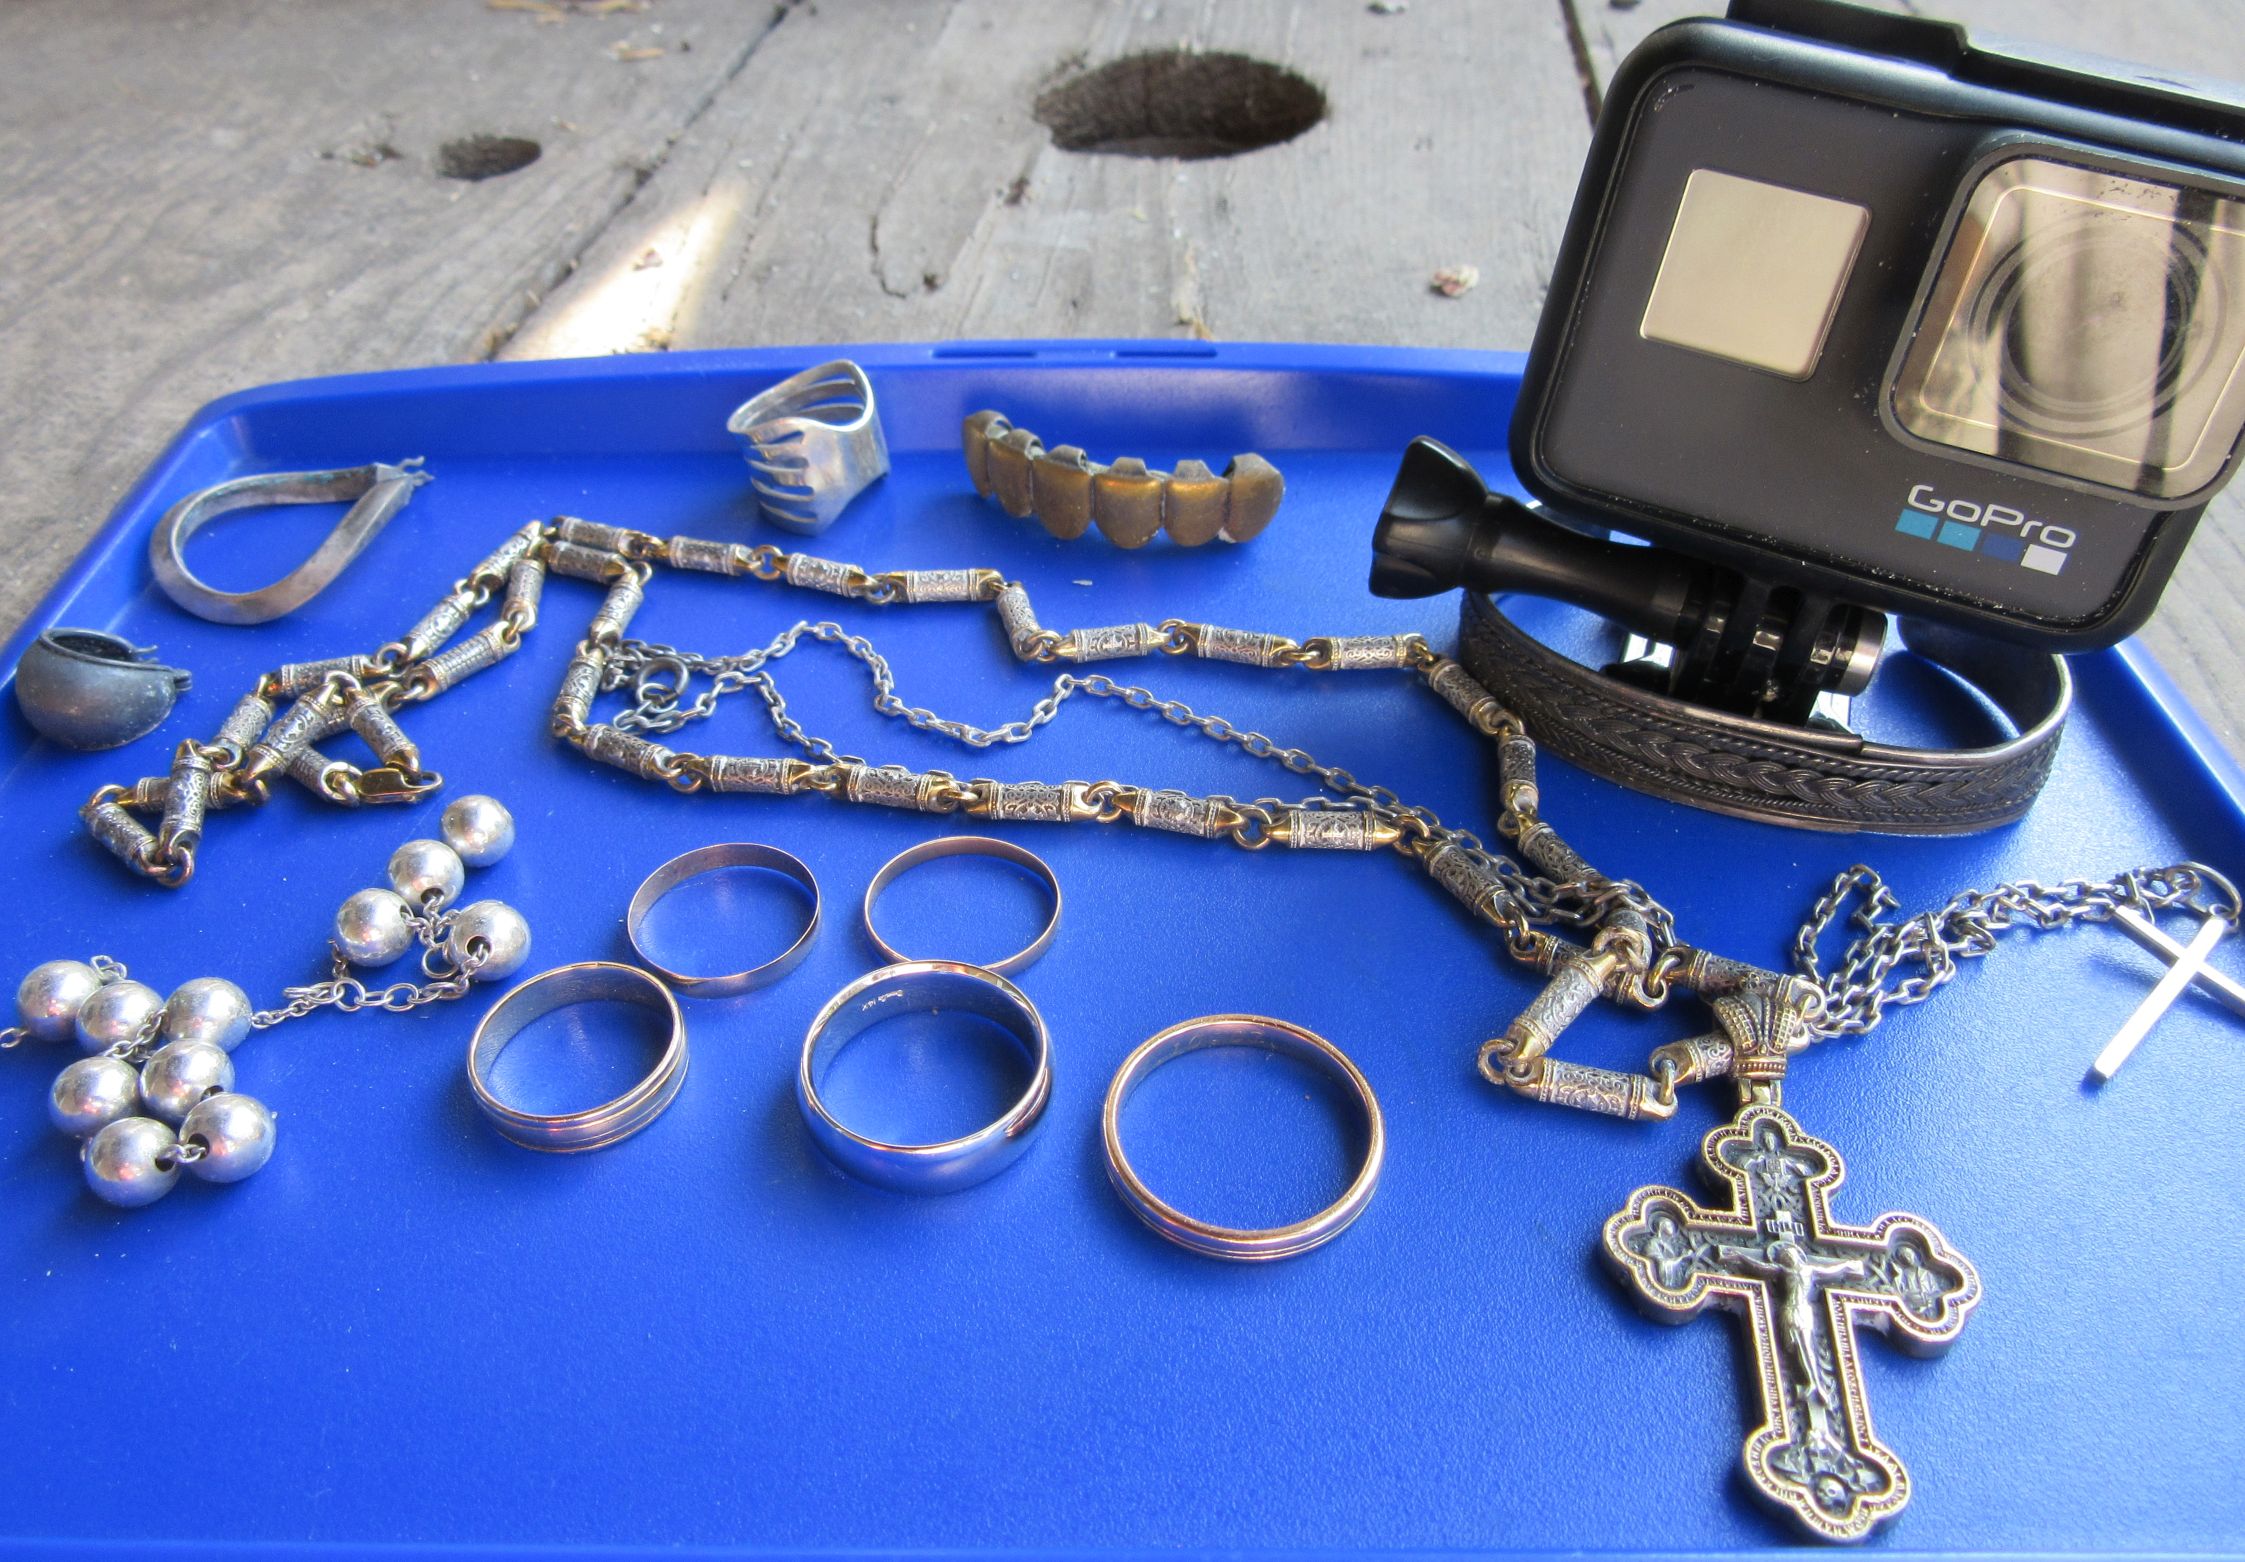


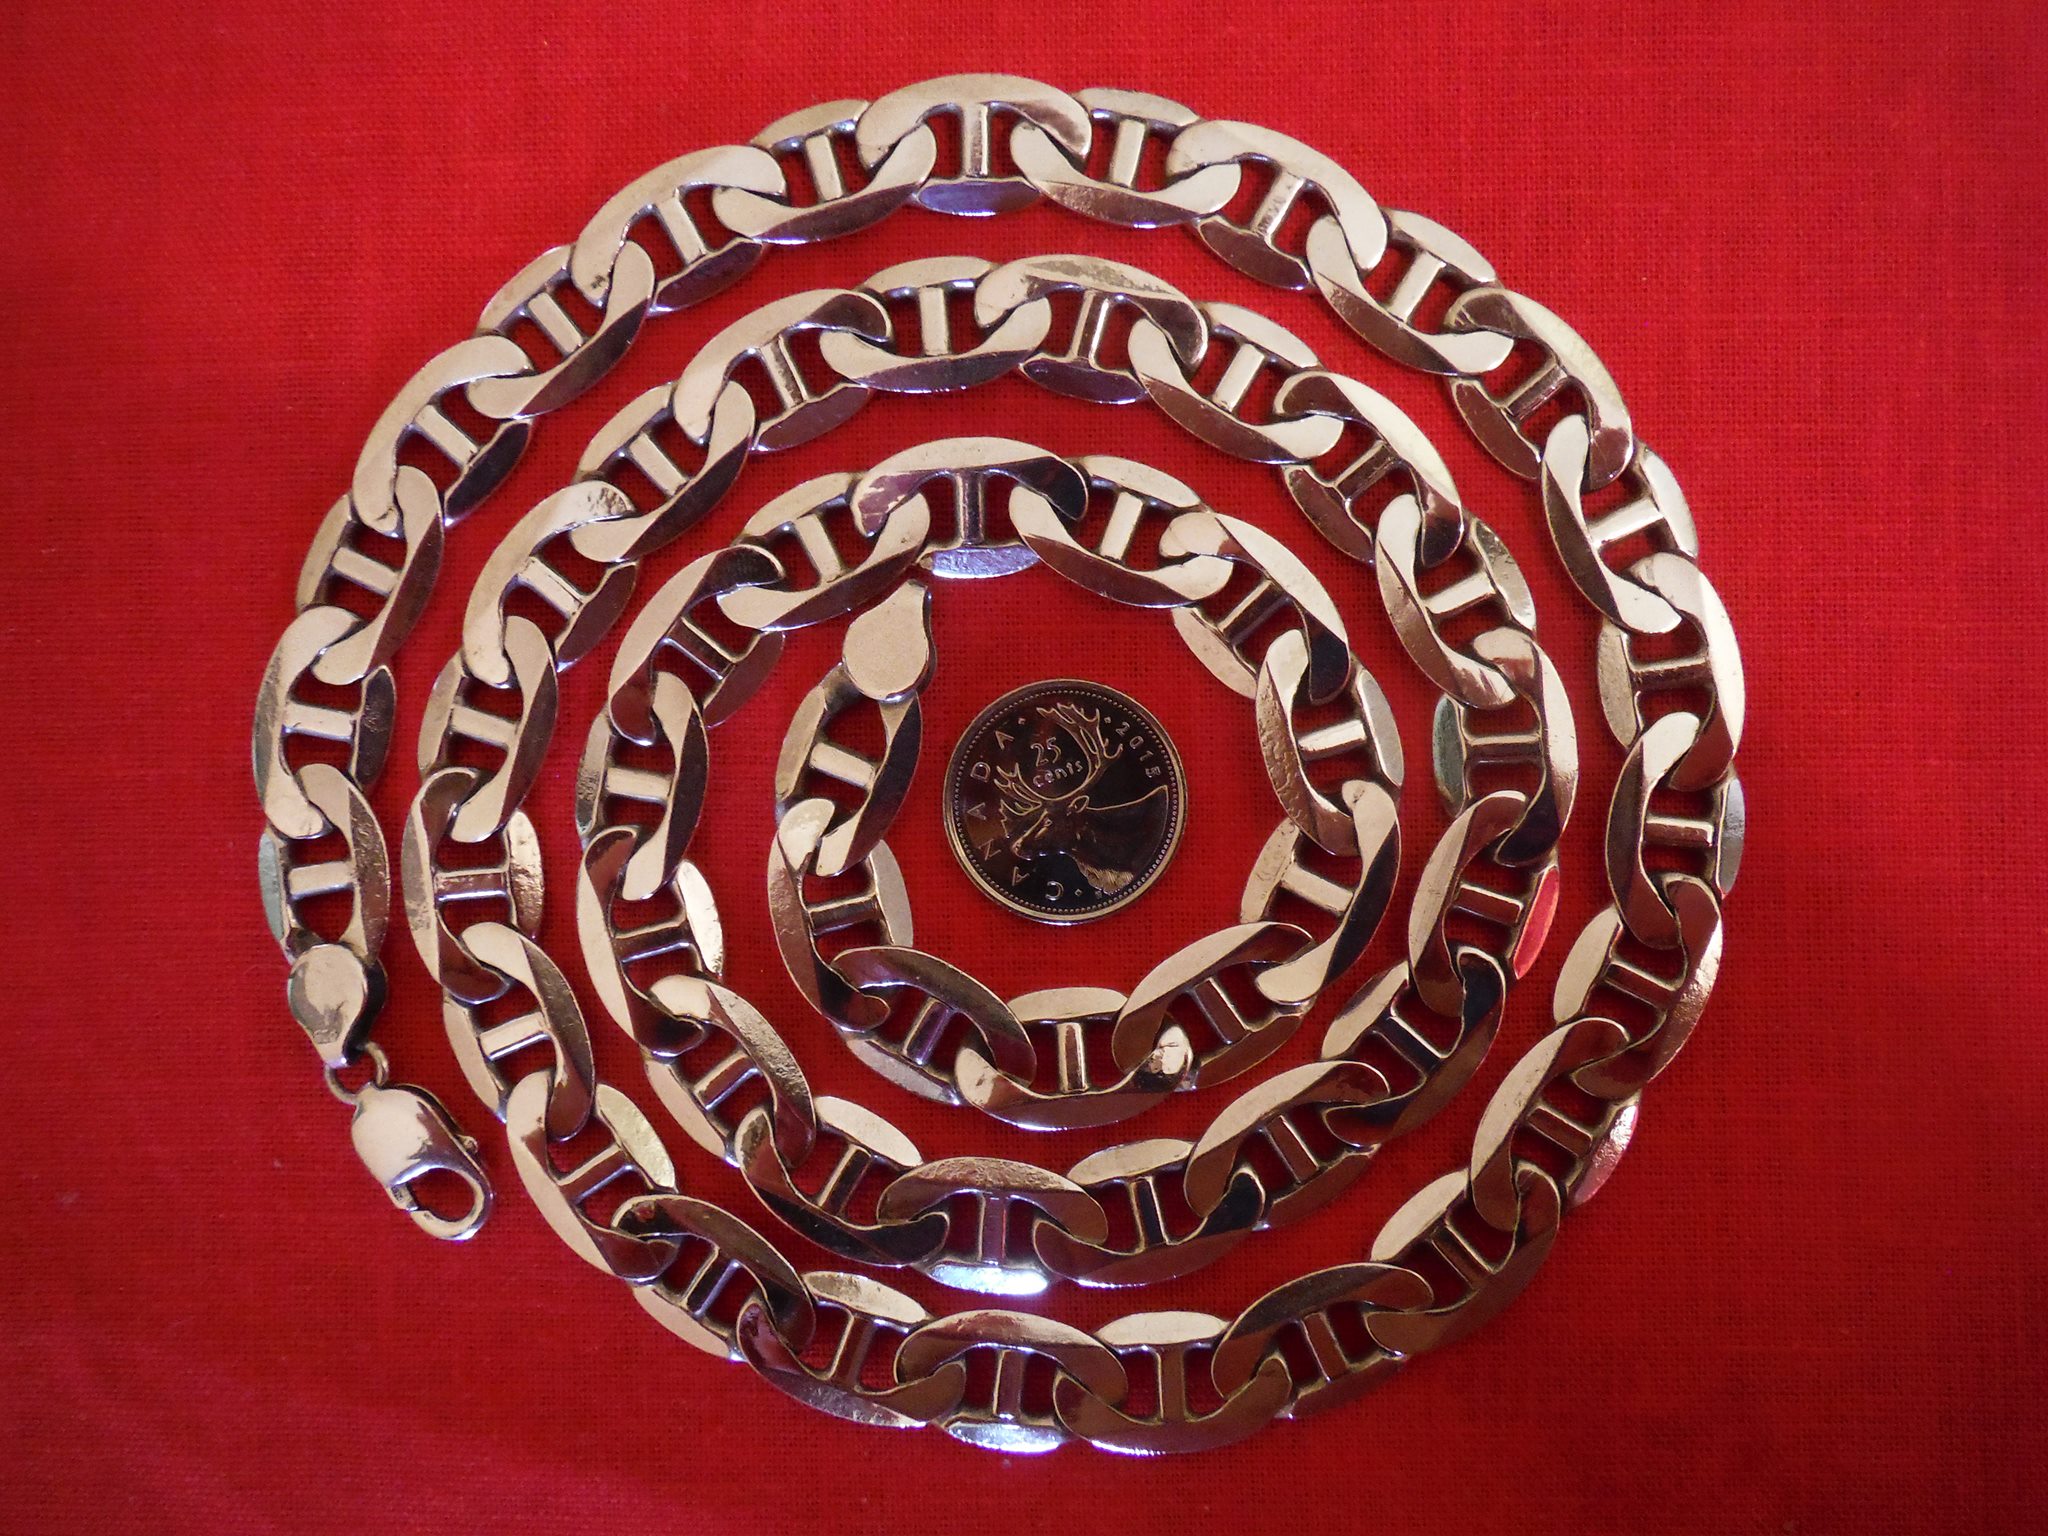


 er’s Guide” by Clive James Clynick